Deploy the Agent
Last Updated: October 02, 2026
This topic explains how to install the Agent Software installed on a server or device that communicates with the PrinterLogic instance. The Agent installs and manages printers. on a device using scripts, which empowers IT teams to efficiently manage and scale software installation.
An end user device requires the Vasion Agent to do the following:
- Install printers on the device.
- Install and update drivers on the device.
- Collect print-job metadata for reports.
- Hold print jobs in a print queue.
- Release held print jobs to a printer.
There are several ways to install the Vasion Agent on a device. Refer to OS Installation for instructions on how to manually install the Agent.
There are also Agent packages in the Admin Console that you can download and use with a Windows start-up script; third-party app, such as Microsoft Configuration Manager, Microsoft Intune, or Ivanti; or Group Policy Object (GPO) on a device with a supported Windows, macOS, or Linux operating system (OS).
We recommend using your organization's software-deployment tool.
Requirements
The following are the minimum device requirements for Agent installation:
- Agent installation requires an OS with a minimum of 300MB of free hard disk space. Printer drivers might require additional space.
- If you use an antivirus software, add the list of folders to exclude from antivirus scans. For more details refer to Antivirus Exclusions.
- macOS devices using ARM processors may experience issues with some print drivers that lack native ARM support. Install Rosetta 2 for these print drivers to function correctly.
- Windows devices using ARM processors are supported as of Windows Agent version 25.1.0.
- C++ ARM64 must be installed on the ARM devices for the Agent to function correctly.
- Advanced features, such as Off-Network Print, Off-Network Cloud Print, Offline Secure Release Print, and Quota Management, are not supported on ARM devices.
- Core features, such as Pull Print and Direct Secure Release, are supported.
Authorization Code
To authorize device communication between the Agent and the Admin Console, you must include an authorization code in the installation script. Follow these steps to generate an authorization code:
- Open a web browser, and log in to the Admin Console.
- Go to Tools
 Tokens Authorized Devices or Tools Authorized Devices, depending on your permissions.
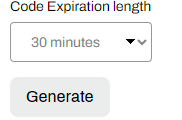
 - From the Code Expiration length field, select the expiration length.
-
Select Generate.
For more details refer to Device Authorization.
Agent-Installation Package
Follow these steps to download the Agent-installation package:
- In the Admin Console, go to Tools
 Settings Client.
 - Scroll down to the Deployable Client Packages section.
-
Select the file type for the desired package.
Agent-Installation Scripts
- Windows
- macOS
- Ubuntu
- Red Hat
Use the command below to install the Agent on a Windows device. The following are additional details:
- The
/qncommand runs the installation silently. - You can copy the PrinterInstallerClient.msi to a different distribution point.
- To install the Agent in a multiuser environment, such as Remote Desktop Services (RDS) or Citrix Virtual Apps, you need to configure the Agent on the server or image for RDS mode. For more details refer to Remote Desktop Services (RDS).
Run the following command in a command prompt:
msiexec /i PrinterInstallerClient.msi /qn HOMEURL=https://<HOME_URL_HERE> AUTHORIZATION_CODE=<AUTH_CODE_HERE>Replace <HOME_URL_HERE> with your instance's URL, and replace <AUTH_CODE_HERE> with your authorization code.
You can add the following parameter to control whether to install the PrinterLogic Extension with the Agent. You can use the following options:
NOEXTENSION=0This parameter overrides any previous setting and includes the extension.NOEXTENSION=1This parameter overrides any previous setting and excludes the extension.
Without the extension parameter, the command performs the same action as the last time the installer or uninstaller ran or whatever is already in the registry overrides.
Additional Agent & Override Commands
Refer to Agent Commands and Override Options for Windows for scripts and variables to further adjust the Agent to better suit your environment.
A macOS device using an M1 chip must have Rosetta 2 installed for the Agent to communicate correctly.
Do not use the Reset Printing System option in the Printers & Scanners tab on macOS because it can cause adverse behavior with the Agent. For more details refer to Reset Printing System Option.
Save the PKG file in the /tmp file directory. If you have not downloaded the file yet, you can use this command:
curl -o /tmp/PrinterInstallerClientSetup.pkg https://<HOME_URL_HERE>/client/setup/PrinterInstallerClientSetup.pkgReplace <HOME_URL_HERE> with your instance's URL.
Use this command to install the Agent:
sudo installer -allowUntrusted -pkg /tmp/PrinterInstallerClientSetup.pkg -target / && sudo /opt/PrinterInstallerClient/bin/set_home_url.sh https <HOME_URL_HERE> && sudo /opt/PrinterInstallerClient/bin/use_authorization_code.sh <AUTH_CODE_HERE>Replace <HOME_URL_HERE> with your instance's URL, and replace <AUTH_CODE_HERE> with your authorization code.
Additional Agent & Override Commands
Refer to Agent Commands and Override Options for Mac & Linux for scripts and variables to further adjust the Agent to better suit your environment.
We recommend using the latest version of Common UNIX Printing System (CUPS) printer to successfully install the Agent.
The installation commands below support Ubuntu (LTS) 22.04 and 24.04.
-
Get the Agent install DEB file from the server:
Replace
<HOME_URL_HERE>with your instance's URL. -
Install the Agent, set the home URL, and authorize the Agent with the following command:
Copy Code64 bitsudo apt update && sudo apt install -y printerinstallerclient_amd64.deb
sudo /opt/PrinterInstallerClient/bin/set_home_url.sh https <HOME_URL_HERE> && sudo /opt/PrinterInstallerClient/bin/use_authorization_code.sh <AUTH_CODE_HERE>Replace
<HOME_URL_HERE>with your instance's URL, and replace<AUTH_CODE_HERE>with your authorization code.
Additional Agent & Proxy Override Commands
Refer to Agent Commands and Override Options for Mac & Linux for scripts and variables to further adjust the Agent to better suit your environment.
Common UNIX Printing System (CUPS) is required if you are using Pull Print and Direct Secure Release.
-
Get the Agent install RPM file from the server:
Copy Codewget https://<HOME_URL_HERE>/client/setup/printerinstallerclient_rhel8.rpmReplace
<HOME_URL_HERE>with your instance's URL. -
Install the Agent, set the home URL, and authorize the Agent with the following command:
Copy Code64 bitsudo yum localinstall -y printerinstallerclient_rhel8.rpm && sudo /opt/PrinterInstallerClient/bin/set_home_url.sh https <HOME_URL_HERE> && sudo /opt/PrinterInstallerClient/bin/use_authorization_code.sh <AUTH_CODE_HERE>Replace
<HOME_URL_HERE>with your instance's URL, and replace<AUTH_CODE_HERE>with your authorization code.
-
Get the Agent install RPM file from the server:
Copy Codewget https://<HOME_URL_HERE>/client/setup/printerinstallerclient_x86_64.rpmReplace
<HOME_URL_HERE>with your instance's URL. -
Install the Agent, set the home URL, and authorize the Agent with the following command:
Copy Code64 bitsudo dnf install -y printerinstallerclient_x86_64.rpm && sudo /opt/PrinterInstallerClient/bin/set_home_url.sh https <HOME_URL_HERE> && sudo /opt/PrinterInstallerClient/bin/use_authorization_code.sh <AUTH_CODE_HERE>Replace
<HOME_URL_HERE>with your instance's URL, and replace<AUTH_CODE_HERE>with your authorization code.
Additional Agent & Proxy Override Commands
Refer to Agent Commands and Override Options for Mac & Linux for scripts and variables to further adjust the Agent to better suit your environment.
Write-Filter Systems
Installing the Agent on write-filter devices might cause an infinite reboot loop because the Agent attempts to reboot the device as part of its check-in. This issues occurs specifically when the Agent attempts to turn off or turn on the write filter to install printers.
If you experience this issue, do the following:
- In the Admin Console, go to Tools Settings Client.
- Scroll down to the Write Filter Settings section.
- Select Disable clients installed with write filter support.
- Select Save in the upper-right corner.
The Vasion Agent is highly customizable. To learn more about Agent options, refer to the following:
- Agent Refresh.
- Sync Options.
- Agent Updates.
- Override Options for Windows.
- Override Options for Mac & Linux.
- Remote Desktop Services (RDS).
- Additional Agent Options.
Troubleshooting Help
This error appeared on macOS ARM devices that were using a printer with an Intel driver attached.
To resolve this error:
-
Install Rosetta on the macOS device.
- Or re-upload the macOS drivers from a device using an ARM processor.
In this topic: