PrinterLogic Agent
Last Updated: October 08, 2026
The PrinterLogic Agent is a software component that is installed on your computer to communicate with the print management system.
Agent Capabilities
Depending on how your administrator implements PrinterLogic, the following are some options you may be able to perform from your workstation:
Print Job Management
- Quickly access the Release Portal A web portal where users sign in to view and release held print jobs before they are sent to physical printers. to release print jobs.
- Quickly access Secure Release Print settings.
- Quickly access the Self-service Portal A web portal where end users can install printers and drivers, manage printer settings, and access the Release Portal. to set a default printer for email print jobs.
Printer Management
- Add new printers.
- Set a default printer.
- Delete printers.
- View printers installed on your system
System Management
- Identity Provider (IdP) A system that creates, maintains, and manages identity information for an organization. An IdP provides authentication services to apps in a federation or distributed network. sign in and sign out.
- Start or end printer port capture for legacy applications.
- Refresh print management configurations.
The options are defined by your system administrator. Not all the options listed here may be available to you.
Access to the PrinterLogic Agent
There are several ways to access the Agent, depending on how your administrator has implemented the PrinterLogic solution. If you have any questions contact your system administrator.
Start Menu
In the Windows Start Menu, search for "printer," or open the Printer Installer folder to view the print management options.

System Tray
In the Windows System Tray, right-click the PrinterLogic icon  to view the available options.
If you left-click the PrinterLogic icon, the default web browser opens the Self-service Portal, where you can install printers.

Menu Bar
On macOS, select the PrinterLogic icon  from the Menu Bar to view the available options.
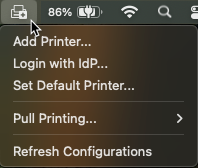
Agent Options
Here are details on what each of the options work. Not all of these options may be visible on your system, depending on your print environment.
- Add Printer: Opens the default web browser and the Self-service Portal. For more details refer to Self-service Portal.
-
Set Default Printer: Shows a list of printers installed on your computer with an option to set a default printer.
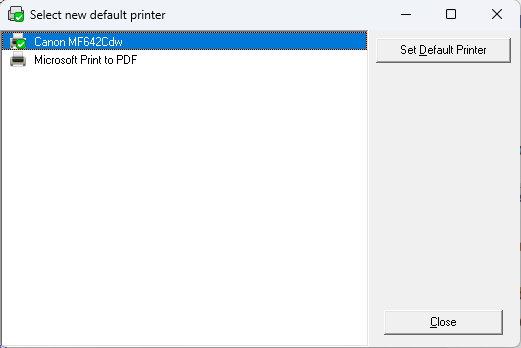
-
Delete Printer: Shows a list of printers installed on your computer with options to remove a printer or to set a default printer.
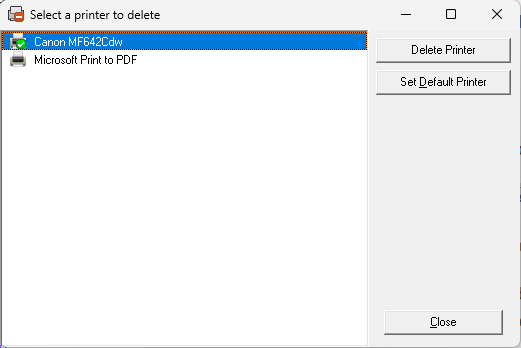
- View Installed Printers: Shows the operating system list of printers installed on your computer.
- Login with / Logout: If your administrator has set up Single Sign-On (SSO), you can use this option to quickly open a web browser and sign in to your identity provider.
-
Capture Printer Port / End Capture: Assign a TCP / IP printer to a port on your workstation. This allows you to print documents using legacy applications on the specified port.
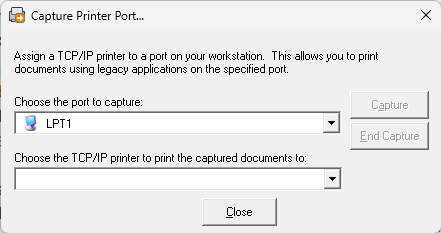
- Refresh Configurations: Triggers a manual Agent check-in so you can access the latest changes and updates.
- Print Job Management: In the Windows Start Menu, this is a standalone option, but in the System Tray (Windows) / Menu Bar (macOS) it is a sub-option under the Pull Printing and Mobile Printing options. Print Job Management opens up the web-based Release Portal, where you can release held jobs. For more details refer to Release Portal.
-
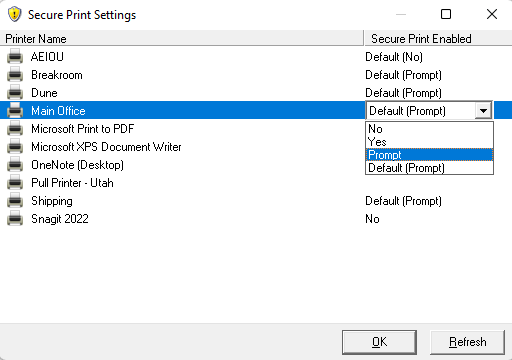
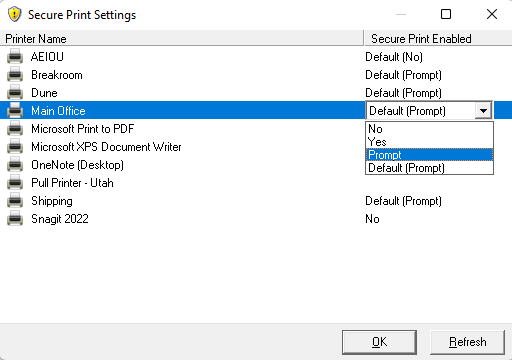
Secure Print Settings: In the Windows Start Menu, this is a standalone option, but in the System Tray (Windows) / Menu Bar (macOS) it is a sub-option under the Pull Printing and Mobile Printing options. Secure Print Settings opens a window that displays installed printers and their secure print options. Use the Secure Print Enabled drop-down to override the default setting. For more details refer to Secure Print Settings.
-
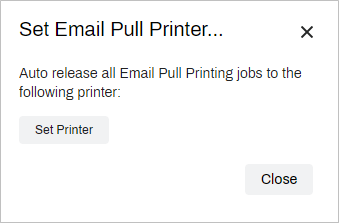
Set Mobile Printer: In the Windows Start Menu, this is a standalone option, but in the System Tray (Windows) / Menu Bar (macOS) it is a sub option found under the Mobile Printing option. This option opens the Self-service Portal modal where you can select a default printer to use when you email print jobs. For more details refer to Email Print Guide.
The Windows Start Menu also shows the options to start, shutdown, or uninstall the client.
Agent Console
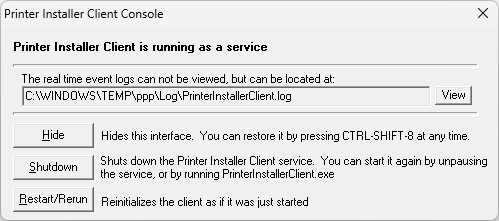
You can access the Agent Console using a default keyboard shortcut. The options included are mostly used for troubleshooting and quick access to the Agent logs. The default keyboard shortcut is Ctrl+Shift+8, but your administrator can change it to a different shortcut, or turn off access altogether. If you have any questions, contact your administrator.
- View: Opens up the Agent log for troubleshooting.
- Hide: Hides the console, which you can reopen using the shortcut.
- Shutdown: Shuts down the Printer Installer Agent service.
- Restart / Rerun: Restarts the Agent.
Secure Print Settings
The Secure Print Settings window shows installed printers and shows whether Secure Release Print is turned on. If your user account has permission to override, you can adjust the secure print settings for your installed printers. To adjust settings, use the dropdown in the Secure Print Enabled column to select the desired option. If you can access the Secure Print Settings modal but cannot make adjustments, your user account does not have permission to override.
- Default (No) / No
- Secure Release Print is not turned on for this printer. This printer immediately processes print jobs.
- Default (Yes) / Yes
- Secure Release Print is turned on. This printer holds print jobs for later release.
- Default (Prompt) / Prompt
-
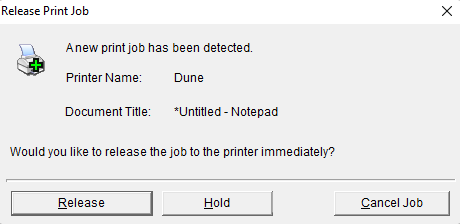
Secure Release Print is turned on. When you send a print job to this printer, a prompt appears, asking whether to print or hold the job for later release.
Troubleshooting Help
This error appeared on macOS ARM devices that were using a printer with an Intel driver attached.
To resolve this error:
-
Install Rosetta on the macOS device.
- Or re-upload the macOS drivers from a device using an ARM processor.
