Manage PINs
Last Updated: November 18, 2026
Use these procedures to turn on PIN authentication for the Control Panel Application (CPA), choose where PrinterLogic stores your PINs, and generate a new PIN for a user. PIN authentication lets users sign in at the printer with a PIN instead of a badge.
Requirements
Review the Requirements before completing the steps.
Turn On PIN Authentication
Follow the steps for your identity source and authentication method. In the Admin Console, go to Tools  Settings General, and scroll down to the Identity Provider Settings section.
LDAP UserID + PIN Settings
Follow these steps for UserID + PIN:
-
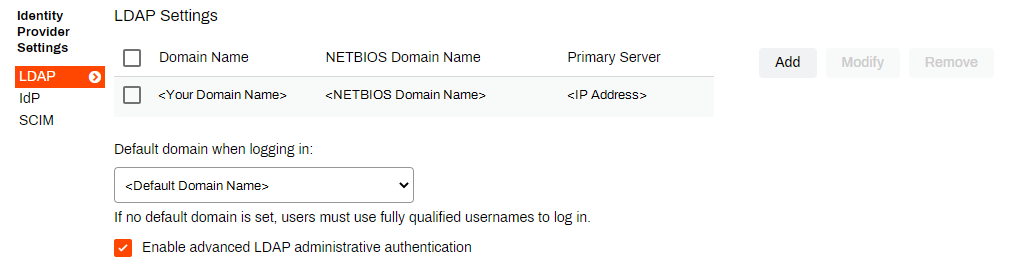
In the Identity Provider Settings section, select LDAP.
-
In the CPA Specific Settings section, select Enable PIN Authentication with UserID.
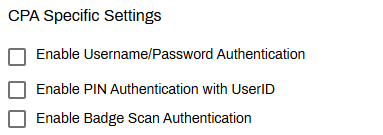
- Select the PIN storage option:
- Database: Enter The field name containing UserID.
- Active Directory: Enter The field name containing UserID and The field name containing PIN.
- Select Save in the upper-right corner.
If you select the Database option, users set their PIN in the Self-service Portal. For more details refer to PIN Self-Registration.
LDAP PIN Only Settings
Turning on the PIN Only feature in your instance changes the UI.
Follow these steps for PIN Only:
-
In the Identity Provider Settings section, select LDAP.
-
In the CPA Specific Settings section, select the PIN Authentication checkbox.
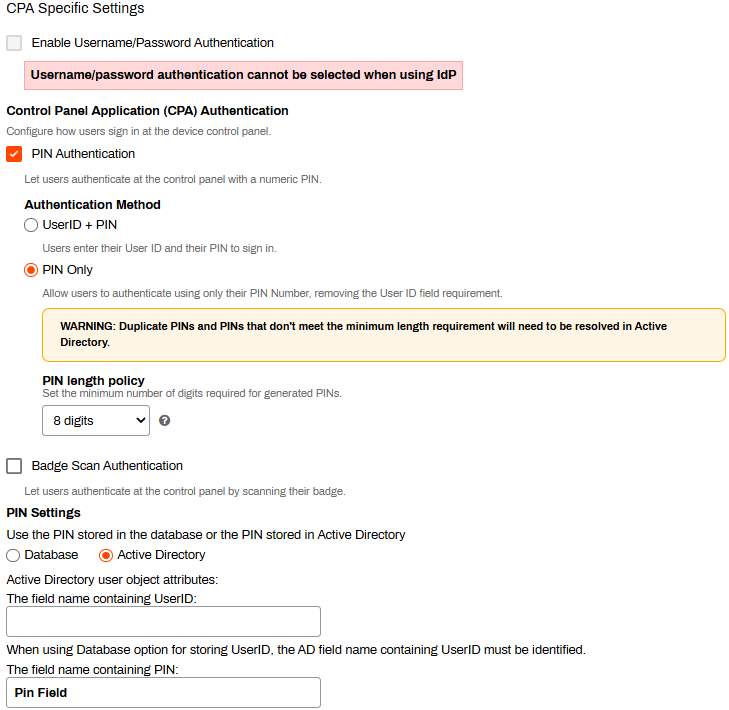
- Select PIN Only.
- Set the minimum PIN length policy. For more details refer to PIN Security & Length.
- In the PIN Settings section, select one of the following:
Database: PrinterLogic stores and manages the PINs.
Users regenerate duplicate PINs or PINs that don't meet the minimum length requirement in the Self-service Portal before they can authenticate at the printer.Active Directory: PINs authenticated in AD. Enter the field name containing the PIN.
Resolve duplicate PINs or PINs that don't meet the minimum length requirement in AD.
- Select Save in the upper-right corner.
IdP UserID + Pin Settings
Follow these steps for UserID + PIN:
-
In the Identity Provider Settings section, select IdP.

-
In the Control Panel Application (CPA) Authentication section, select Enable PIN Authentication.
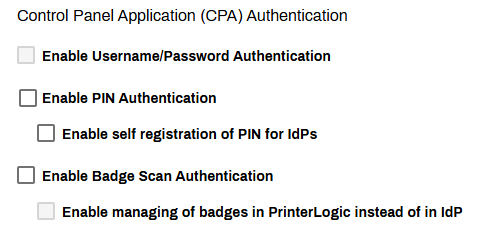
- If you do not use your IdP to map and manage PINs, select Enable self registration of PIN for IdPs.
- Select Save in the upper-right corner.
Do not select Enable self registration of PIN for IdPs if you already have a PIN attribute mapped through your IdP.
If you select the Enable self registration of PIN for IdPs option, users set their PIN in the Self-service Portal. For more details refer to PIN Self-Registration.
IdP PIN Only Settings
Turning on the PIN Only feature in your instance changes the UI.
Follow these steps for PIN Only:
-
In the Identity Provider Settings section, select IdP.
-
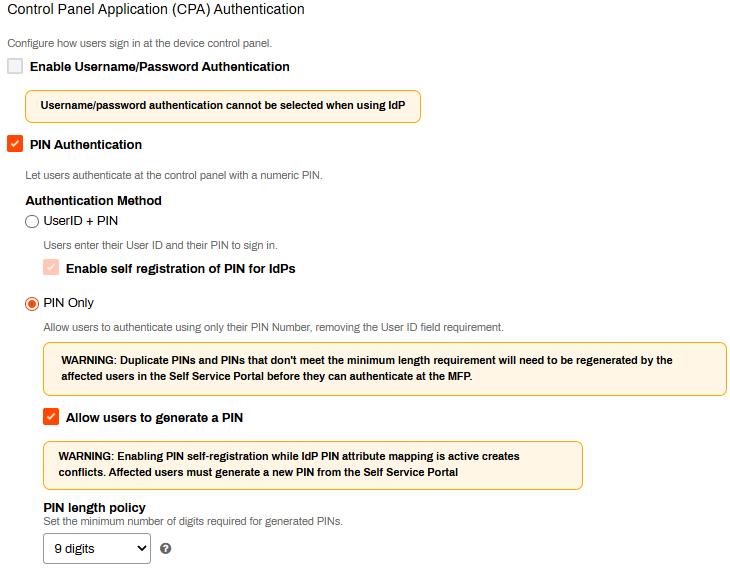
In the Control Panel Application (CPA) Authentication section, select the PIN Authentication checkbox.
-
Select PIN Only.
Resolve duplicate PINs or PINs that don't meet the minimum length requirement in the IdP.
-
(Optional) Select the Allow users to generate a PIN checkbox.
This option switches PIN settings to database for all users. Turning on PIN self-registration while IdP PIN attribute mapping is active creates conflicts. Affected users generate new PINs from the Self-service Portal.
Users regenerate duplicate PINs or PINs that don't meet the minimum length requirement in the Self-service Portal before they can authenticate at the MFP.
- Set the minimum PIN length policy. For more details refer to PIN Security & Length.
- Select Save in the upper-right corner.
If you leave Allow users to generate a PIN unselected, PrinterLogic reads PINs from your IdP. Users cannot generate PINs, and the Admin Console does not offer admins to generate a PIN for them.
Generate PINs
With PIN Only, the Self-service Portal displays a different option that generates a PIN based on the PIN length policy. Users can generate a PIN only once and can access it in the Self-service Portal if they forget it. If needed, admins can generate a new PIN for a user.
Follow these steps:
- In the Admin Console, go to Tools Identity Management.
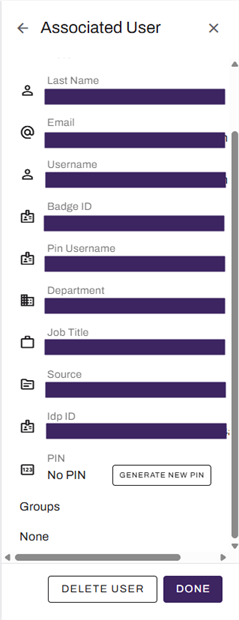
- Find the user, and expand the user's details.
- In the user details, select GENERATE NEW PIN.
-
Confirm that you want to replace the user's current PIN.
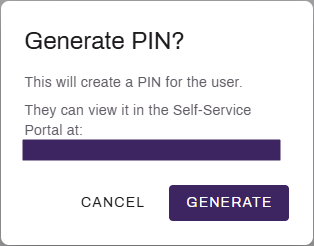
The previous PIN stops working immediately. Admins cannot view a user's PIN. Users view their PIN in the Self-service Portal. For more details refer to View PIN.
Next Steps
Refer to the following:
In this topic: