Offline Secure Release Print (OSRP)
Last Updated: October 08, 2026
With OSRP, if the device that sent the job is unreachable, the user can release a print job from a virtual print queue. This feature works with Pull Print and Direct Secure Release.
When a user holds a job, the Service Agent receives a copy and keeps it in a virtual print queue. When the user releases the job and PrinterLogic detects that the device Agent is offline, the Service Agent releases the copy to the printer.
Requirements
Review the Requirements before configuring this feature.
Process Overview
You perform these high-level procedures:
- Turn On the OSRP Settings & Filter.
- Turn On the OSRP Service.
1. Turn On the OSRP Settings & Filter
Follow these steps:
- In the Admin Console, go to Tools
 Settings Printing.
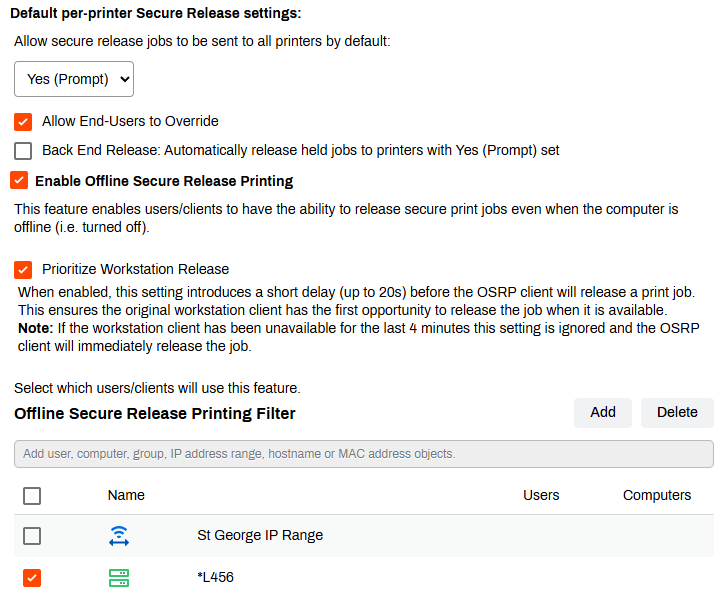
 - In the Pull Printing section, select Enable Offline Secure Release Printing.
-
(Optional) Select Prioritize Workstation Release.

This setting introduces a short delay, which lets the service check whether the device Agent is online to release the job before releasing it through the OSRP service.
-
Below Select which users/clients will use this feature, select Show Filter.

- Select the Add button.
- Select the object type, use the Add modal to select the object, and then select OK.
- Select Save.
Users and groups that you add to the filter can print using OSRP.
2. Turn On the OSRP Service
Turn on the OSRP service on the Windows Service Agent. The Service Agent must be able to reach printers over the network. Printers on different networks require another Service Agent that can reach them.
Follow these steps:
- Select the Service Agent in the tree structure.
- Select the Offline Printing tab.
- Select Enable Offline Secure Release Printing.
- Select Save.
- Access the physical device designated as the Service Agent.
- Use the system tray icon or Start menu to refresh configurations.
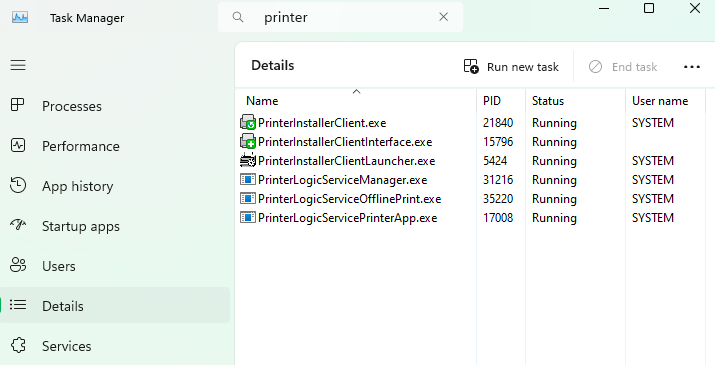
- Open the Task Manager, and select the Details tab.
- In the Search field, enter printer to locate the Agent services.
- Confirm that the following services are running:
- Agent services, which include VasionClient.exe, PrinterInstallerClient.exe, PrinterInstallerClientInterface.exe, and PrinterInstallerClientLauncher.exe.
- PrinterLogicServiceManager.exe.
- PrinterLogicServiceOfflinePrint.exe.
Other active services on the Service Agent also appear.
After you configure OSRP and the service runs, the Service Agent sends a copy to the printer if a user’s workstation is unavailable when they release a held print job. For environments with multiple sites, Vasion recommends using a preferred Service Agent.
(Optional) Assign Preferred Service Agent
This option assigns the Service Agent that users in an IP address range use when printing with OSRP. This configuration is helpful in large environments. With an OSRP Service Agent selected on the IP address range object, when a user who is in the range prints, the copy of the print job goes to that specific Service Agent.
For details on creating an IP address range object, refer to IP Address Ranges.
Follow these steps:
- In the Admin Console, select the IP address range object.
-
On the General tab, use the Preferred service client dropdown menu to select the Service Agent.

- Select Save.
Next Steps
Troubleshooting Help
-
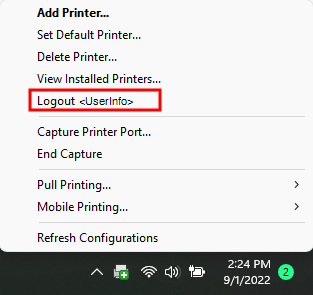
Verify that you are logged in to the Agent. You can right-click the PrinterLogic icon to confirm you are signed in.
-
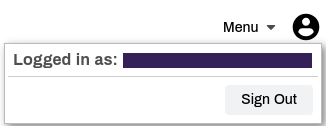
You can also go to the Self-service Portal and select the user avatar to check who is signed in.
If you your Secure Release Print jobs do not appear in the release portal, check the following:
-
Verify that you are logged in to the Client on the workstation you used to send the print job. You can right-click the PrinterLogic icon to confirm you are signed in.
-
Verify that you are signed in to the Self-service Portal / Release Portal. Select the user avatar to verify user identity.
In this topic: