Configure Print To Sign
Last Updated: June 08, 2026
Use this topic to configure Print To Sign so that end users can route documents into Vasion Sign directly from the print dialog.
Key Points
Review the Requirements before configuring this feature.
- The Send to Vasion Sign object reaches users through deployments or self-installing from the Self-service Portal. For more details refer to Printer Deployment.
- Users must have the Creator role to access the Sign tab.
Configure Print to Sign
1. Configure Send to Vasion Sign Object
To configure the Send to Vasion Sign object:
- Create or locate the Send to Vasion Sign object in the tree structure.
-
Select the Drivers / Profiles tab, and assign a driver for the desired operating system(s).
The Use Internet Printing Protocol (IPP) driver option is not supported by this object, but gets applied to all driverless printers by default. Switch to a universal, generic, or commonly used driver from your print environment.
- Select the Security
 Portal Security tab.
- Select the Add button to define the users, groups, or devices that can see this object on the Self-service Portal.
- Select the Hide from Portal on the General tab to remove the object as a self-install option.
- Select Save.

After configuration, end users see Send to Vasion Sign in their print dialog alongside physical printers. Selecting this destination routes the document to Vasion Sign rather than to a printer. No physical copy is produced.
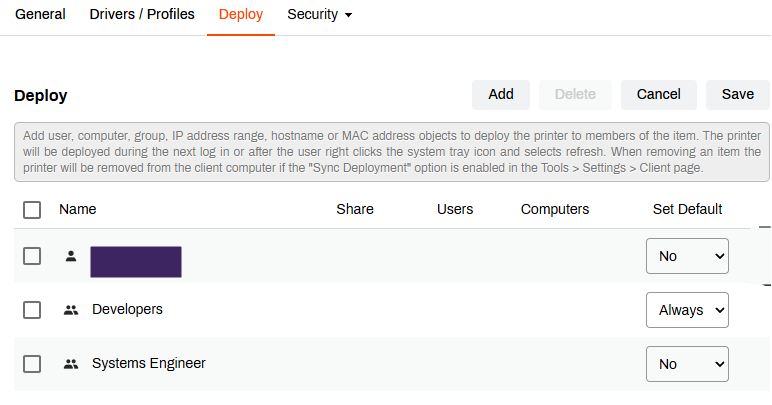
2. Add Deployments
Deployments control which users, groups, and devices automatically see the Send to Vasion Sign object in their print dialog. Alternatively, users can self-install the object from the Self-service Portal if they are included in the Portal Security assignments.
To add an object deployment:
- Select the Deploy tab on the object.
- Select the Add button to define the users, groups, or devices.
- Save your changes.
3. Assign Workflow Permissions in Automate
Separately, you must assign the Creator role in Vasion Automate so that users and groups can access the Sign tab in Vasion Automate.
To assign the Creator role:
- Select Admin from the side navigation, then select Roles and Permissions.
- Select the more icon to the right of the Creator role.

- Select User Assignments or Group Assignments.
-
In the modal, search for and select the desired users or groups.

- Select Save when finished.
