Amazon Root CA 1 Cert
Last Updated: June 17, 2026
Below are the steps you need to obtain an Amazon Root CA1 so you can manually install it on a printer. Use your preferred browser to export the certificate and name and save it where you can access it to upload to the multifunction printer (MFP).
Instructions by Browser and OS
- Chrome
- Edge
- Firefox
The export steps are the same regardless of the operating system you use. The difference is how the operating systems process the exported file so it is ready to upload.
Export the Certificate
-
In the web browser, open the PrinterLogic Admin Console, and then select the Site information button
 to the left of the URL.
- Select Connection is secure.
-
Select Certificate is valid.
- In the Certificate Viewer modal, select the Details tab.
- Select Amazon Root CA 1, and then select Export.
Windows OS
- Browse to the location in which you want to save the file, name the file, and select Save.
-
Use File Explorer to open the certificate with the Crypto Shell Extensions.
- Select the Details tab, and ensure that <All> is selected in the Show field.
- Select Copy to File, and select Next.
- Select the Base-64 encoded X.509 (.CER) option, and select Next.
- Browse to the location in which you want the certificate, name it, and select Next.
- Select Finish.
Mac / Linux
-
Open a terminal, and browse to the location where the certificate downloaded.
-
Run the following command, replacing
<infile>with the certificate name as it was downloaded and<outfile>with the name you want.Copy Code$ openssl base64 -in <infile> -out <outfile>
The certificate is ready for upload to a printer.
The export steps are the same regardless of what operating system you use. The difference is on how the operating systems process the exported file so it's ready to upload.
Export the Certificate
-
In the web browser, open the PrinterLogic Admin Console, and then select the Lock button to the left of the URL.

- Select Connection is secure.
-
Select the Certificate button
 .
.
- In the Certificate Viewer modal, select the Details tab.
- Select Amazon Root CA 1, and then select Export.
Windows OS
- Browse to the location in which you want to save the file, name the file, and select Save.
-
Use File Explorer to open the certificate with the Crypto Shell Extensions.
- Select the Details tab, and ensure that <All> is selected in the Show field.
- Select Copy to File, and select Next.
- Select the Base-64 encoded X.509 (.CER) option, and select Next.
- Browse to the location in which you want the certificate, name it, and select Next.
- Select Finish.
Mac / Linux
-
Open a terminal, and browse to the location where the certificate downloaded.
-
Run the following command, replacing
<infile>with the certificate name as it was downloaded and<outfile>with the name you want.Copy Code$ openssl base64 -in <infile> -out <outfile>
The certificate is ready for upload to a printer.
Export the Certificate
The export steps are the same regardless of what operating system you use. The difference is on how the operating systems process the exported file so it's ready to upload.
-
In the web browser, open the PrinterLogic Admin Console then select the Lock icon to the left of the URL.

- Select Connection is secure.
- Select More Information.
-
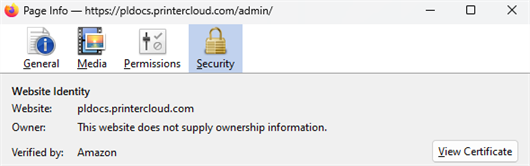
On the Security tab, select View Certificate.
- In the Certificate page, select the Amazon Root CA 1 tab.
- In the Miscellaneous section, select the PEM (cert) download link.
- Select Export.
Windows OS
-
Browse to the location where the file downloaded, and open the certificate with the Crypto Shell Extensions.
- Select the Details tab, and ensure that <All> is selected in the Show field.
- Select Copy to File, and select Next.
- Select the Base-64 encoded X.509 (.CER) option, and select Next.
- Browse to the location in which you want the certificate, name it, and select Next.
- Select Finish.
Mac / Linux
-
Open a terminal, and browse to the location where the certificate downloaded.
-
Run the following command, replacing
<infile>with the certificate name as it was downloaded and<outfile>with the name you want.Copy Code$ openssl base64 -in <infile> -out <outfile>
The certificate is ready for upload to a printer.
Upload the Certificate
You can upload your certificate by signing in to the printer's web portal. The location where to find the upload option varies by manufacturer, but you can typically find certificate options in the Security section.
In this topic: