API Print Service
Last Updated: September 22, 2026
The PrinterLogic Application Programming Interface (API) Print Service A PrinterLogic Output connector that lets source systems send print jobs through web requests rather than traditional print queues or drivers. Running on a Service Agent, the API Print Service accepts representational state transfer (RESTful) API calls so apps that do not natively support printing can still print. provides printing capability from systems that do not typically support it by accepting print jobs via web requests. You can eliminate the need to install print queues on your source application and move to a driverless print model, reducing the work required to maintain the print environment.
Requirements
-
You must have a functional Service Agent that meets the minimum required specifications. For more details refer to Service Agents.
Running IPv6 on your Windows Service Agent might cause conflicts. You might need to turn off IPv6 on the Service Agent's network adapter to resolve the conflict.
- Your Service Agent must be able to access the following service URLs adjusted for your region.
https://agent-api.app.printercloud.com.https://agent-api-grpc.app.printercloud.com.ofn.app.printercloud.com.ofn-gw.app.printercloud.com.
- For Transport Layer Security (TLS), have a certificate signed by a certificate authority (CA) A trusted entity that issues and validates digital certificates. The primary purpose of a CA is to verify the authenticity and trustworthiness of a website, domain, and organization. trusted by the source application.
- Refer to Output Service Recommendations for managing updates to the Output service on the Service Agent.
Ubuntu Service Agent
Customers with an Ubuntu (LTS) 22.04 Service Agent must run an additional command on the Service Agent after configuring the steps below. The command initializes the service.
sudo ln -s "$(cat /etc/pl_dir)/service_client/service-output-management/bin/libmako-adapter-lib.so" "$(cat /etc/pl_dir)/service_interface/lib/libmako-adapter-lib.so" Turn On the API Print Service
- In the Admin Console, select the Service Agent where you want to configure the API Print Service.
- Select the Output Automation tab.
-
Enter the Domain Name of the Service Agent you are using for PrinterLogic Output.
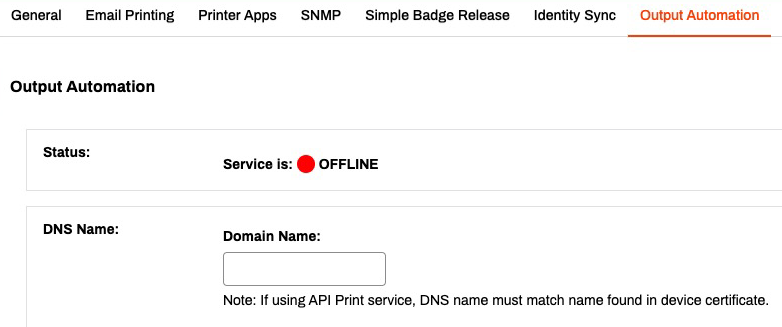
This Domain Name must match the device certificate name and the Service Agent must map this Domain Name to its local IP address. If this field is empty, the service will fail to start, and adds a "Failed to get host address" to the log.
-
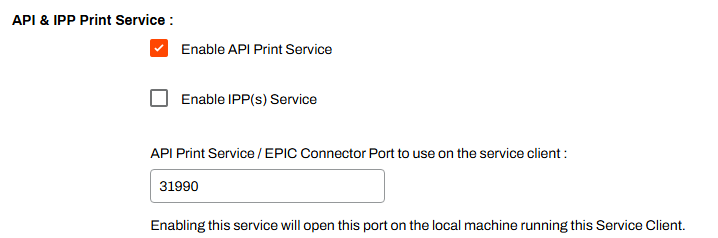
Scroll down to the API & IPP Print Service section and select Enable API Print Service.
-
The default port is 31990, but you can change this, if necessary.
-
-
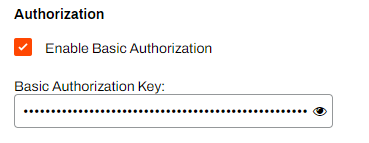
If your application is secured, you can select Enable Basic Authentication to generate an authorization code or enter a code from your application to provide authorization to send jobs to PrinterLogic.
- If you have a code from your application, select and delete the generated code and enter your application's code.
- Select Save.
Certificate
You need a certificate only when you turn on Transport Layer Security (TLS) on a service. You can turn on TLS independently on the API Print Service and on the Internet Printing Protocol Secure (IPPS) service. When you turn on TLS, the certificate must be trusted by the source application calling the service.
Follow the steps below to configure your certificate:
-
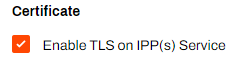
Select Enable TLS on IPP(s) Service.
-
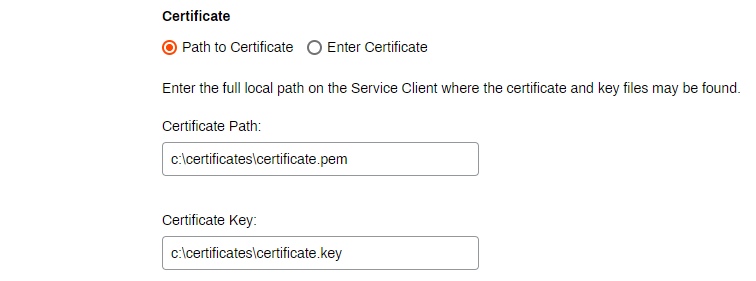
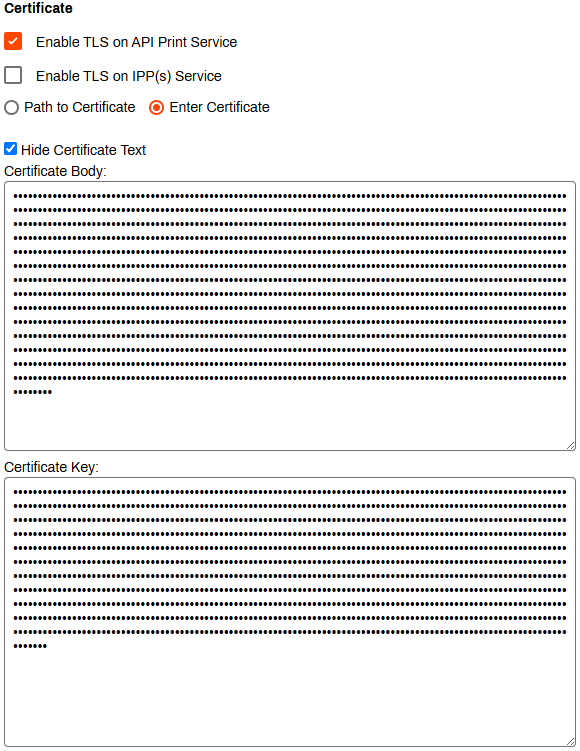
Enter the information for your certificate using one of the following options:
-
Path to Certificate: Enter the file path to where your .pem and .key files are stored on the Service Agent.
-
Enter Certificate: Paste the contents of the certificate and key files into the corresponding text boxes.
-
The Status section shows a green circle and states the service is Online when everything is configured correctly.

Supported API Calls
Once configured, your source application can make the RESTful API calls. For more details refer to API Print Service Schemas.
Optional Next Step
Troubleshooting Help
In some setups, external applications may need to reach the PrinterLogic Output Service Agent using a DNS name that resolves to an external IP address. However, this can cause issues the following issues:
- The Service Agent cannot resolve the DNS name to its internal IP address.
- External DNS resolution conflicts with internal requirements.
Check if the Service Agent can resolve the DNS name to its internal IP address. If the DNS name does not resolve correctly, you may need to modify the hosts file. Refer to Troubleshoot DNS Resolution for Output Automation Service Client
Ensure that the DNS name in the UI matches the one in the certificate used by the Service Agent.
In this topic:
PrinterLogic Output modernizes traditional output management by automating critical document and print workflows, bridging back-end systems and end-user printing, and connecting seamlessly with existing EMR, EHR, and ERP systems. PrinterLogic Output automates document routing, conversion, and delivery, reducing manual effort and streamlining operations
- EMR/EHR/ERP Connectors
- API Service
- Output Rules
- Batch Printing
- Output Console
- Print Job Regionalization
- Document Conversions & Driverless Printing
- Confirmed Delivery
- Quick Configuration
- API Cloud Link
Check out our Solution Brief. for more about these features.
Yes, PrinterLogic Output easily connects your systems with Vasion to route and deliver documents to your desired destinations while offering you more granular control and visibility.
It seamlessly connects with ERP/EMR/CRM systems and other business-critical applications, enhancing your current document management without needing a complete overhaul. The API Service also supports on-prem and cloud-based systems, expanding your integration capabilities with ease and flexibility.
The Output Console offers complete control and oversight over your printing and document environment. This unified interface offers the ability to view printers, filter and sort print jobs, track processed jobs, redirect failed print jobs, and cancel or reprint past jobs. With robust reporting capabilities, you gain enhanced insights into queue statuses and printer performance, ensuring efficient, transparent print operations. Reduce downtime by quickly identifying and troubleshooting issues to protect your critical business processes.
PrinterLogic Output provides robust security features that protect sensitive documents during transmission and storage, ensuring that only authorized users can access critical information. It includes:
- Detailed Audit Trails: Track document access and delivery for compliance and security audits.
- Zero Trust Remote Printing: Allow secure print jobs from remote facilities without costly VPNs.
- Information Security: Document and print jobs are stored locally and encrypted when at rest on our services.
Vasion's Secure Release Print capabilities ensure that print jobs are accessible to only authorized users. Users must authenticate at the printer before releasing their documents, whether by badge swipe, entering credentials at the CPA, or scanning a QR code, preventing sensitive documents from falling into the wrong hands.
Additionally, Vasion's SaaS platform is ISO27001:2022 and SOC 2 Type 2-certified to mitigate risks to customer data and help manufacturing organizations better meet their business, legal, and regulatory requirements.
PrinterLogic Output is easy to implement. Tools like Network Scanner, the Data Manager, and Quick Config tool help you migrate queues and apply settings in bulk. You can also configure zones to route jobs by region and use the Output Console for real-time monitoring, job health, and automatic redirection.
PrinterLogic Output is licensed per print queue. You will need additional licensing to access additional features like Secure Release and Off-Network Printing.
The API Print Service can send documents to the printer via LPR and RAW protocols.
As a PrinterLogic Output customer, you will already have a functional Service Agent and printer configured. From there, you must secure a digital certificate issued by a reputable Certificate Authority (CA), recognized and trusted by the system or application you are connecting to the Output Service.
For additional information on API Print Service prerequisites, refer to API Print Service.
The API Print Service runs on the PrinterLogic Output Service on a Windows or Debian Linux server either on-premise or in your cloud instance. This allows the API Print Service to reach your source application and printers unless Off-Network Print is utilized. This back-end configuration is flexible to your environment's requirements to function seamlessly with your existing systems and processes.
The API Print Service accepts and processes print jobs concurrently for improved scalability and speed. Documents sent to the same printer will be printed in sequential order.
The Service's maximum capacity depends on the hardware it is running on and network connection speeds. If capacity is reached, additional Service Agents can be utilized with a load balancer to distribute traffic to a highly available partner Service Agent.
PrinterLogic Output was built to scale with high volumes of input in mind and has been shown to process high volumes of documents in less than a second. Various factors, like job size, sequential printing, and hardware capacity, can affect print job speed.
Your documents sent to the API Print Service pass within a Transport Layer Security (TLS) tunnel to the HTTPS server. Files are also encrypted, while at rest, by the Service after receiving them.
If the API Print Service prints directly to printers on its network, standard LPR or RAW printing may be used, which will not encrypt print files between the Service and printer.
For unsecured or public networks between the Service and your printers, we recommend leveraging Off-Network Print to route documents from your system through a Vasion-hosted gateway in the cloud. The Internal Routing Service, hosted on a Service Agent, opens a communication line to receive and download files to the printer. All print traffic is encrypted during this process.
PrinterLogic Output is supported in both the PrinterLogic and Virtual Appliance platforms. PrinterLogic offers the most flexibility in terms of Vasion's available configuration options.
For print jobs from Epic or our API Service, the Batch Printing functionality lets you collect batches of documents and print them in a specific order every time, ensuring complex processes remain standardized and efficient.