Output Service Recommendations
Last Updated: September 25, 2026
This document outlines best practices for maintaining PrinterLogic Output Service Agent services. Please note that these are general guidelines as each environment is different.
Service Agent Updates
Automatic Updates
Vasion recommends turning off automatic updates on the Service Agents running the Output Automation service in production environments. Turning this feature off prevents interruptions to your critical printing infrastructure, allows more control over when Service Agent updates reach your production environment, and provides time to test the update(s) on other Service Agents.
To turn off Service Agent automatic updates in your Admin Console, do the following:
- Go to the Service Agent object in the tree structure.
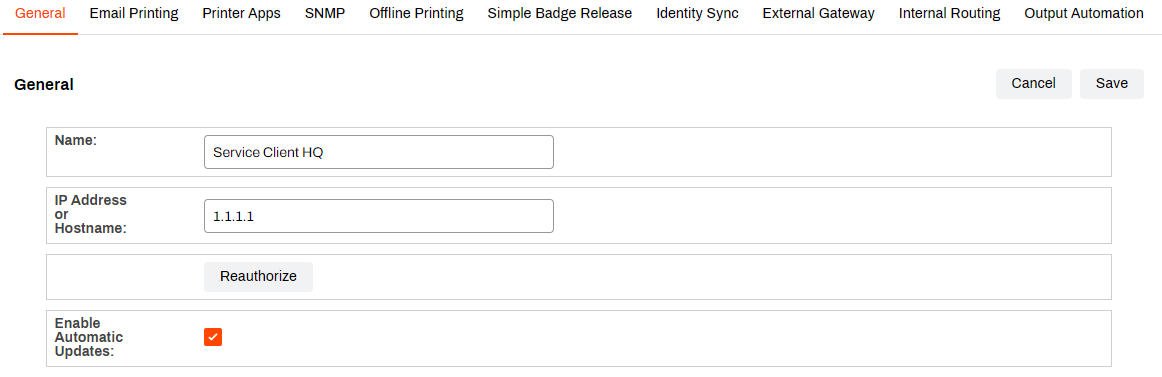
- On the General tab, deselect Enable Automatic Updates.
- Select Save in the upper-right corner.
For more details refer to Automatic Updates.
Testing Updates
Vasion recommends creating a non-production Service Agent object to test the updates before updating your production Service Agent(s).
The test Service Agent:
- Can exist in the same instance that manages your production environment.
- Clearly name it for testing or non-production.
- Must use a separate, non-production zone.
- The non-production environment should use different hardware than the production environment.
Select the Enable Automatic Updates setting on the testing Service Agent, or turn it on after the release. After the update, verify that the services run as expected.
Keep in mind that the Service Agent restarts during the update. If the service is actively handling jobs before the restart, those jobs could become stuck and fail to complete.
When you are ready to update the production Service Agent, do the following:
- Go to the Service Agent's General tab.
- Select the checkbox for Enable Automatic Updates.
- Select Save.
- Wait 3-5 minutes for the services to update.
- Deselect the checkbox for Enable Automatic Updates.
- Select Save.
Load-Balanced Environments
If you have multiple Service Agents running in a load-balanced configuration:
- Remove one Service Agent from your load balancing, and allow time for it to complete active jobs.
- Select the Enable Automatic Updates checkbox on that Service Agent and select Save.
- Allow 3-5 minutes for the update to complete.
- Deselect the Enable Automatic Updates checkbox on that Service Agent and select Save.
- Add the Service Agent back to the pool.
- Repeat these steps for additional Service Agents in the pool.
Roll Back an Update
If there is an issue with your updated version of our service, you can roll back by following these steps. Please note, these steps are Windows specific. macOS and Linux devices follow the same process, but use different tools to start or stop software and paths to PrinterLogic Log File Locations.
Before selecting the Enable Automatic Updates option:
- Go to C:\Program Files (x86)\Printer Properties Pro\Printer Installer Client on the Service Agent machine.
- Copy the service folder (e.g., service-output-management).
- Paste that folder into a different folder location.
If there is an issue that requires rolling back:
- Open the Task Manager.
- Select the Details tab.
- Right-click the PrinterInstallerClientLauncher.exe service, and select End process tree. If the other PrinterLogic services do not end, end them individually.
- Go to C:\Program Files (x86)\Printer Properties Pro\Printer Installer Client on the Service Agent.
- Replace the service folder with the one stored in the previous steps.
- Confirm that you have deselected Enable Automatic Updates on that Service Agent object's General tab.
- Go to the Services tab in Task Manager.
- Right-click on PrinterInstallerLauncher and select Start.
The Service Agent starts and the service uses the folder that was added back in.
In this topic:
PrinterLogic Output modernizes traditional output management by automating critical document and print workflows, bridging back-end systems and end-user printing, and connecting seamlessly with existing EMR, EHR, and ERP systems. PrinterLogic Output automates document routing, conversion, and delivery, reducing manual effort and streamlining operations
- EMR/EHR/ERP Connectors
- API Service
- Output Rules
- Batch Printing
- Output Console
- Print Job Regionalization
- Document Conversions & Driverless Printing
- Confirmed Delivery
- Quick Configuration
- API Cloud Link
Check out our Solution Brief. for more about these features.
Yes, PrinterLogic Output easily connects your systems with Vasion to route and deliver documents to your desired destinations while offering you more granular control and visibility.
It seamlessly connects with ERP/EMR/CRM systems and other business-critical applications, enhancing your current document management without needing a complete overhaul. The API Service also supports on-prem and cloud-based systems, expanding your integration capabilities with ease and flexibility.
The Output Console offers complete control and oversight over your printing and document environment. This unified interface offers the ability to view printers, filter and sort print jobs, track processed jobs, redirect failed print jobs, and cancel or reprint past jobs. With robust reporting capabilities, you gain enhanced insights into queue statuses and printer performance, ensuring efficient, transparent print operations. Reduce downtime by quickly identifying and troubleshooting issues to protect your critical business processes.
PrinterLogic Output is easy to implement. Tools like Network Scanner, the Data Manager, and Quick Config tool help you migrate queues and apply settings in bulk. You can also configure zones to route jobs by region and use the Output Console for real-time monitoring, job health, and automatic redirection.
PrinterLogic Output is licensed per print queue. You will need additional licensing to access additional features like Secure Release and Off-Network Printing.
As a PrinterLogic Output customer, you will already have a functional Service Agent and printer configured. From there, you must secure a digital certificate issued by a reputable Certificate Authority (CA), recognized and trusted by the system or application you are connecting to the Output Service.
For additional information on API Print Service prerequisites, refer to API Print Service.
The API Print Service runs on the PrinterLogic Output Service on a Windows or Debian Linux server either on-premise or in your cloud instance. This allows the API Print Service to reach your source application and printers unless Off-Network Print is utilized. This back-end configuration is flexible to your environment's requirements to function seamlessly with your existing systems and processes.