Last Updated: June 24, 2024
Connect WorkDocs
WorkDocs Connection Requirements
To connect Vasion to WorkDocs you need the following:
- Access to the Amazon IAM console
- Account with full rights to create and modify folders and documents
- Create WorkDocs site
- Vasion Admin rights
Create IAM User
- Navigate to the Amazon IAM Console https://console.aws.amazon.com/iam/home.
- Select Access management > Users > Add User.
- Enter a username for Vasion to access the account; for example, vasionworkdocs, and select Programmatic access for the access type.
- Choose Next: Permissions.
- On the Set Permissions page, choose Attach existing policies directly.
- In the Filter policies box, search for WorkDocs.
- Check the box next to AmazonWorkDocsFullAccess and choose Next: Tags.
- Choose Next: Review, then Create User.
- Choose Download .csv – use this file to set up the credentials in Vasion.
Create WorkDocs Site
- Navigate to the WorkDocs console https://console.aws.amazon.com/zocalo/.
- In the WorkDocs left navigation select My Sites and choose Create a New WorkDocs Site.
- Under Quick Start, select Launch.
- Enter the subdomain for a Site URL; for example, vasion.
- Enter an email address, first name and last name for the person that is administering the site
- Choose Complete Setup
- The site takes a few minutes to initialize. Once it is finished, a notification is sent to your administrator account.
- In the e-mail, choose Get Started!
- Enter a New Password, then choose the button to continue.
- The URL in the address bar brings you to the site—this is where any folders created, or any files that are uploaded are stored.
Retrieve the Organization ID (Directory ID)
- Open the Directory Service Console at https://console.aws.amazon.com/directoryservicev2/
- Make note of the Directory ID value next to the Directory name of the site you created above;
- Make note of the region in the URL where you were redirected
It can take up to 3 minutes or more for the connection to register before it is available to configure in Vasion
Connect WorkDocs
- Click on the Admin App and click on Cloud Storage in the navigation menu
-
Double-click Add Storage Provider
- In the Select Cloud Storage Provider modal click on WorkDocs and click Continue
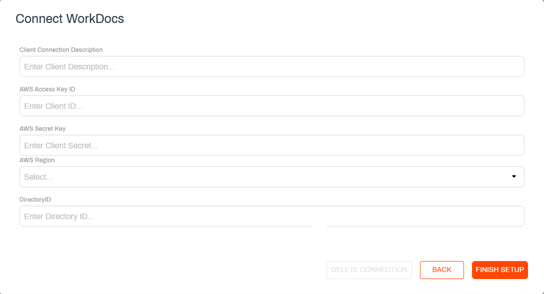
- In the Connect WorkDocs modal enter the following:
Cloud Connection Description — enter a unique name that identifies this cloud storage connection. This name is displayed when navigating to this location in the Vasion apps.
- Client ID — enter the Access Key ID from the CSV file (Step 9 of Create IAM User, above)
- Client Secret — enter the Secret access key from the CSV file (Step 9 of Create IAM User, above)
- Region — use the drop-down to select the region where the WorkDocs site was created (Step 3 of Retrieve the Organization ID, above)
DirectoryID— enter the Directory ID value of the site directory (Step 2 of Retrieve the Organization ID, above)
Use for Data Automation Only — check this box if the storage connection is only used for the Import or Export automations.
- Click Finish Setup
When the drive is connected you should see a successful connection alert.
If you have selected to use the drive for data automation only, the drive does not display when navigating storage locations in the Vasion apps. The drive is only visible when configuring Import or Export automations. For more details, see Import / Export.
Edit the WorkDocs Connection
You can make any updates to the connection at any time by doing the following:
-
Double-click the connection tile
-
Update the information in the appropriate fields
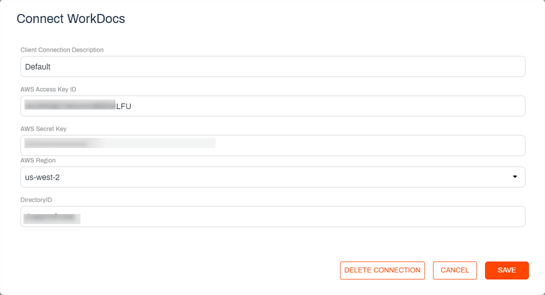
- Click Save
Delete the WorkDocs Connection
To delete the cloud storage connection do the following
-
Double-click the connection tile
-
Click Delete Connection
-
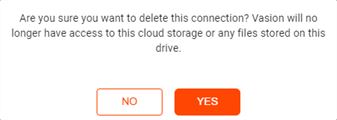
In the delete confirmation modal click Yes