Last Updated: August 09, 2024
Import / Export
The Import and Export automations are used to automatically import or export files from a directory accessible to Vasion. Import and Export functionality supports local paths and UNC A standard for identifying servers, printers and other resources in a network. A UNC path uses double slashes or backslashes to precede the name of the computer. paths.
Requirements
Before you create the Import automation, you must already have a Parent Folder created in the storage location. For details on how to create folders, see Parent Folders.
If the documents being imported include barcodes and you would like to configure the Barcode Attributing section, you must already have Barcode Configurations set up in Vasion. For details, see Barcode Configuration.
Import
The Import functionality is used search for files in a directory accessible to Vasion and lets your store the documents found in any configured Storage locations, whether the Vasion drive or any connected cloud storage. Additionally, you can configure the automation to automatically send the documents directly to a workflow.
To create a new Import automation you must configure:
- General Settings
- Build Import
- Barcode Attributing
1. General Settings
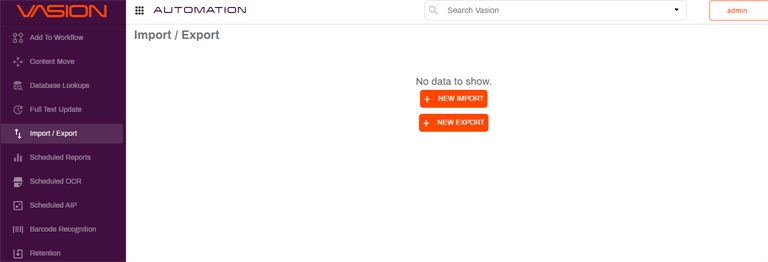
- In the Automation app click on Import / Export in the side navigation.
-
Click on the + New Import button.
- In the General tab, enter the name for the new Import in the Import Name field.
-
If you have an on-premises instance of Vasion, you may enter a value on the Run On Machine filed otherwise leave blank.
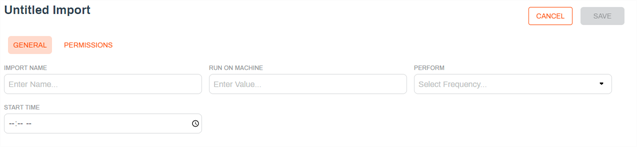
The value in this field determines the server used to run the automation and is only required where there are multiple Vasion clients and / or client services running for the environment.
- Use the Perform drop-down to select the frequency you want the automation to run. The next fields that display depend on what you select here.
- Once — use this option to only run the automation once. The next field display updates to Start Date, and you can type the date in the format shown or click on the Calendar icon
 to pick the date.
 - Daily — use this option to run the automation every day. The only remaining option is the Start Time.
- Weekly — use this option to run the automation once a week. The next field updates to Weekdays and you can use the drop-down to select one or more days of the week by checking the appropriate box.
- Monthly — use this option to run the automation once a month. The next field updates to Months and you can use the drop-down to select one or more months by checking the appropriate box.
- Frequency — use this option to run the automation at a specified time interval in minutes. In the next field, type in the number of minutes for the time interval.
- Once — use this option to only run the automation once. The next field display updates to Start Date, and you can type the date in the format shown or click on the Calendar icon
- In the Start Time, enter the time of day to run the automation in the format shown or click on the Clock icon
 to pick the time.
 - If the Monthly option is selected, a Day of Month field is shown. Type in the day of the selected month(s) when you would like to run the automation.
2. Build Import
- Click on the arrow next to Build Import to expand the section.
- In the Import From field choose from the following options:
Cloud Storage — use this option to select a folder from an S3 cloud storage locations that has been configured for automation use only. Click the Browse button to navigate to the appropriate folder.

External Source — Use this option to select a folder location outside of Vasion. Enter the path name to the folder location in the Folder field.

- Click the Browse button to select the location in the appropriate Vasion storage folder where you want the documents to be imported. The selected folder displays in the Import To field.
- If you would like to also send the documents to a Workflow, do the following:
- Use the Send to Workflow drop-down to select the appropriate workflow.
Use the Object drop-down to select an object to include all the fields of that object at metadata.

- Depending on the type of documents being imported, here are some additional options:
Document Name Attributing — check this box if you want the document name to be parsed and matched to fields according to a configured file name convention
For this functionality additional assistance may be required. Email support@vasion.com.
- Delete Files Upon Import — check this box if you would like to delete the files from the original location after files are successfully imported.
- Internal Lookup Process - check this box to begin a document lookup process so that any of the following options can be applied, if selected.
- OCR Document — check this box to run OCR when importing the file. For more details, seeOCR.
- Only Import New Files — check this box if you only want to import any documents added since the last time the Import automation was completed.
Use Field-based Attributing — check this box to parse out the value from a field and enter it into another.
This functionality is only available when there are client services running for the environment.
Use Object Mapping — check this box to look for specified field values on import and switch the object, if necessary.
This functionality is only available when there are client services running for the environment.
- Import Structure in Selected Folder — check this box to import all child folders and documents found in the original file location.
- Import Structure Below Folder — check this box to create a child folder and only import the files inside that child folder.
- Don't Create Subfolders — check this box to not allow subfolders to be created within the selected folder.
- Use the Search Name drop-down to select the Full Text Search from the list.
3. Barcode Attributing
If your import documents include barcodes you can apply any of the following settings:
-
Click on the arrow next to Barcode Attributing to expand the section.
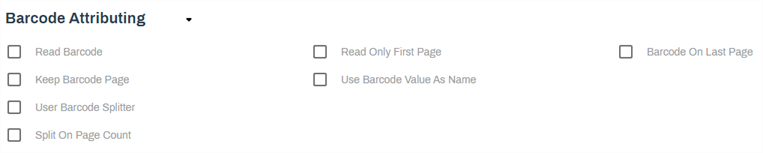
- Check the box next to the setting you want to apply:
- Read Barcode — check this box if you would like barcodes from scanned documents indexed. When this box is checked, complete these additional fields:
- Use the Barcode Attributing drop-down to select a Barcode Configuration.
Enter a value in the Prefix text box if you would like to add a prefix to the file name when importing the document.

- Read Only First Page — check this box to only search the first page of the document to read the barcode.
- Barcode On Last Page — check this box only search the last page of the document to read the barcode.
- Keep Barcode Page — check this box if you want to keep the page of the document containing the barcode.
- Use Barcode Value as Name — check this box to use the barcode value as the document name.
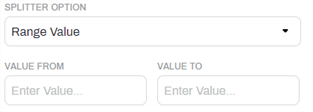
- Use Barcode Splitter — check this box if the document has multiple barcodes and you would like to split the file. When this option is checked, the Splitter Option drop-down is then displayed so you can select one of the following:
Range Value — specify a value range to use as a basis for comparison to split the document. In the Value From field enter the starting range and in the Value To field enter the ending range.
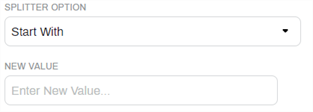
Start With — specify the starting value of the barcode you want to use to split the document. Enter the value in the New Value field.
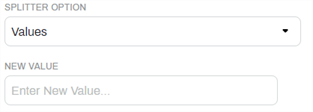
Values — specify the value of the barcode you want to use to split the document. Enter the value in the New Value field.
- Advance Barcode —
- Value Changed —
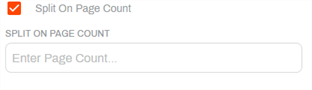
Split on Page Count — check this box to split the document on a specific page. Enter the page number in the Split on Page Count field.
- Read Barcode — check this box if you would like barcodes from scanned documents indexed. When this box is checked, complete these additional fields:
You can skip to the Permissions section or click Save to complete the Import automation setup
Export
The Export functionality is used to search for files in Vasion Storage, including any configured cloud storage, and exports the documents found to a file location outside of Vasion.
To create a new Export automation you must configure:
- General Settings
- Build Export
- Exported Subfolders
- Custom Naming
1. General Settings
- In the Automation app click on Import / Export in the side navigation.
-
Click on the + New Export button.
- In the General tab, enter the name for the new Export in the Export Name field.
-
If you have an on-premises instance of Vasion, you may enter a value on the Run On Machine filed otherwise leave blank.
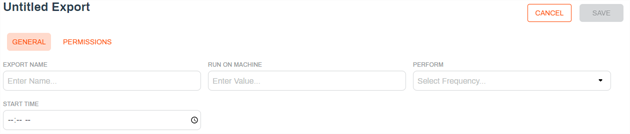
The value in this field determines the server used to run the automation and is only required where there are multiple Vasion clients and / or client services running for the environment.
- Use the Perform drop-down to select the frequency you want the automation to run. The next fields that display depend on what you select here.
- Once — use this option to only run the automation once. The next field display updates to Start Date, and you can type the date in the format shown or click on the Calendar icon to pick the date.
- Daily — use this option to run the automation every day. The only remaining option is the Start Time.
- Weekly — use this option to run the automation once a week. The next field updates to Weekdays and you can use the drop-down to select one or more days of the week by checking the appropriate box.
- Monthly — use this option to run the automation once a month. The next field updates to Months and you can use the drop-down to select one or more months by checking the appropriate box.
- Frequency — use this option to run the automation at a specified time interval in minutes. In the next field, type in the number of minutes for the time interval.
- Once — use this option to only run the automation once. The next field display updates to Start Date, and you can type the date in the format shown or click on the Calendar icon
- In the Start Time, enter the time of day to run the automation in the format shown or click on the Clock icon to pick the time.
- If the Monthly option is selected, a Day of Month field is shown. Type in the day of the selected month(s) when you would like to run the automation.
2. Build Export
- Click on the arrow next to Build Export to expand the section.
-
Click the Browse button to select the Vasion storage folder that has the documents to be exported. The selected folder displays in the Folder To Export field. The Export Configuration drop-down defaults to Manual Export.

You only need to use the Manual Export drop-down to select one of the existing configurations if there are multiple Vasion clients and / or client services running for the environment that have multiple export configurations. Once you select the export configuration, you can skip to the Permissions section or click Save to complete the setup.
-
Use the Export To drop-down to select where to export the folder:
-
External Source — use this option to select a location outside of Vasion. In the Folder field enter the path to the folder location where you want to export the documents.

-
Cloud Storage — use this option to select cloud storage configured in Vasion. Click the Browse button to navigate to the cloud storage location.

You cannot export to a cloud storage location configured for Automation Only.
-
- Check the Move to Folder After Export box if you would like to move the documents to another folder after the export is complete. When this box is checked, complete the following:
- Click the Browse button to select the folder where you would like to move the exported documents. The selected folder displays in the Move To field.
If you would like to delete the documents from Vasion instead of moving them to another storage location, check the Delete Documents After Export field.

-
Export Documents — check this box if you would like to export the actual documents stored in Vasion.
If the box is left unchecked, the export configuration only generates a CSV file listing the documents contained in the storage location.
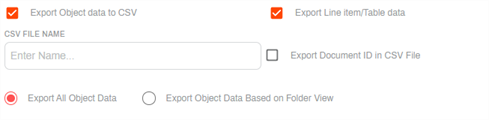
- Export To CSV — check this box if the documents contain barcodes and you would like to export the barcode images to a CSV file. When this box is checked, complete the following:
- In the CSV File Name field enter the name you would like for the CSV file.
Check the Export Document ID in CSV File if you would like to get a list of all the exported document in a CSV file.
If you would like all object data associated with each document exported in the CSV, choose Export All Object Data. If you would like the data limited by what is displayed in the folder, choose Export Object Data Based on Folder View
-
Export Line item/Table Data — check this box if you would like to export line item data that was captured in an Amazon Textract process. When this box is checked, complete the following:
-
In the CSV File Name field, enter the name you would like for the CSV file.
-
Check the Export Document ID in CSV File if you would like to get a list of all the exported document in a CSV file.

-
3. Exported Subfolders
The Export automation creates subfolders in the destination file location where you want to save the exported documents. The Exported Subfolders functionality lets you select an object field name as the name of the subfolder it creates at the destination. Complete the following:
-
Click on the arrow next to Exported Subfolders to expand the section.
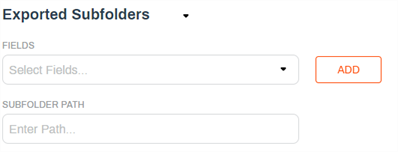
- Use Fields drop-down to select an object field to use as the subfolder name and click the Add button. Ensure the Subfolder Path field is populated or it is not added to the automation.
4. Custom Naming
The Custom Naming option lets you select an object field to parse data and use to name the documents being exported. You can also enter custom text on a designated page location similar to a watermark.
-
Click on the arrow next to Custom Naming to expand the section.
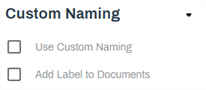
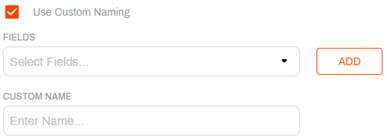
- Check the Use Custom Naming field if you would like to select an object field for the document names. When the box is checked, complete the following:
Use Fields drop-down to select an object field and click the Add button. Ensure the Custom Name field is populated or it is not added to the automation.
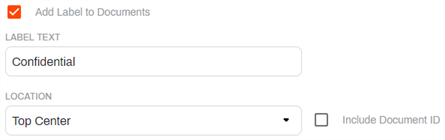
- Check the Add Label to Document box if you would like insert custom text to the document. When the box if checked, complete the following:
- In the Label Text field enter the custom text you would like to insert into the document.
- Use the Location drop-down to select where in the document page(s) you would like to insert the label.
Check the Include Document ID box if you would like it to be inserted along with the label text.
Permissions
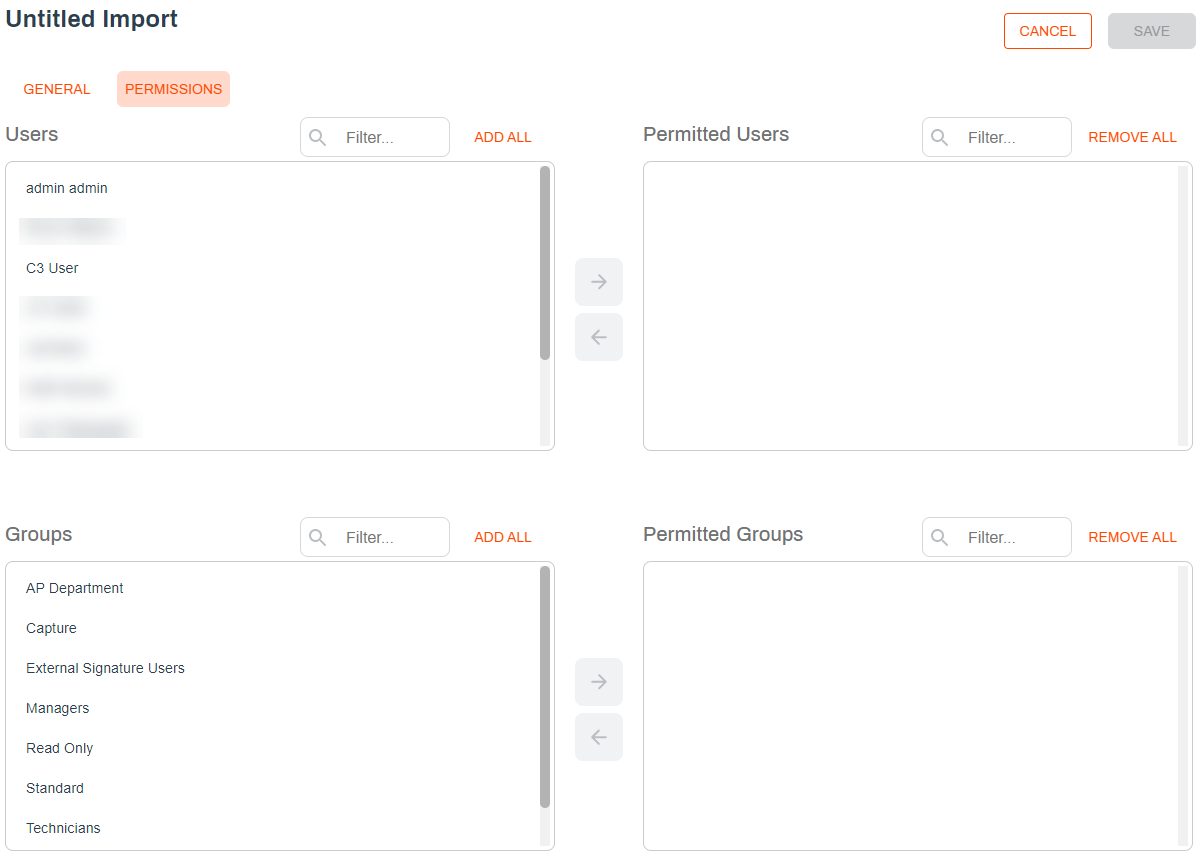
You can change who can see or edit the automation by assigning user or group permissions. If you leave all users and groups in the left column, then the automations can be seen by all users and groups by default.
- Click on the Permissions tab at the top of the screen.
- Select the users and / or groups you would like to have permission to access the folder and click the right arrow button
 .
. - You can also add or remove all users or groups by clicking on the Add All or Remove All buttons above each column.
The roles that a user has can also limit which users can see and run this job. See Roles for more information on what roles do and how they may affect what you are trying to do.
When the configuration is complete, click Save at the top of the page to save your automation and run automatically based on the specified settings.