Last Updated: June 24, 2024
Schedule OCR
Optical Character Recognition (OCR Optical Character Recognition (OCR) is the electronic conversion of images of typed or printed text into machine-encoded text. This allows for easier reading and searching of content.) recognizes text inside images and scanned documents. It is used in digitizing printed texts so they can be electronically searched, stored, displayed online and used in machine processes. Vasion uses intelligent OCR capture to make digital content fully searchable, extract key information and apply fields to digital documents.
By running the OCR process manually, or through the Schedule OCR automation, text in a document, you can:
- Capture and store data efficiently
- Populate key fields into an existing PDF template
- Route information into a pre-existing table or database, or
- Route to specific recipients or departments.
To create a new Schedule OCR automation you must configure:
- General Settings
- Build OCR
1. General Settings
- In the Automation app click on Scheduled OCR in the side navigation.
-
Click on the New Schedule OCR button.
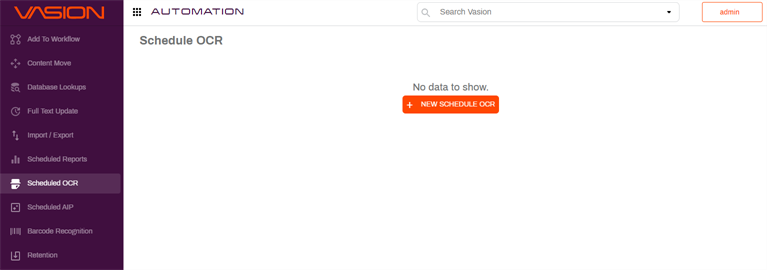
- In theGeneraltab, enter the name for the new Schedule OCR automation in the Name field.
-
If you have an on-premises instance of Vasion, you may enter a value on the Run On Machine filed otherwise leave blank.
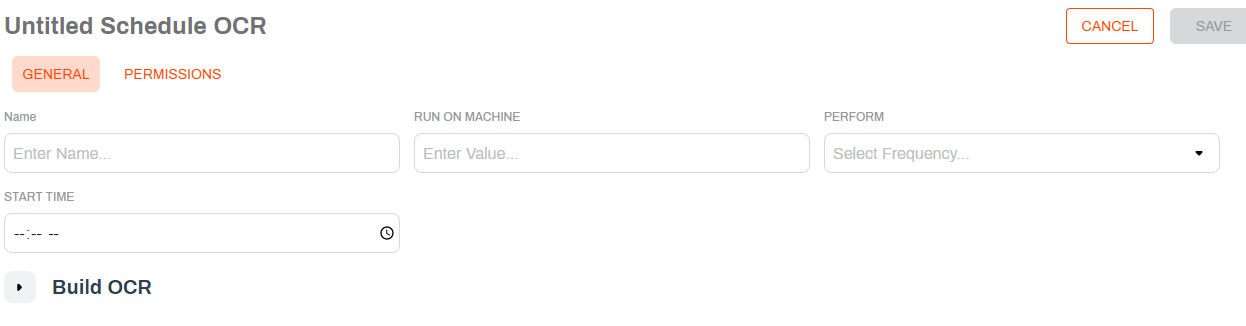
The value in this field determines the server used to run the automation and is only required where there are multiple Vasion clients and / or client services running for the environment.
- Use the Perform drop-down to select the frequency you want the automation to run. The next fields that display depend on what you select here.
- Once — use this option to only run the automation once. The next field display updates to Start Date, and you can type the date in the format shown or click on the Calendar icon
 to pick the date.
 - Daily — use this option to run the automation every day. The only remaining option is the Start Time.
- Weekly — use this option to run the automation once a week. The next field updates to Weekdays and you can use the drop-down to select one or more days of the week by checking the appropriate box.
- Monthly — use this option to run the automation once a month. The next field updates to Months and you can use the drop-down to select one or more months by checking the appropriate box.
- Frequency — use this option to run the automation at a specified time interval in minutes. In the next field, type in the number of minutes for the time interval.
- Once — use this option to only run the automation once. The next field display updates to Start Date, and you can type the date in the format shown or click on the Calendar icon
- In the Start Time, enter the time of day to run the automation in the format shown or click on the Clock icon
 to pick the time.
 - If the Monthly option is selected, a Day of Month field is shown. Type in the day of the selected month(s) when you would like to run the automation.
2. Build OCR
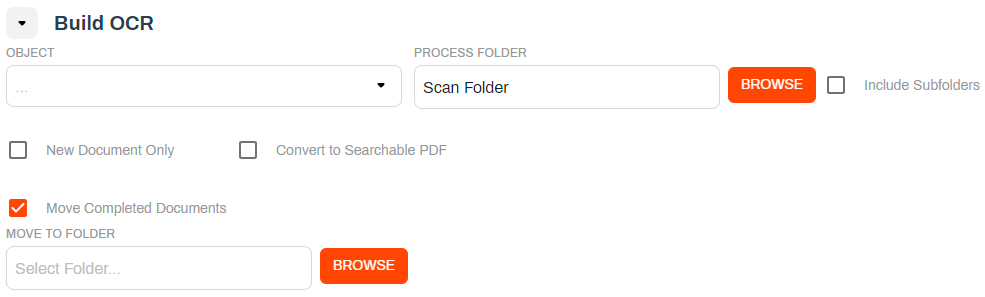
- Click on the Browse button to select the folder where you want to run OCR. The folder you select displays in the Process Folder field.
- Check the Include Subfolders box If you would like Vasion to also run OCR on any subfolders within the selected folder.
- Check the New Document Only box if you want Vasion to check the folder for new documents and run OCR on the new documents, only.
- Check the Convert to Searchable PDF option if you want the document to be converted so that when it is downloaded / exported, the text can be searched using the "Find" functionality when using a PDF reader.
- Check the Move Completed Documents box to move documents to a new folder location once the OCR is finished.
- Click on the Browse button to select the folder where you want to run OCR. The folder you select displays in the Move to Folder field.
Permissions
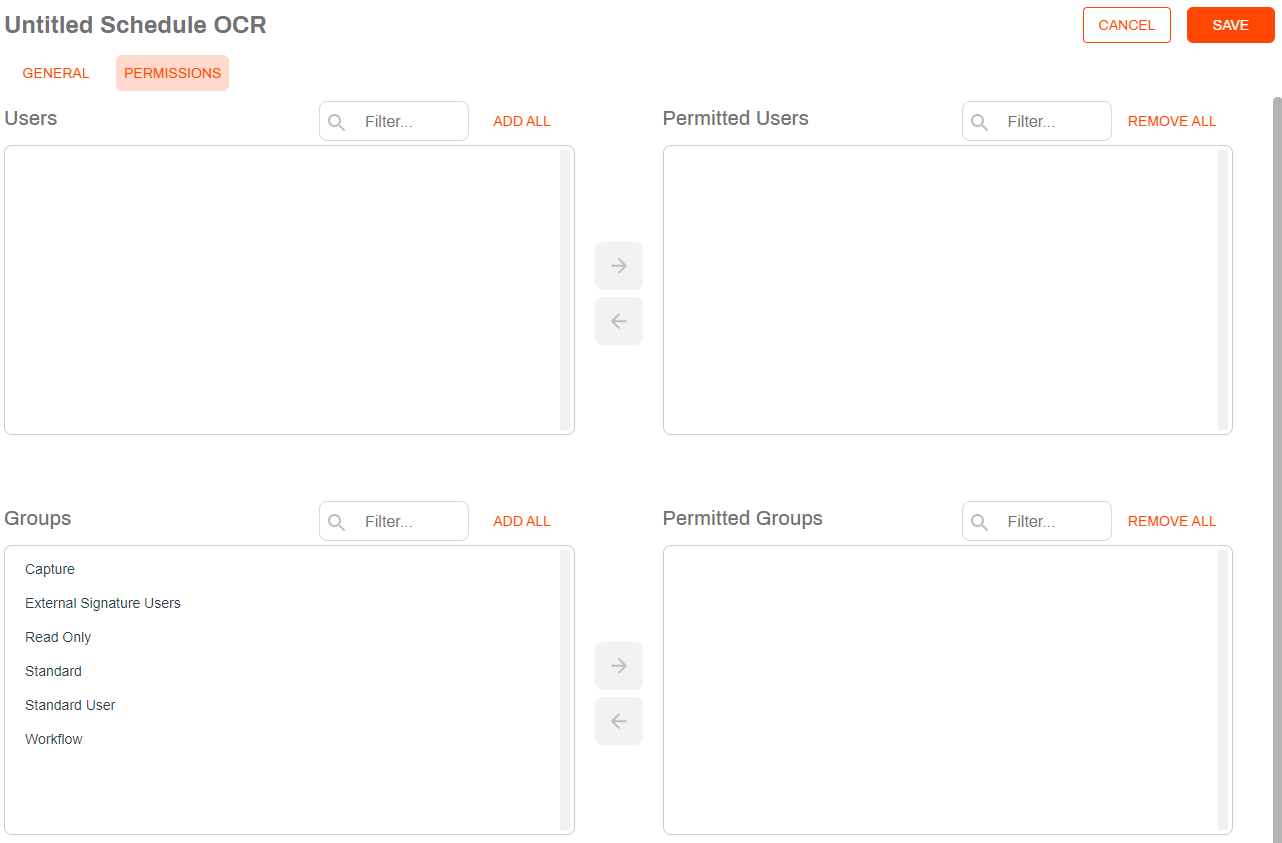
You can change who can see or edit the automation by assigning user or group permissions. If you leave all users and groups in the left column, then the automations can be seen by all users and groups by default.
- Click on the Permissions tab at the top of the screen.
- Select the users and / or groups you would like to have permission to access the folder and click the right arrow button
 .
. - You can also add or remove all users or groups by clicking on the Add All or Remove All buttons above each column.
The roles that a user has can also limit which users can see and run this job. See Roles for more information on what roles do and how they may affect what you are trying to do.
When the configuration is complete, click Save at the top of the page to save your automation and run automatically based on the specified settings.