Last Updated: August 13, 2024
Scheduled AIP
Set up a Scheduled AIP Advanced Image Processing (AIP) is a feature that allows Administrators to set up image processing based on Zonal OCR, Barcode, and Zonal OMR. automation to process a specified configured AIP on all the documents in a Vasion storage location. You can also configure the automation to move the documents into a folder or workflow once they are successfully processed.
Requirements
Before you create the Scheduled AIP automation, you must already have:
- A Parent Folder created in the storage location. For details, see Parent Folders.
- An AIP process set up. For details, see Advanced Image Processing (AIP).
To create a new Advanced Image Processing automation you must configure:
- General Settings
- Build AIP
1. General Settings
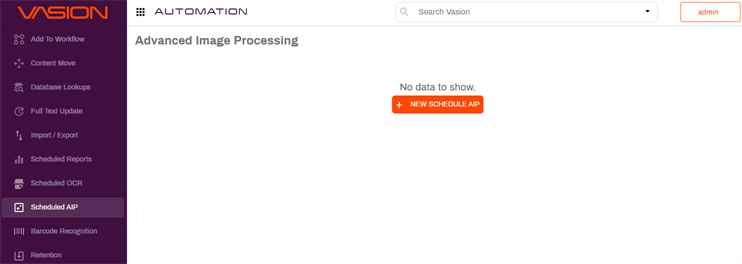
- In the Automation app, click on Scheduled AIP in the side navigation.
-
Click on the + New Scheduled AIP button.
- In the General tab, enter the name for the new Scheduled AIP automation in the Scheduled AIP Name field.
-
If you have an on-premises instance of Vasion, you may enter a value on the Run On Machine field otherwise, leave blank.
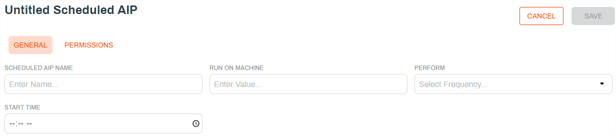
The value in this field determines the server used to run the automation and is only required where there are multiple Vasion clients and / or client services running for the environment.
- Use the Perform drop-down to select the frequency you want the automation to run. The next fields that display depend on what you select here.
- Once — use this option to only run the automation once. The next field display updates to Start Date, and you can type the date in the format shown or click on the Calendar icon
 to pick the date.
 - Daily — use this option to run the automation every day. The only remaining option is the Start Time.
- Weekly — use this option to run the automation once a week. The next field updates to Weekdays and you can use the drop-down to select one or more days of the week by checking the appropriate box.
- Monthly — use this option to run the automation once a month. The next field updates to Months and you can use the drop-down to select one or more months by checking the appropriate box.
- Frequency — use this option to run the automation at a specified time interval in minutes. In the next field, type in the number of minutes for the time interval.
- Once — use this option to only run the automation once. The next field display updates to Start Date, and you can type the date in the format shown or click on the Calendar icon
- In the Start Time, enter the time of day to run the automation in the format shown or click on the Clock icon
 to pick the time.
 - If the Monthly option is selected, a Day of Month field is shown. Type in the day of the selected month(s) when you would like to run the automation.
2. Build Scheduled AIP
- Click on the arrow next to Build Scheduled AIP to expand the section.
- Click on Browse to select the folder where the documents are stored. Once selected, the folder name displays in the Process Folder field.
-
Check the Include Subfolders box if you want to process documents stored in any subfolders within the selected folder.
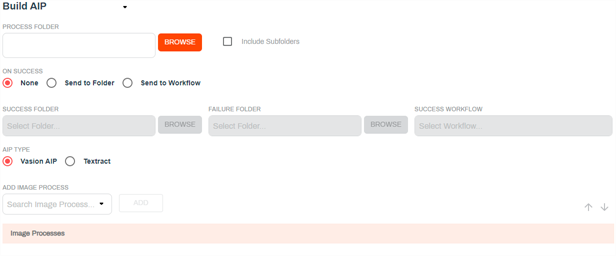
- Select from one of the On Success options:
- None — this is the default option. Select this to only run the AIP process selected below.
- Send to Folder — select this option if you would like to move the documents within the folder to another storage location after the AIP process is completed. When this option is selected, complete the following:
- Click on the Browse button and select the new location where you would like to store the documents that are successfully processed. Once the folder is selected, it displays in the Success Folder field.
Click on the Browse button and select the new location where you would like to store the documents if the AIP process fails. Once the folder is selected, it displays in the Failure Folder field.

Send to Workflow — select this option if you would like to send the document to a workflow once the AIP process completes successfully.
- In the AIP Type section, select:
- Vasion AIP — use this option to select one or more existing Vasion AIP processes.
- Textract AIP — use this option to select a Textract process configuration if you have Textract enabled.
- Use the Add Image Processes drop-down to select the process you want to use to scan the document.
- Click Add.
- If you would like to remove a process, select the remove icon
 .
. -
When running multiple processes in a document, you can rearrange the order in which the processes run by selecting a process and using the up / down arrows to move the selected process up or down.

Permissions
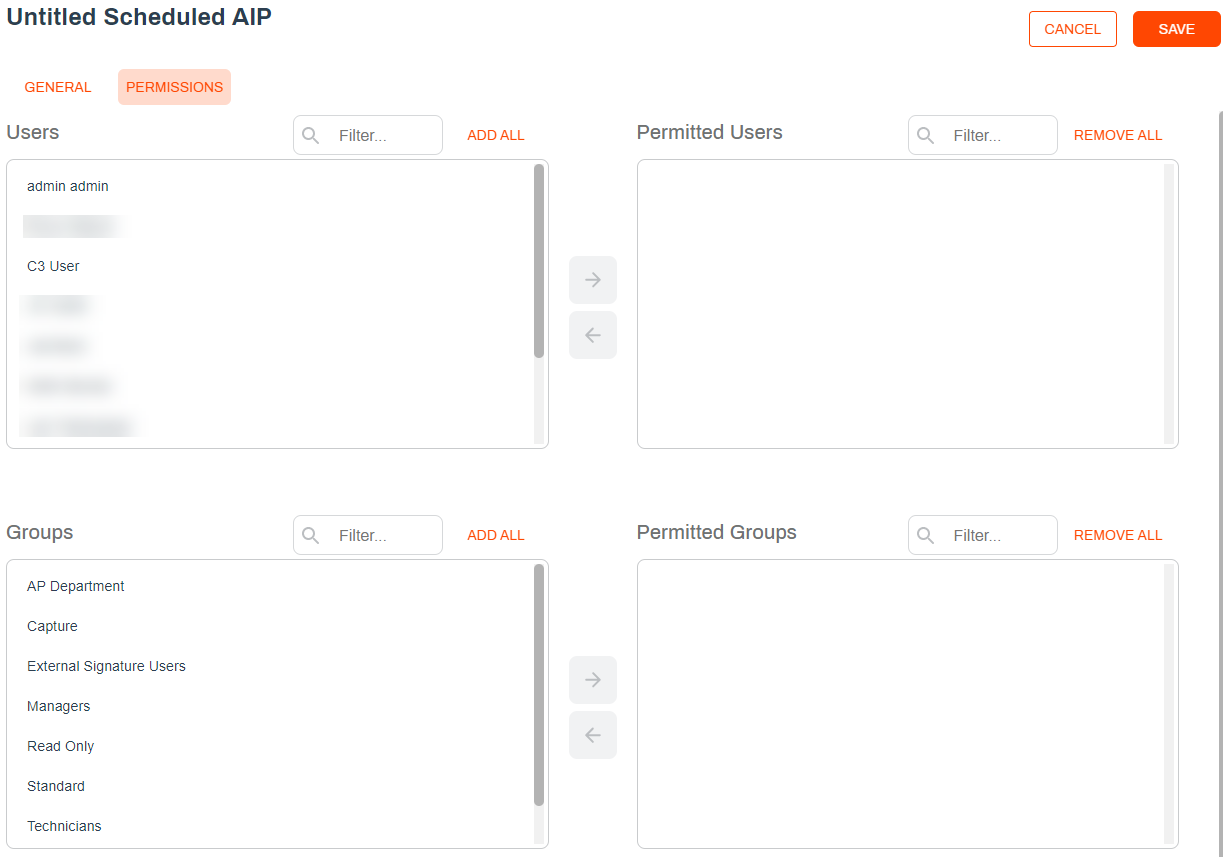
You can change who can see or edit the automation by assigning user or group permissions. If you leave all users and groups in the left column, then the automations can be seen by all users and groups by default.
- Click on the Permissions tab at the top of the screen.
- Select the users and / or groups you would like to have permission to access the folder and click the right arrow button
 .
. - You can also add or remove all users or groups by clicking on the Add All or Remove All buttons above each column.
The roles that a user has can also limit which users can see and run this job. See Roles for more information on what roles do and how they may affect what you are trying to do.
When the configuration is complete, click Save at the top of the page to save your automation and run automatically based on the specified settings.
The most common use cases for Amazon Textract within Vasion include:
- Mapping Amazon Textract data to Vasion fields
- Routing documents to Vasion workflows from captured data by Amazon Textract
- Storing documents with Vasion's native third-party storage integrations like AWS Workdocs or AWS S3
Amazon Textract accurately extracts printed text, handwriting, tables, and other data from uploaded documents using machine learning.
Amazon Textract supports PNG, JPEG, TIFF, and PDF file formats.
Vasion supports four Amazon Textract endpoints: expense, lending, identity, and analyzing documents. Using these endpoints, users can initiate document processing for invoices, POs, contracts, driver's licenses, and more.