Configure ServiceNow Integration
Last Updated: October 08, 2026
Use this procedure to connect PrinterLogic to your ServiceNow instance. After you configure the integration, printer asset data syncs automatically from PrinterLogic to your ServiceNow Configuration Management Database (CMDB).
Requirements
Before you begin, review the Requirements.
Configure ServiceNow
Before PrinterLogic can connect to ServiceNow, you must configure your ServiceNow instance to accept the integration.
Step 1: Turn On the Client Credentials Grant System Property
-
Select All in the upper-left to open the ServiceNow search navigator.
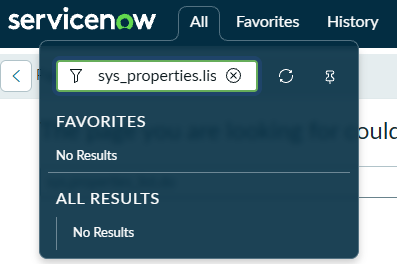
- Enter sys_properties.list in the search bar, then press Enter.
-
Search for the following property:
Copy Codeglide.oauth.inbound.client.credential.grant_type.enabled - If the property exists, confirm the Value is set to true, and Type is set to true | false.
- If the property does not exist:
- Select New and enter the following values:
- Name: glide.oauth.inbound.client.credential.grant_type.enabled.
- Type: true | false.
- Value: true.
- Select Save.
- If the property does not exist:
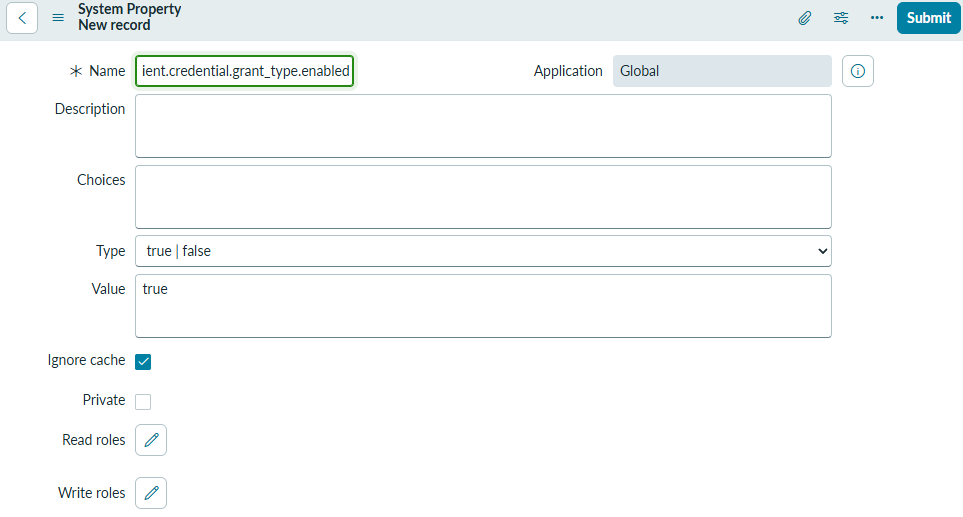
A missing or false value causes a 400 error when PrinterLogic attempts to connect.
2. Create Integration User
-
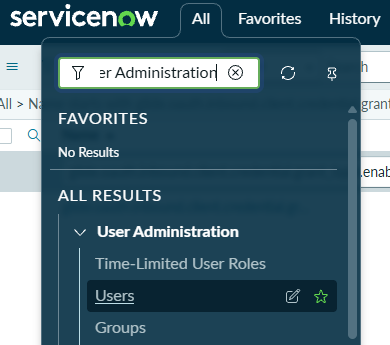
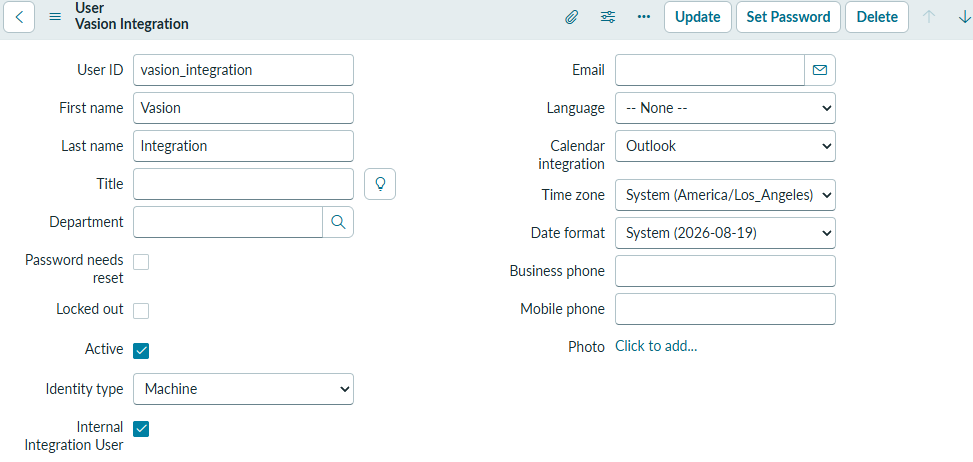
In the ServiceNow navigator, go to User Administration > Users.
- Select New and enter the following values:
- UserID: Vasion Integration, or unique name.
- First Name: Vasion.
- Last Name: Integration.
- Identity Type: Machine.
- Active: Selected.
- Internal Integration User: Selected.
- Select Submit.
- Scroll to the Roles related list at the bottom of the user record and select Edit.
-
Search for and add the following roles:
- asset: CMDB read and write access.
- itil: Required for the Identification & Reconciliation (I&R) API.
- oauth_user: Allows the user to authenticate using OAuth.
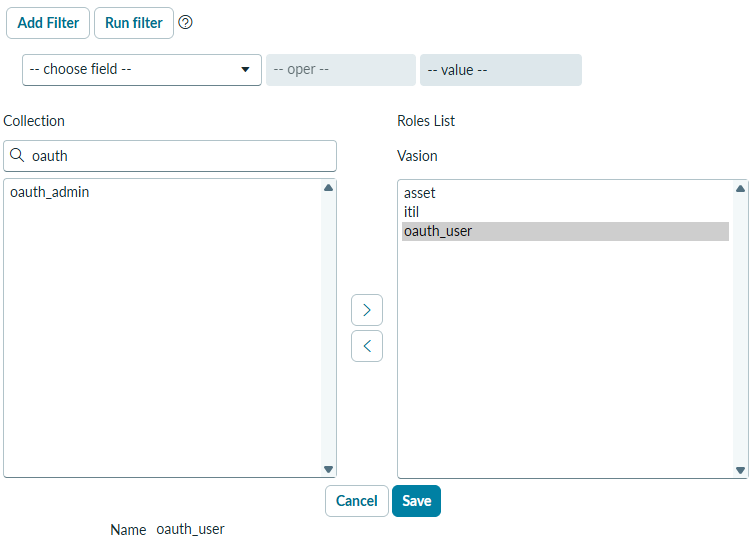
- Select Save.
3. Create the OAuth Application
-
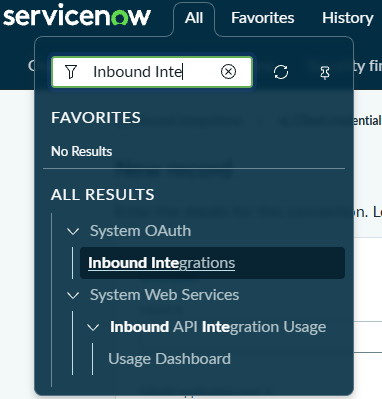
In the ServiceNow navigator, search for and select Inbound Integrations.
- Select New Integration.
- In the Select your application connection type modal, select OAuth - Client credentials grant.
- Enter the following values:
- Name: Vasion Integration, or unique name.
- Provider Name: Vasion.
- OAuth Application User: UserID from the integration user created in step 2.
- Active: Selected.
- Scroll to the Auth scope section and confirm Allow access only to APIs in selected scope is selected.
- Select Create auth scope and name it vasion_print_integration, then select Save.
-
In the Configure auth scopes section, select the Limit authorization to the following APIs field and:
- Type and select Table API. This API queries manufacturers and models.
- Type and select Identification and Reconciliation API. This API pushes printer data into the CMDB.
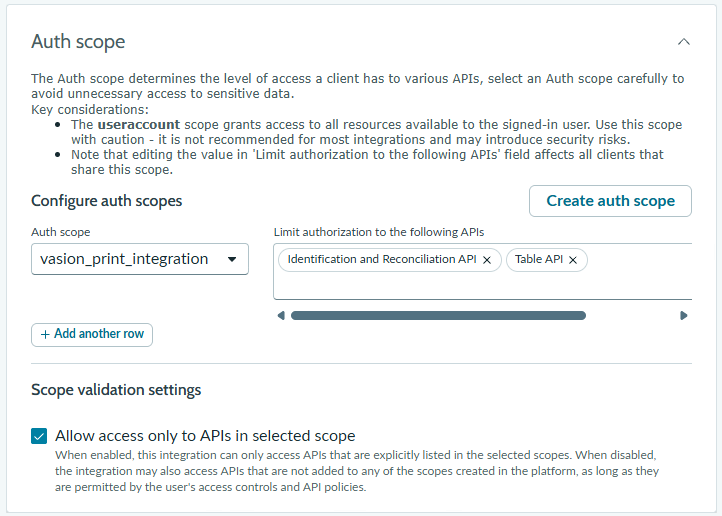
If Allow access only to APIs in selected scope is selected with no scopes configured, all API calls are blocked.
-
(Optional) In Advanced Options, confirm or adjust the following:
- Access Token Lifespan: 1800 (30 minutes, the default)
- Token Format: Opaque
PrinterLogic automatically requests a new token when the current one expires, so any lifespan value works.
- Select Save.
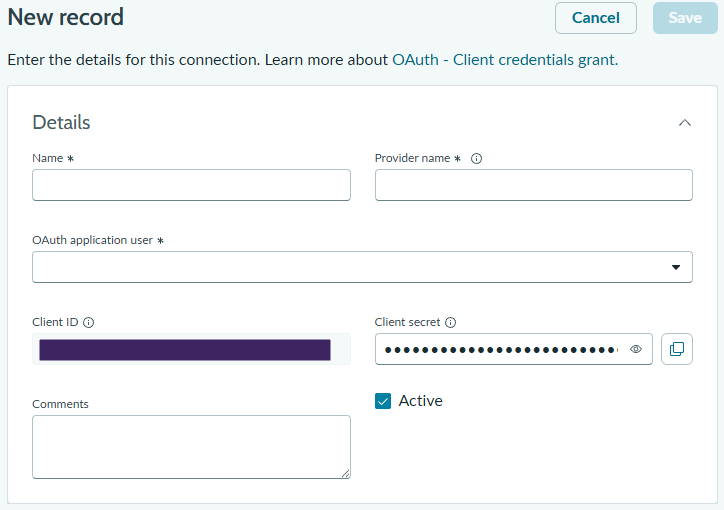
Note the Client ID and Client Secret displayed on the saved record. You need these values in step 6.
4. Register Discovery Source
Every sync request PrinterLogic sends includes the parameter sysparm_data_source=Vasion_Print. You must register this value in ServiceNow before the first sync.
-
In the browser address bar, append the following path to your ServiceNow instance URL and press Enter:
Copy Code/sys_dictionary.do?sysparm_query=name=cmdb_ci%5Eelement=discovery_sourceExample: https://your-instance.service-now.com/sys_dictionary.do?sysparm_query=name=cmdb_ci%5Eelement=discovery_source
-
Select the Choices tab further down the page, then select New and enter the following values:
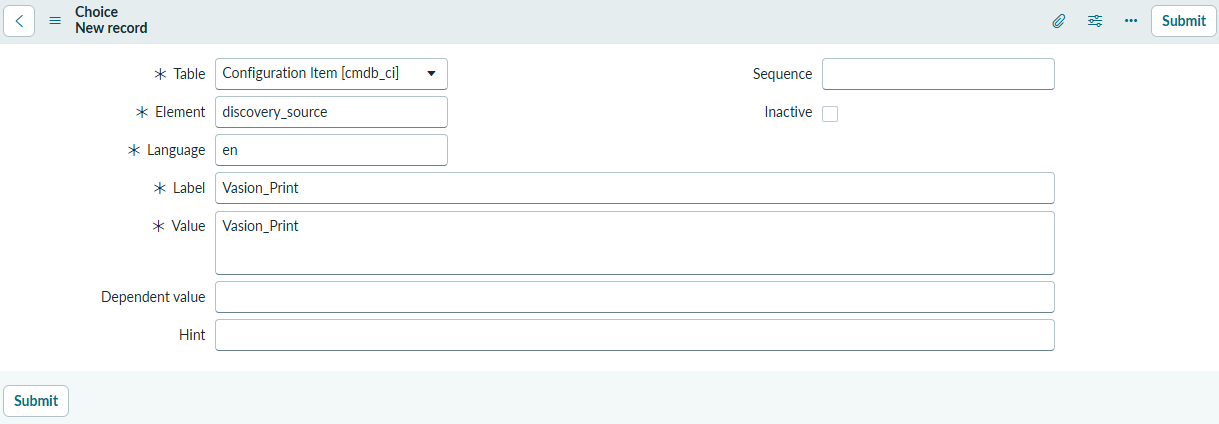
- Element: discovery_source (confirm auto-populated).
- Label: Vasion_Print.
- Value: Vasion_Print.
- Select Submit.
The Label and Value must exactly match the Data Source Name you enter in step 7, including capitalization. A mismatch causes the I&R API to reject all incoming payloads.
5. Verify CI Identification Rules and Add Related Attributes
-
In the ServiceNow navigator, search for and select CI Identifiers.
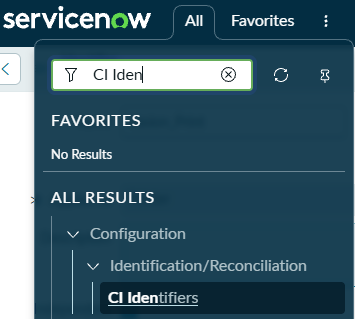
- Select New, and give the new record a name.
- Search for and select Printers in the Applies to dropdown.
- Confirm that the Active and Independent options are turned on, then select Submit.
- Search for and select your identifier app again.
-
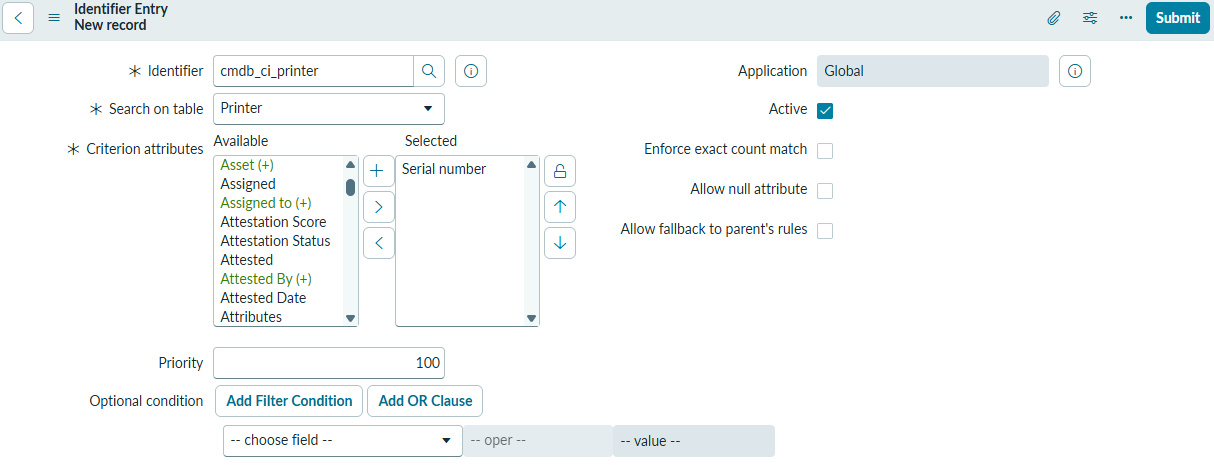
In the Identifier Entries tab, select New and:
- In the Search on table dropdown, search for and select Printer.
- Select Criterion attributes.
- Move Serial number to the Selected column.
- Set the priority to 100.
- Select Active.
- Select Submit.
-
Use the New button in the Identifier Entries tab to add any additional validation identifiers.
Vasion recommends adding at least Serial number and Asset Tag. If neither field matches an existing record, ServiceNow creates a new cmdb_ci_printer entry.
- After adding your Identifier Entries, select the Related Entries tab.
- Select New, then:
- Search for and select Key Value in the Related table dropdown.
- Select Configuration item in the Referenced Field dropdown.
- Adjust the priority as needed, then select Submit.
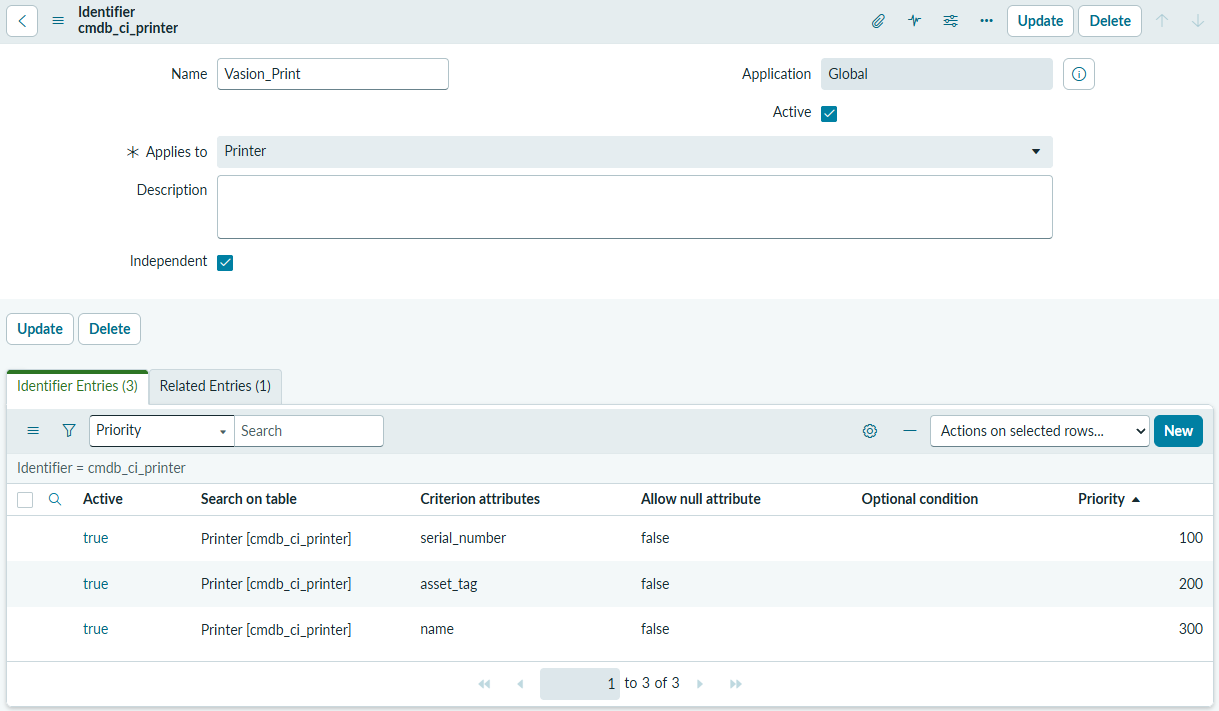
This related entry lets Vasion sync extended printer attributes, such as port, location, color support, and duplex support, as key-value tags on the printer record in the ServiceNow CMDB.
6. Add Printer Tags (Optional)
If you need to add additional printer tags to sync:
-
Search for and select Printers.
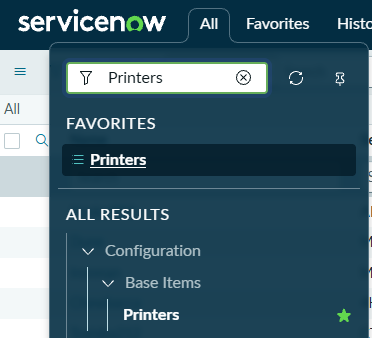
- Select the desired printer.
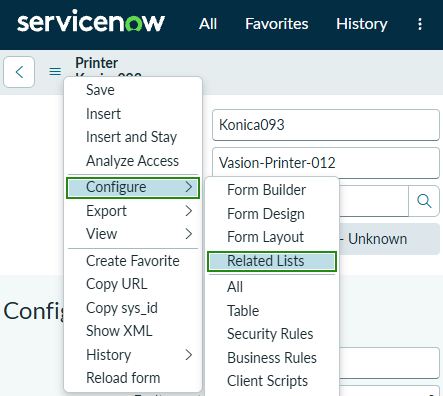
-
From the side menu, select Configure, then Related Lists.
- Locate the desired tags, select, and use the arrows to move them to the Selected column.
- Select Save when finished.
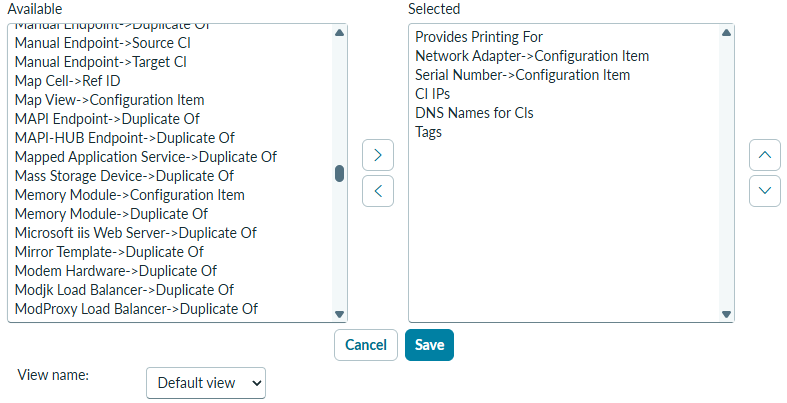
These printer tags now show as tabs under the printer information.
7. Connect Vasion to ServiceNow
- In the PrinterLogic Admin Console, go to Admin
 Integrations .
 - Select the ServiceNow integration.
-
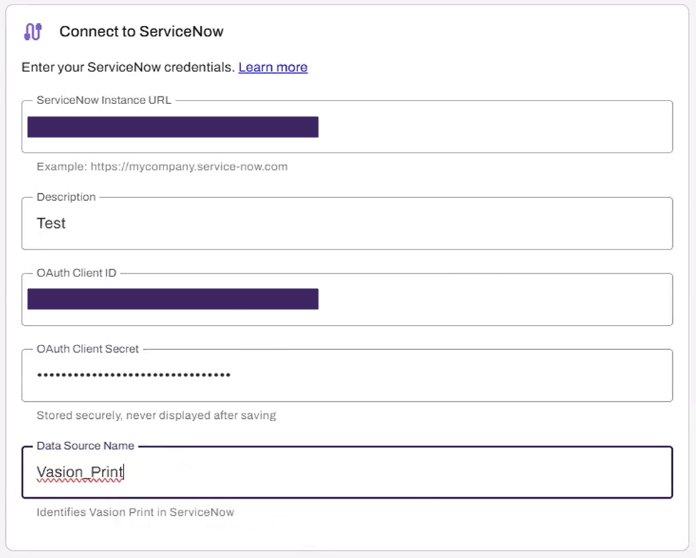
Enter the following values:
- ServiceNow Instance URL: e.g., https://your-instance.service-now.com.
- Description (Optional): A label for your reference.
- Client ID: The Client ID from step 3.
- Client Secret: The Client Secret from step 3.
- Data Source Name: Vasion_Print (recommended)
The Data Source Name must exactly match the value you registered in step 4, including capitalization.
- Select Connect to connect and proceed.
-
In the Add Fields tab, select the Identifier Field(s). Serial Number or Custom field.
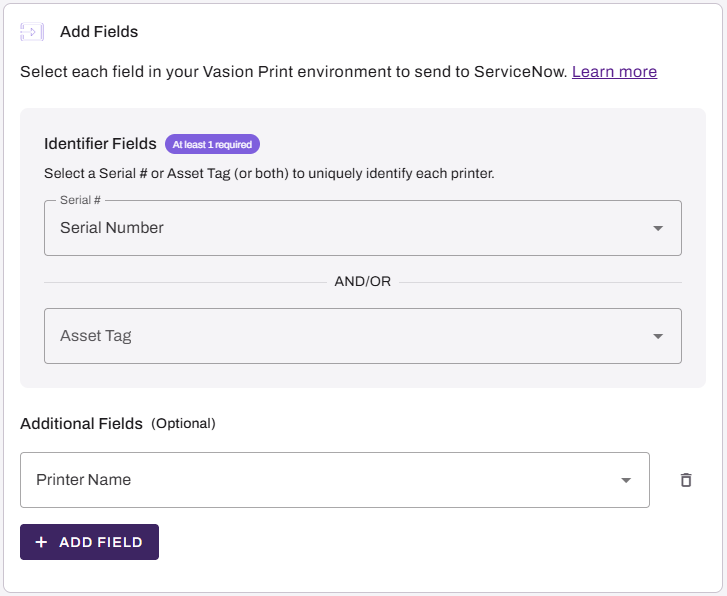
If you want to use a different field for the identifier, it must be a custom printer field with a value for each printer object.
- Use the Additional Fields (Optional) to add more fields to sync.
- Select Next to proceed.
-
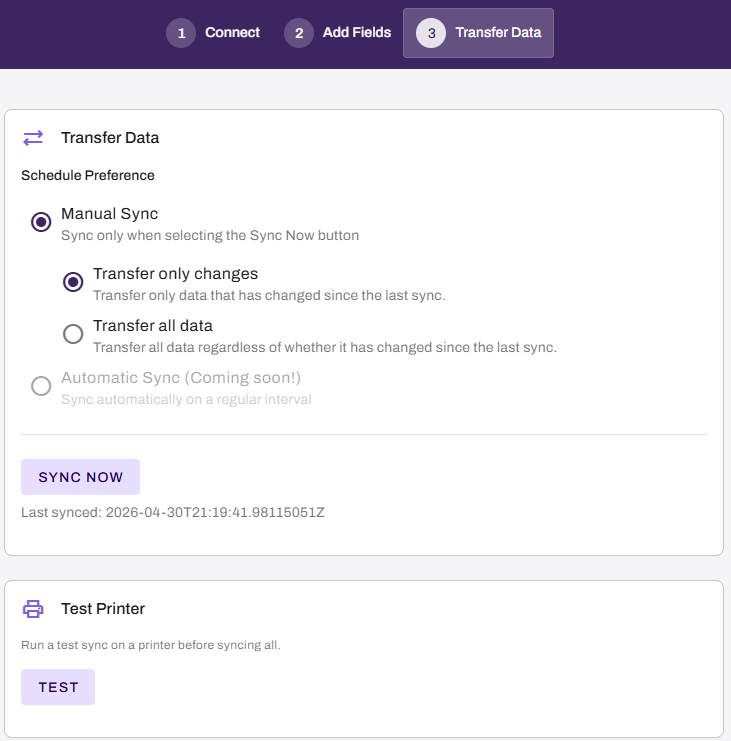
On the Transfer Data tab select from:
- Manual Sync:
- Transfer only changes: Transfer only data that has changed since the last sync.
- Transfer all data: Transfer all data regardless of whether it has changed since the last sync.
- Automatic Sync:
- Sync Frequency: In hours.
- Start Time: Time for the sync to occur.
- Manual Sync:
- Select Sync Now, or Test, to test the sync first.
- Select Save.
After the connection is saved, the ServiceNow integration appears in the Added Integrations section of the Integrations page.
Sync Printers
The automatic sync occurs at the defined interval on the Transfer Data tab.
To manually sync printers:
- In the Vasion Admin Console, go to Admin Integrations.
- Select the more icon for the ServiceNow integration
 , then select Settings.
 - Select the Transfer Data tab.
- Select Sync Now.
Allow time for printers to sync. Beneath the Sync Now button, the sync history displays.
In this topic: