PingOne
Last Updated: October 08, 2026
An identity provider (IdP) uses an authentication token to vouch for a person's identity. Vasion Automate uses IdPs for several tasks, including logging in to the Admin Console and portals, deploying printers, releasing print jobs, and more.
The CPA supports only badge and PIN authentication for cloud IdPs.
Connection Requirements
- Access to PingOne admin portal
- Add a new application in PingIdentity
- Vasion Automate Admin rights
Configure Connection
To add and configure app properties for the Vasion Automate connection do the following:
- Set Authentication Type
- Create PingOne App
- Add the X-509 Certificate
- Configure Single Sign On
- Configure Provisioning
- Turn on the IdP
- JIT Provisioning
- Add PrinterLogic Admins
1. Set Authentication Type
In a separate browser window, log in to Vasion Automate, and do the following:
- Select Admin from the left-side navigation.
- Select the Authentication option.
-
Select the + New Authentication button.

- Select the IdP that you want to configure.
- Select Next.
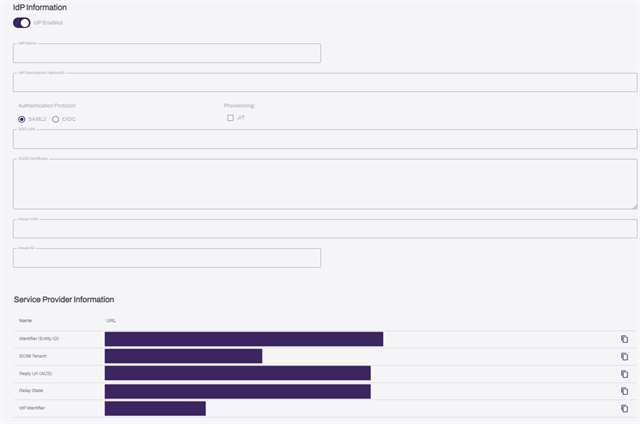
- Give your IdP a unique name.
- (Optional) Add a description.
- Select SAML2 in the Authentication Protocol section.
-
In the Provisioning section, if you are using Systems for Cross-domain Identity Management (SCIM), leave the Just-in-Time (JIT) option deselected.
- Leave the IdP Information page open. You need this information for the next step.
2. Create the PingOne App
- Log in to your PingOne portal.
-
Go to Applications
 Applications.
-
Select the + (plus) button next to Applications.
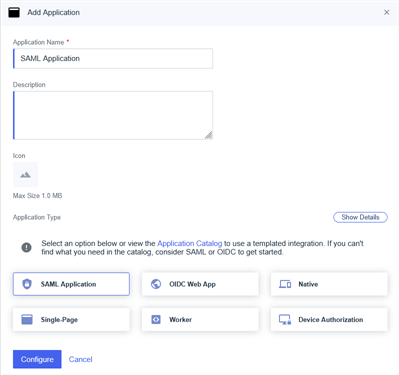
- Enter a name for your application in the Application Name field.
-
Select the SAML Application from the Application Type selections, then select the Configure button.
-
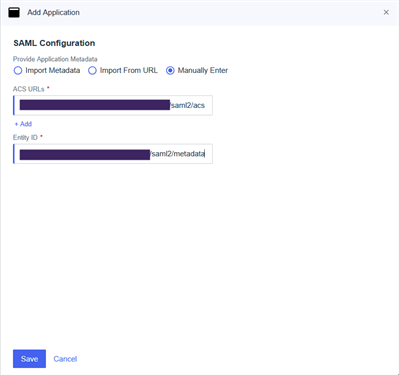
Select the Manually Enter option from the Provide Application Metadata options.
-
Enter the Reply Url (ACS) from Vasion Automate into the ACS URLs field in PingOne.
-
Enter the Identifier (Entity ID) from Vasion Automate into the Entity ID field in PingOne.
-
Select Save.
-
Leave the current browser open on the new app screen for the following steps.
3. Add the X-509 Certificate
- In the PingOne app, select the Configuration tab.
-
Select the edit button.
- Select Download Signing Certificate.
- Select the X509 PEM (.crt) option.
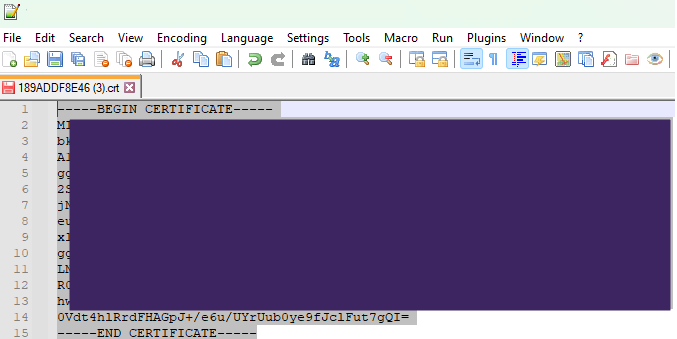
- Open the file in your preferred text editor.
-
Copy the certificate body, including the Begin / End headers, and paste it in the X-509 Certificate field in Vasion Automate.
4. Configure Single Sign On
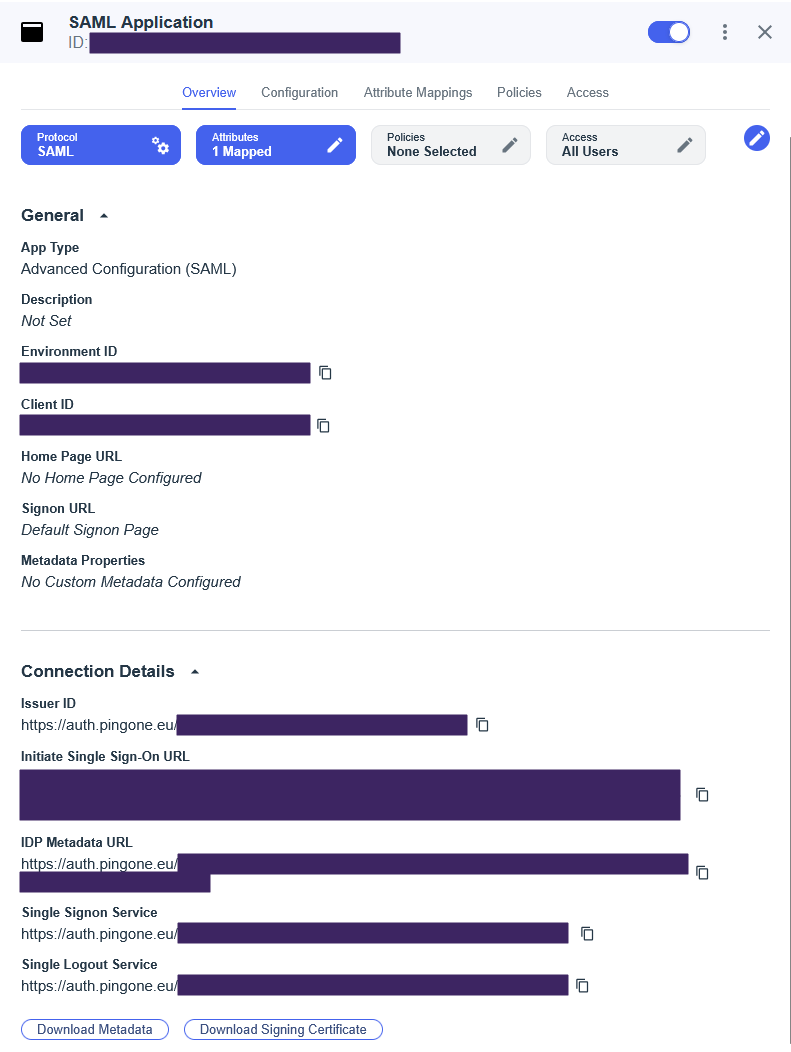
- Select the Overview tab in PingOne.
- Copy the PingOne Issuer ID and:
- Paste it into the Vasion Issuer URL field.
- Cut the alphanumeric portion after the / and paste it into the Issuer ID field.
- Example: Issuer URL: https://auth.pingone.eu/, Issuer ID: 1e877fb7-550g56-4aa8-9b18-06d93d9fa65f
- Copy the PingOne Single Signon Service URL, and paste it in the Vasion Automate SSO URL field.
-
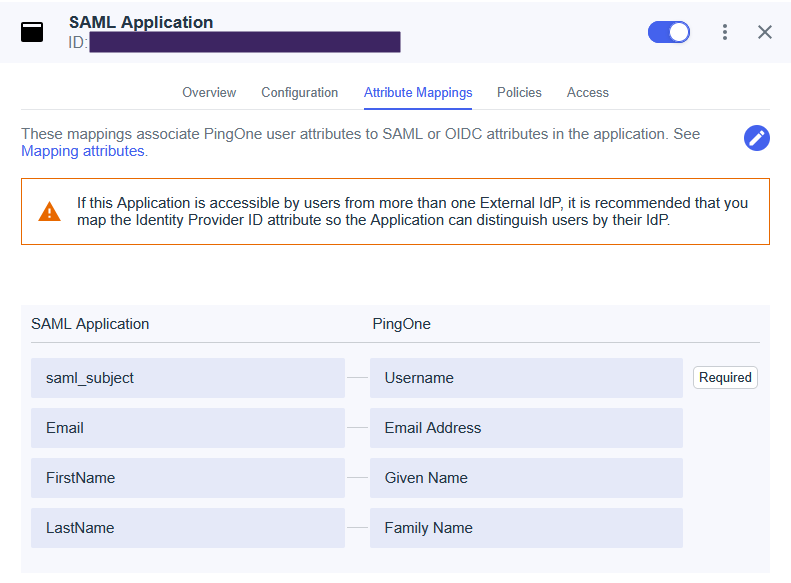
Select the Attribute Mappings page in PingOne, then select the Edit button
 in the top right.
 - Add the following attributes on the Map Attributes tab:
- saml_subject / Username
- FirstName / Given Name
- LastName / Family Name
- Email / Email Address
- Select Save.
- Select the toggle on the PingOne SAML Application to turn on the application.
- Select Save in Vasion Automate.
5. Configure Provisioning
If you are configuring PingOne using JIT provisioning, skip to 6. Turn On the IdP below.
SCIM Provisioning
Create the SCIM Application
- Log in to your PingOne portal.
-
Go to Applications
Application Catalog.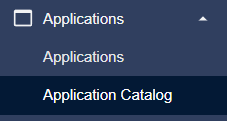
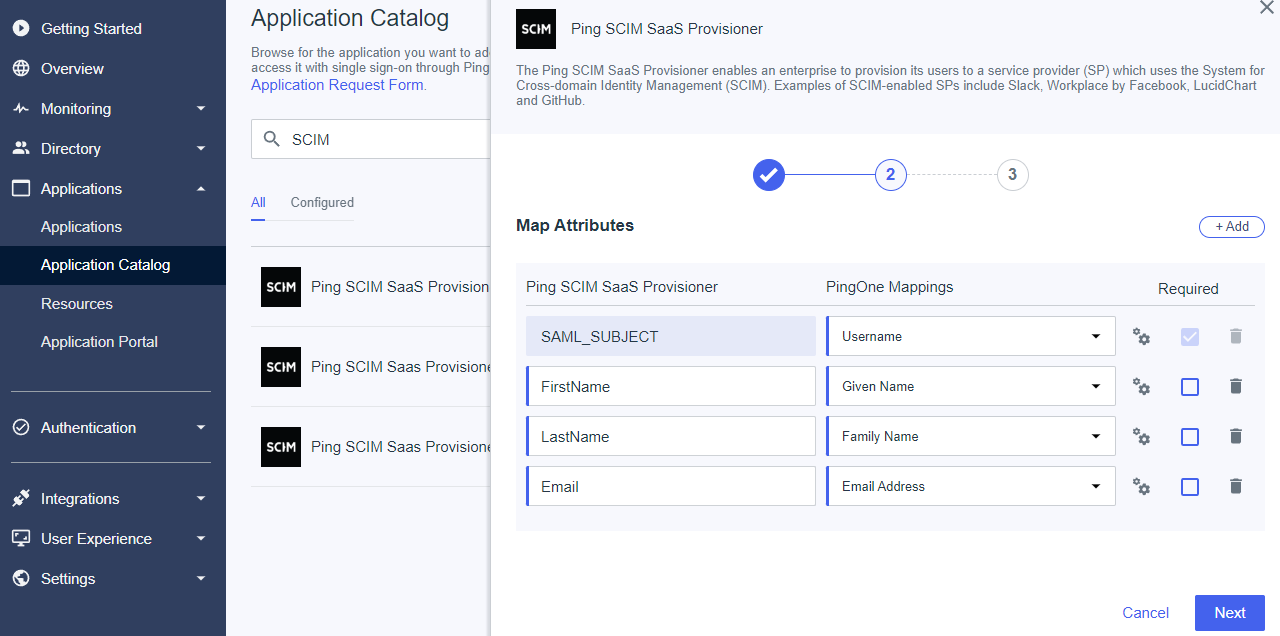
- Search for SCIM, and select an unused Ping SCIM SaaS Provisioner option.
- Enter a name for your app, and then select Next.
- Add the following attributes on the Map Attributes tab:
- SAML_Subject / Username
- FirstName / Given Name
- LastName / Family Name
- Email / Email Address
- Select Next.
- Add the desired Groups, and then select Save.
-
Select View in Applications list.

-
Select Enable Advanced Configuration, and then select Enable in the modal.

-
Leave the current browser open on the new app screen for the following steps.
Create Provisioning Connection
-
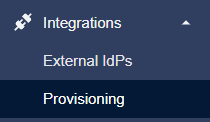
In the PingOne portal, select Integrations from the left-side menu and select Provisioning.
-
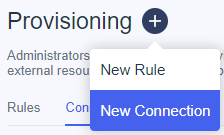
Select the + (plus) button next to Provisioning, and select New Connection.
- Select the Identity Store option.
- Select the SCIM Outbound option, and then select Next.
- Name the connection, and then select Next.
- In Vasion Automate, select the PingOne IdP in the Authentication section.
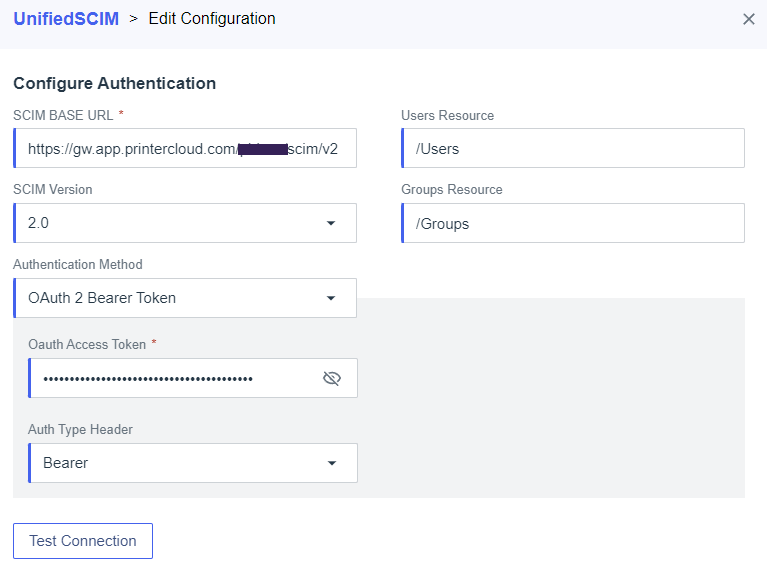
- Copy the Vasion Automate SCIM Tenant URL, and paste it in the PingOne SCIM Base URL field.
- Select OAuth 2 Bearer Token in the PingOne Authentication Method dropdown menu.
Apply a SCIM Token
- In the Vasion Automate Authentication section, select the PingOne IdP.
-
Select the Generate New Token button.
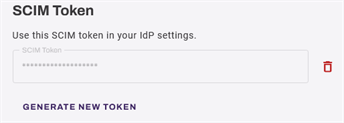
Generating a SCIM token invalidates any previous tokens for that IdP.
- Copy the token.
- Select the Vasion Automate Save button.
- Paste the token into the PingOne Oauth Access Token field.
- Select Test Connection to verify connectivity.
- Select Next, and adjust the preferences as needed.
- Select Save in PingOne.
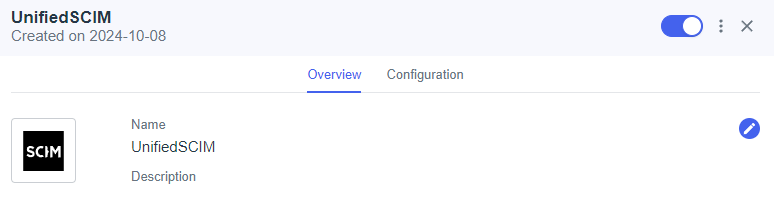
- Select the toggle switch in the upper-right corner of the Overview tab to turn on the connection.
Create a Rule
-
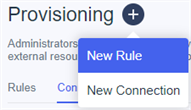
On the Provisioning tab in the PingOne portal, select the + (plus) button next to Provisioning and select New Rule.
- Select the + (plus) button to the right of the provisioning connection that you created.
- Select Continue.
- Name the rule.
- Select Next.
-
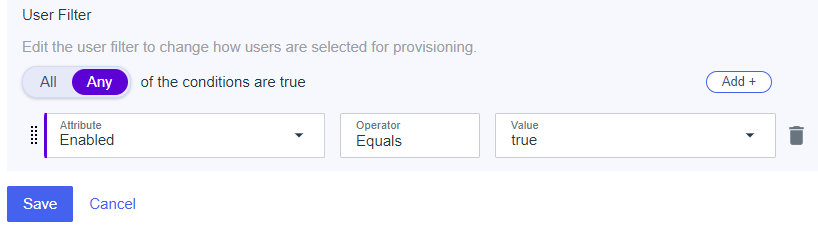
Do the following to provision a User Filter:
-
Select the Edit button next to User Filter.

- Select Any for of the conditions are true.
- From the Attribute dropdown menu, select Enabled.
- Enter "Equals" in the Operator field.
- In the Value dropdown menu, select true.
-
- Select Save.
- Do the following to provision groups:
Select the Edit button next to Groups.

- Search for and select the groups that you want to provision.
- Select Save.
- In the Overwrite Group Memberships modal, select I understand and want to continue.
- Select Save.
- Select Next.
- Verify the Attribute Mapping has been maintained, then select Save.
- In the Rule panel, select the toggle switch in the upper-right corner to turn on the rule.
This action starts provisioning and displays the results in the Sync Status section.
6. Turn On the IdP
- In Vasion Automate, close the IdP Information page.
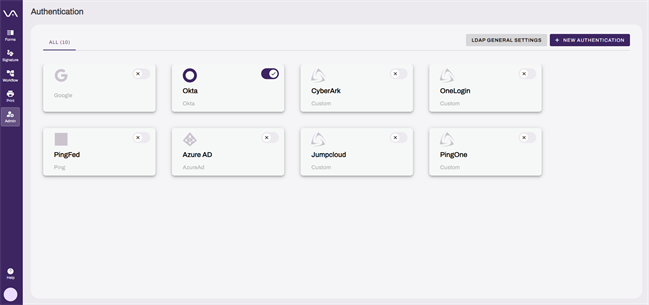
- In the Authentication page, select the button next to the configured IdP to turn it on.
7. JIT Provisioning
This section applies only to JIT configurations. If you have configured this app to use SCIM, skip to the next section.
When using JIT provisioning, the app creates users during the first sign-in attempt:
- Access your Vasion instance, and select Sign In With <IdP Name>.
- Attempt to sign in with your IdP credentials.
-
This sign-in attempt fails and returns you to the sign-in screen.
This behavior is expected. With JIT, this action triggers user creation in the Vasion instance.
- The second sign-in attempt with valid credentials initiates a typical sign-in sequence.
For admins who need access to the Admin Console, you still need to add them to the Users page located in Tools Users.
8. Assign Vasion Automate Roles
For steps on assigning users and roles to the PrinterLogic and Vasion Automate Admin Console, refer to Admin Console Users.
In this topic: