Manage Rules
Last Updated: October 08, 2026
Use this topic to manage existing rules in Output Rules, including making changes, reordering rules, activating, deactivating, or deleting rules.
Requirements
Access to rules requires the following:
- The Rules Admin role assigned to your user to create and manage workflows.
View Rules
To view any existing rules do the following:
- In the side navigation select Workflows
 Output Rules.
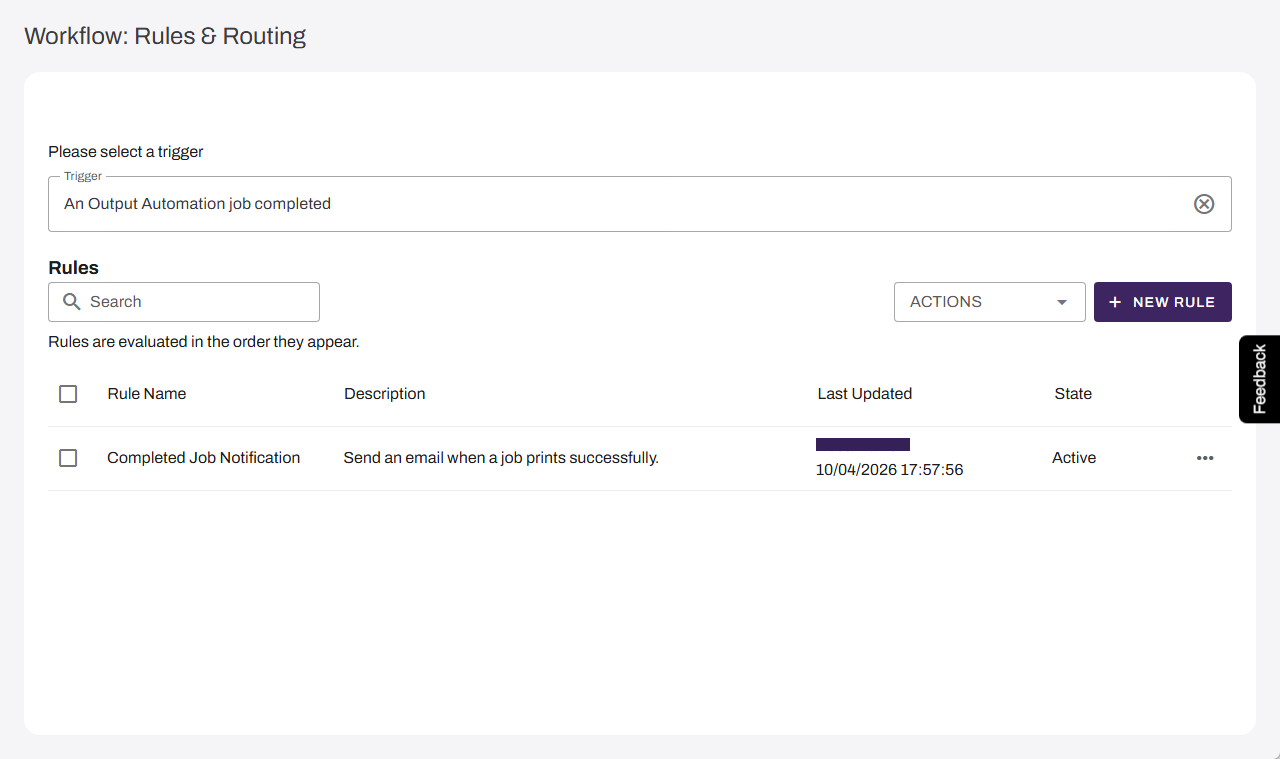
 - Select a trigger from the Trigger dropdown. Rules configured for the selected trigger appear in the Rules table.
Deactivate a Rule
To deactivate a rule, do the following:
- In the side navigation, select Workflows Output Rules.
- Select a trigger from the Trigger dropdown to display the rules for that trigger.
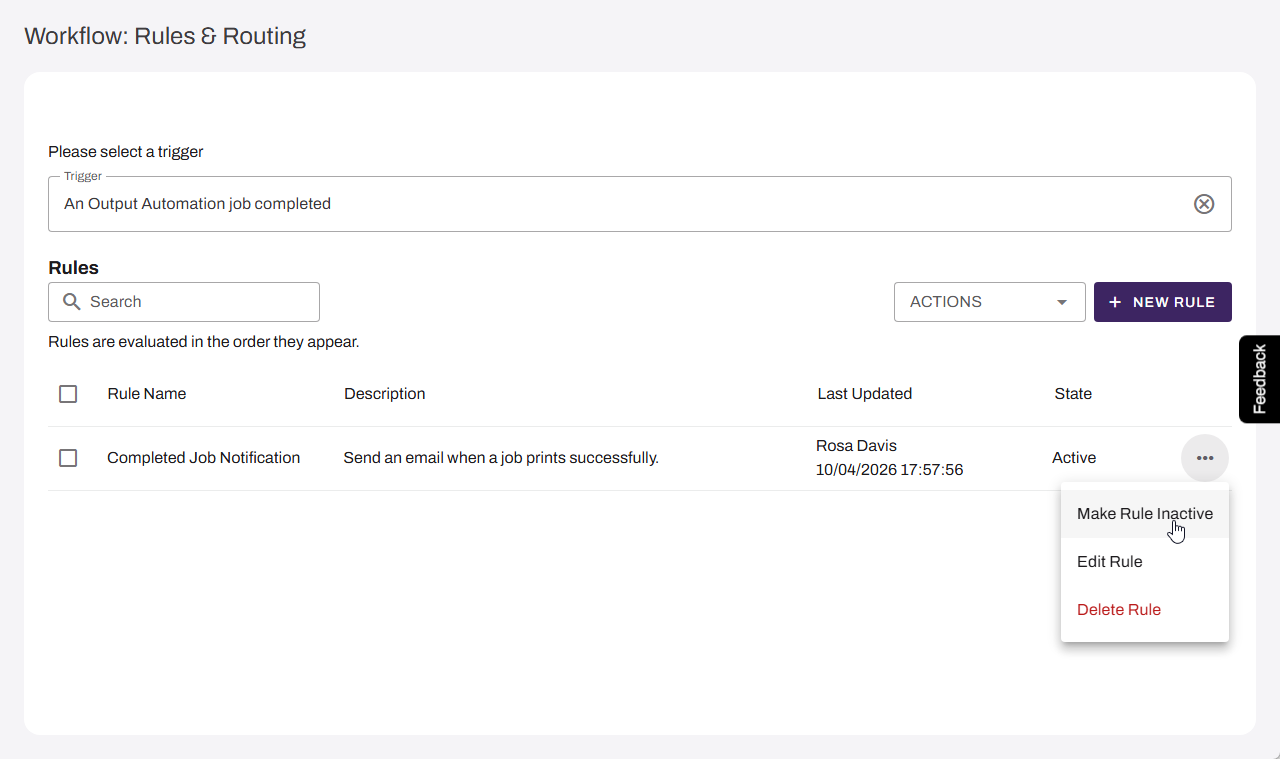
- Select the More menu next to the rule you want to deactivate.
- Select Make Rule Inactive.
The rule remains in the table but PrinterLogic Output stops applying it to incoming print jobs.
The More button shows Make Rule Inactive only when the selected rule is active.
Edit a Rule
To edit a rule, do the following:
- In the side navigation, select Workflows Output Rules.
- Select a trigger from the Trigger dropdown to display the rules for that trigger.
- Select the More menu next to the rule you want to edit.
- Select Edit Rule.
- Update the rule components as needed.
- Select Save.
The updated rule activates immediately. PrinterLogic Output starts applying the updated rule to incoming print jobs.
Reorder Rules
To reorder rules, do the following:
- In the side navigation, select Workflows Output Rules.
- Select a trigger from the Trigger dropdown to display the rules for that trigger.
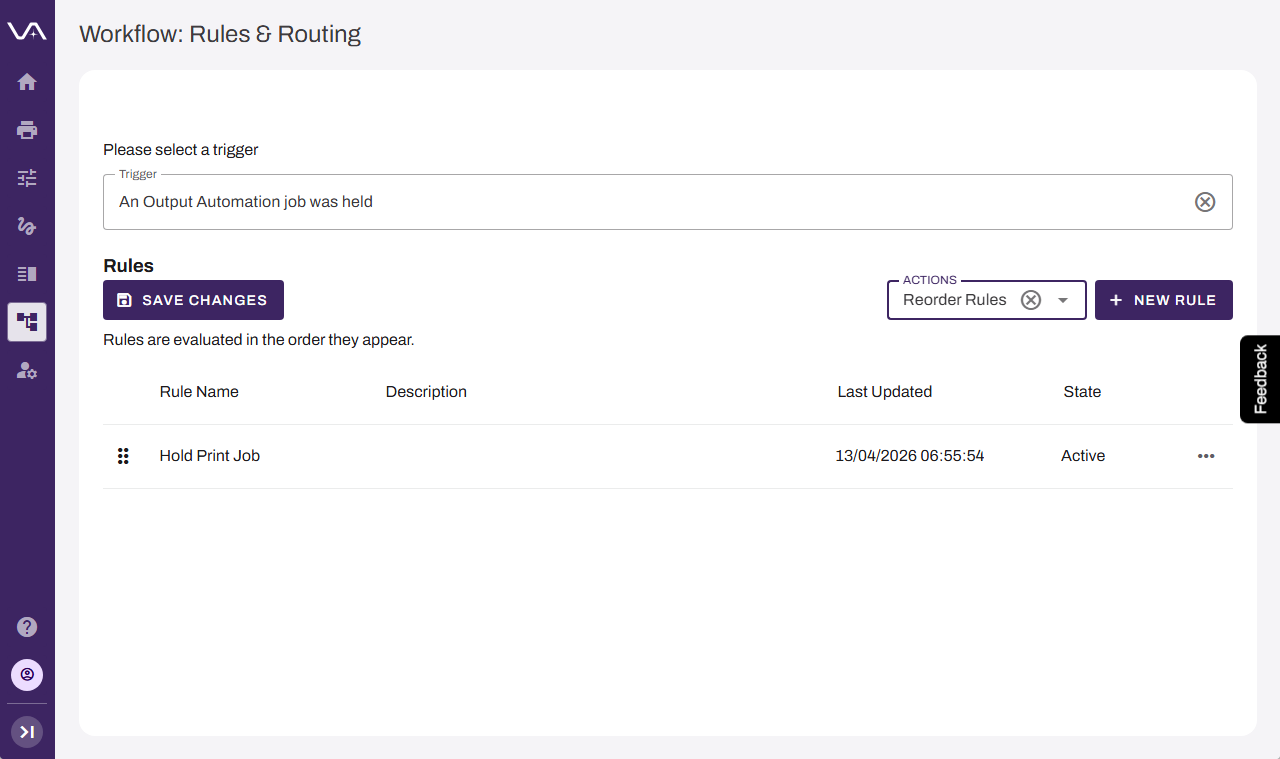
- Select the Actions dropdown and select Reorder Rules.
- Select and hold the Drag indicator
 next to the rule you want to move.
 - Drag the rule to the desired position and release.
- Select Save Changes.
PrinterLogic Output evaluates rules in the updated order for incoming print jobs.
Set Trigger Fallback
To set the trigger fallback, do the following:
- In the side navigation, select Workflows Output Rules.
- Select a trigger from the Trigger dropdown to display the rules for that trigger.
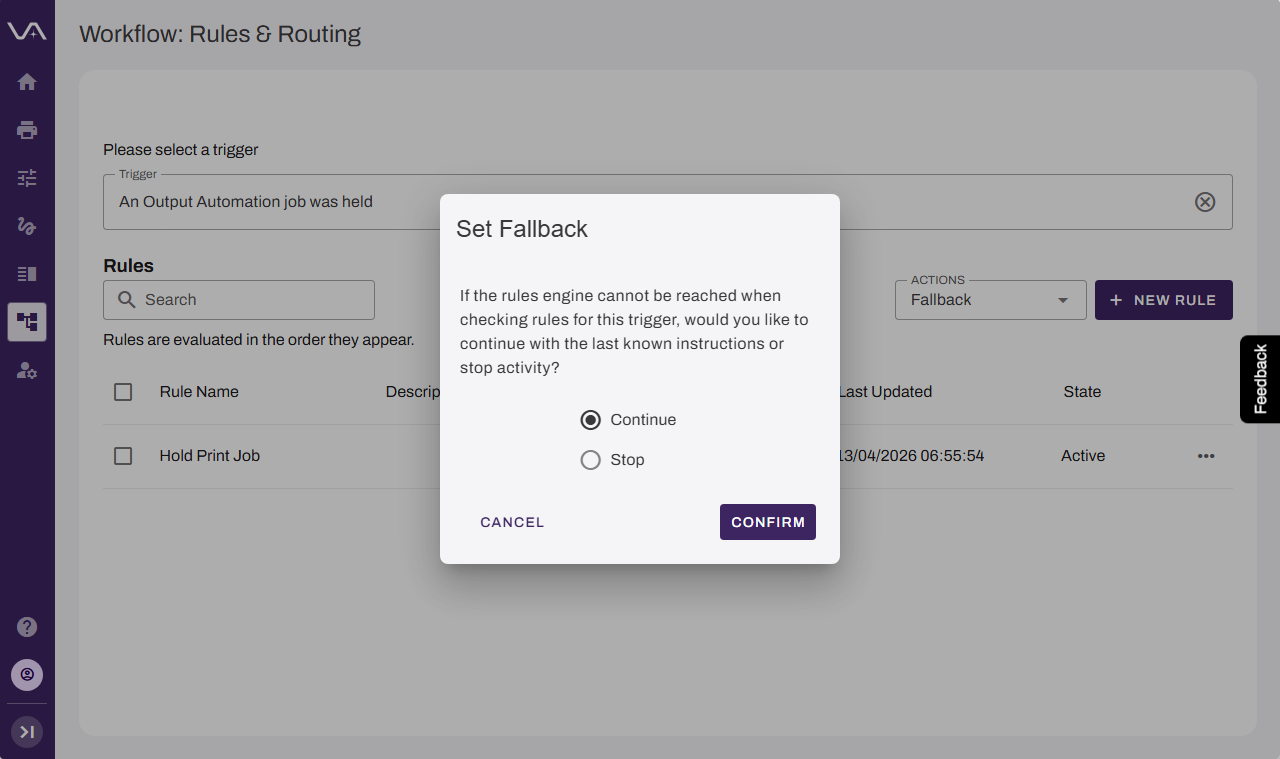
- Select the Actions dropdown and select Fallback.
- In the Set Fallback modal, select one of the following options:
- Continue: PrinterLogic Output sends print jobs to the printer as requested. This option prioritizes productivity.
- Stop: PrinterLogic Output pauses print jobs until the connection is restored. This option prioritizes security.
- Select Confirm.
Delete A Rule
To delete a rule, do the following:
- In the side navigation, select Workflows Output Rules.
- Select a trigger from the Trigger dropdown to display the rules for that trigger.
- Select the More menu next to the rule you want to delete.
- Select Delete Rule.
- In the Delete this rule? modal, select Delete to confirm.
Deleted rules are permanently removed and cannot be recovered.
Next Steps
Refer to the following for more information:
- Refer to Output Rules Workflows for an overview of the feature and how rules work.
- Refer to Output Rules Components for details about available triggers, conditions, and actions.
- Refer to Create a New Rule to add a new rule to your environment.
In this topic: