Last Updated: June 26, 2024
Create a Document Package
The Document Packager option is available by selecting an object from Forms. For additional details about this feature, see Document Packager.
Requirements
To create a document package, the following is required:
- An Object to index The action of classifying and providing specific identification information for speedy document retrieval data from which you can select which fields contain the information used to link the documents. For more details, see Objects.
-
The Object must have a Document Type drop-down field. This field defines which documents are needed to complete the package.
The Packager feature does not support Allow Multiple Values for the Document Type drop-down.
You can also configure the following options:
- Rules — additional filters used to validate which documents are included in the package. This step is optional.
- Merge package documents — you can merge two or more documents to create one file by selecting which documents from the package to merge.
- Move original documents — when documents are merged, you can specify where to move the original documents.
Create a New Package
The process to create a package is as follows:
- Define the package.
- Add any rules. This step is optional.
- Configure the document and package options.
1 Define the Package
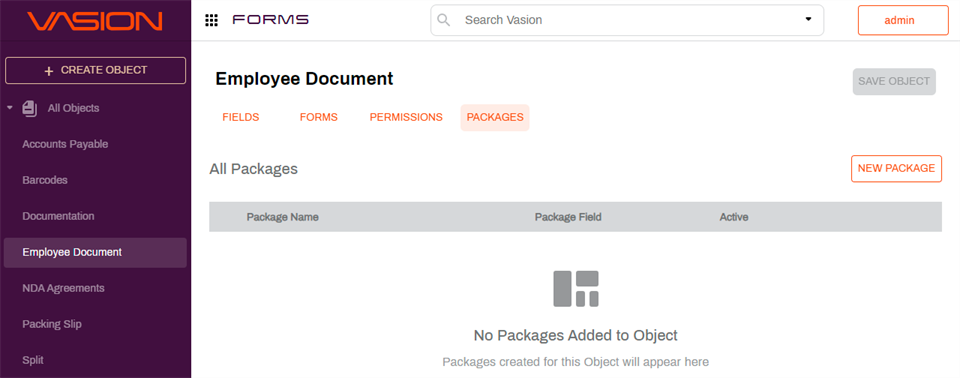
- With the desired object open, select the Packages tab.
- Select New Package.
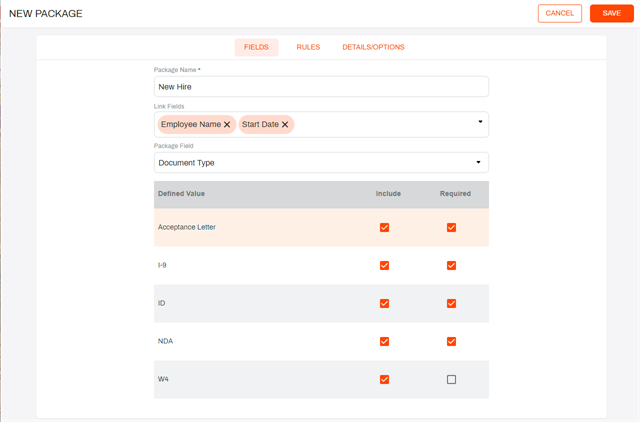
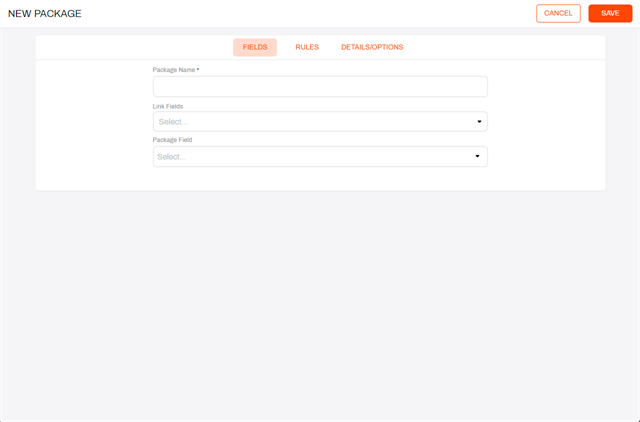
- In the Fields tab of the New Package page, complete the following:
- Package Name — enter the name for the package.
- Link Fields — Select the field(s) you want to use to link the documents to the package. You can select one or more fields. For example, select the employee name and start date fields if you want to use the package to start an onboarding workflow.
Document Type — use the drop-down to select which document types should be included in the package by selecting the Include check box. Select which of the items are required in order to complete a package.
2 Add Rules
This is an optional step if you want to match additional criteria for which documents should be included in the package. For example, 1n a multinational organization, you may only want to include documents from a specific country in the package.
- Field — use the drop-down to select which field contains the value you want to use for comparison.
-
Value — enter the exact value you want to compare.
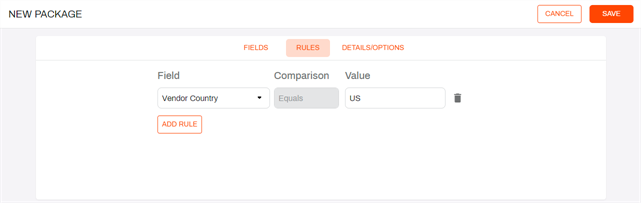
If the Rules tab is left blank, the system uses the Link Field and Document Type options across the entire object.
3. Document and Package Options
When a package is complete, you can decide what to do with the documents when the package is submitted.
-
Package Submission:
-
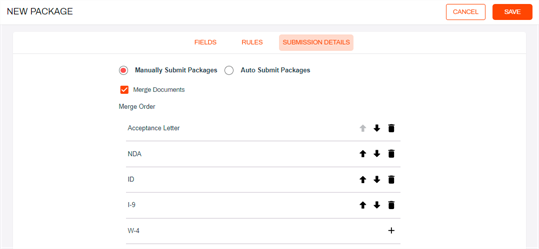
Manually Submit Packages — use this option to manually monitor the documents and packages. You choose when you submit the package after all the documents are completed.
-
Auto Submit Packages — use this option to automatically perform the actions configured in the Submission Details tab once all the documents for a package are complete.
-
- Merge Documents — use this option to merge one or more of the documents into a new document. When this option is selected, you can do the following:
- Set a merge order by using the arrows to move a document up or down.
Use the delete button to remove a document from the merge package. Any documents not selected for merge are linked as individual documents.
- Merged Package Destination — use the drop-down to select the package destination
Storage — use the Browse button to select the destination folder.

Workflow — use the drop-down to select the workflow.

- Move Original Documents — use this option to move the original documents from their current location.
If you decided to merge the documents, use this option to move the original documents to a different storage location.

If you decide not to merge the documents, use this option to move the original documents to a workflow.

Select Save at the top of the page to complete your document package.
Learn more about how to view and submit a document package.