Last Updated: June 18, 2024
Create New Objects
To create objects the following is required:
- Object name
- Create object fields
You can additionally configure the following options:
- Define a file name format
- Object permissions
Below is a basic overview of how to create a new object.
Object Name
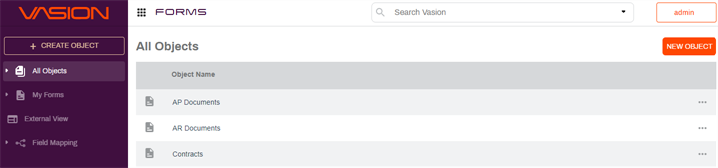
- From the Vasion Home page click on the Forms app or the click on the App button
 in the header and click the Forms app.
 - You have two options to create a new object:
- Click the + Create Object button at the top of the left navigation, or
Click the New Object button on the right side of the page.
-
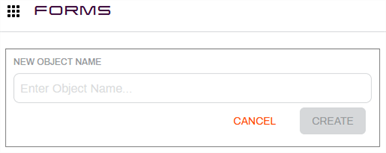
In the new object page enter a name in the New Object Name field and click Create.
Once you have the object name, you can create any object fields you need.
Add Existing Object Fields
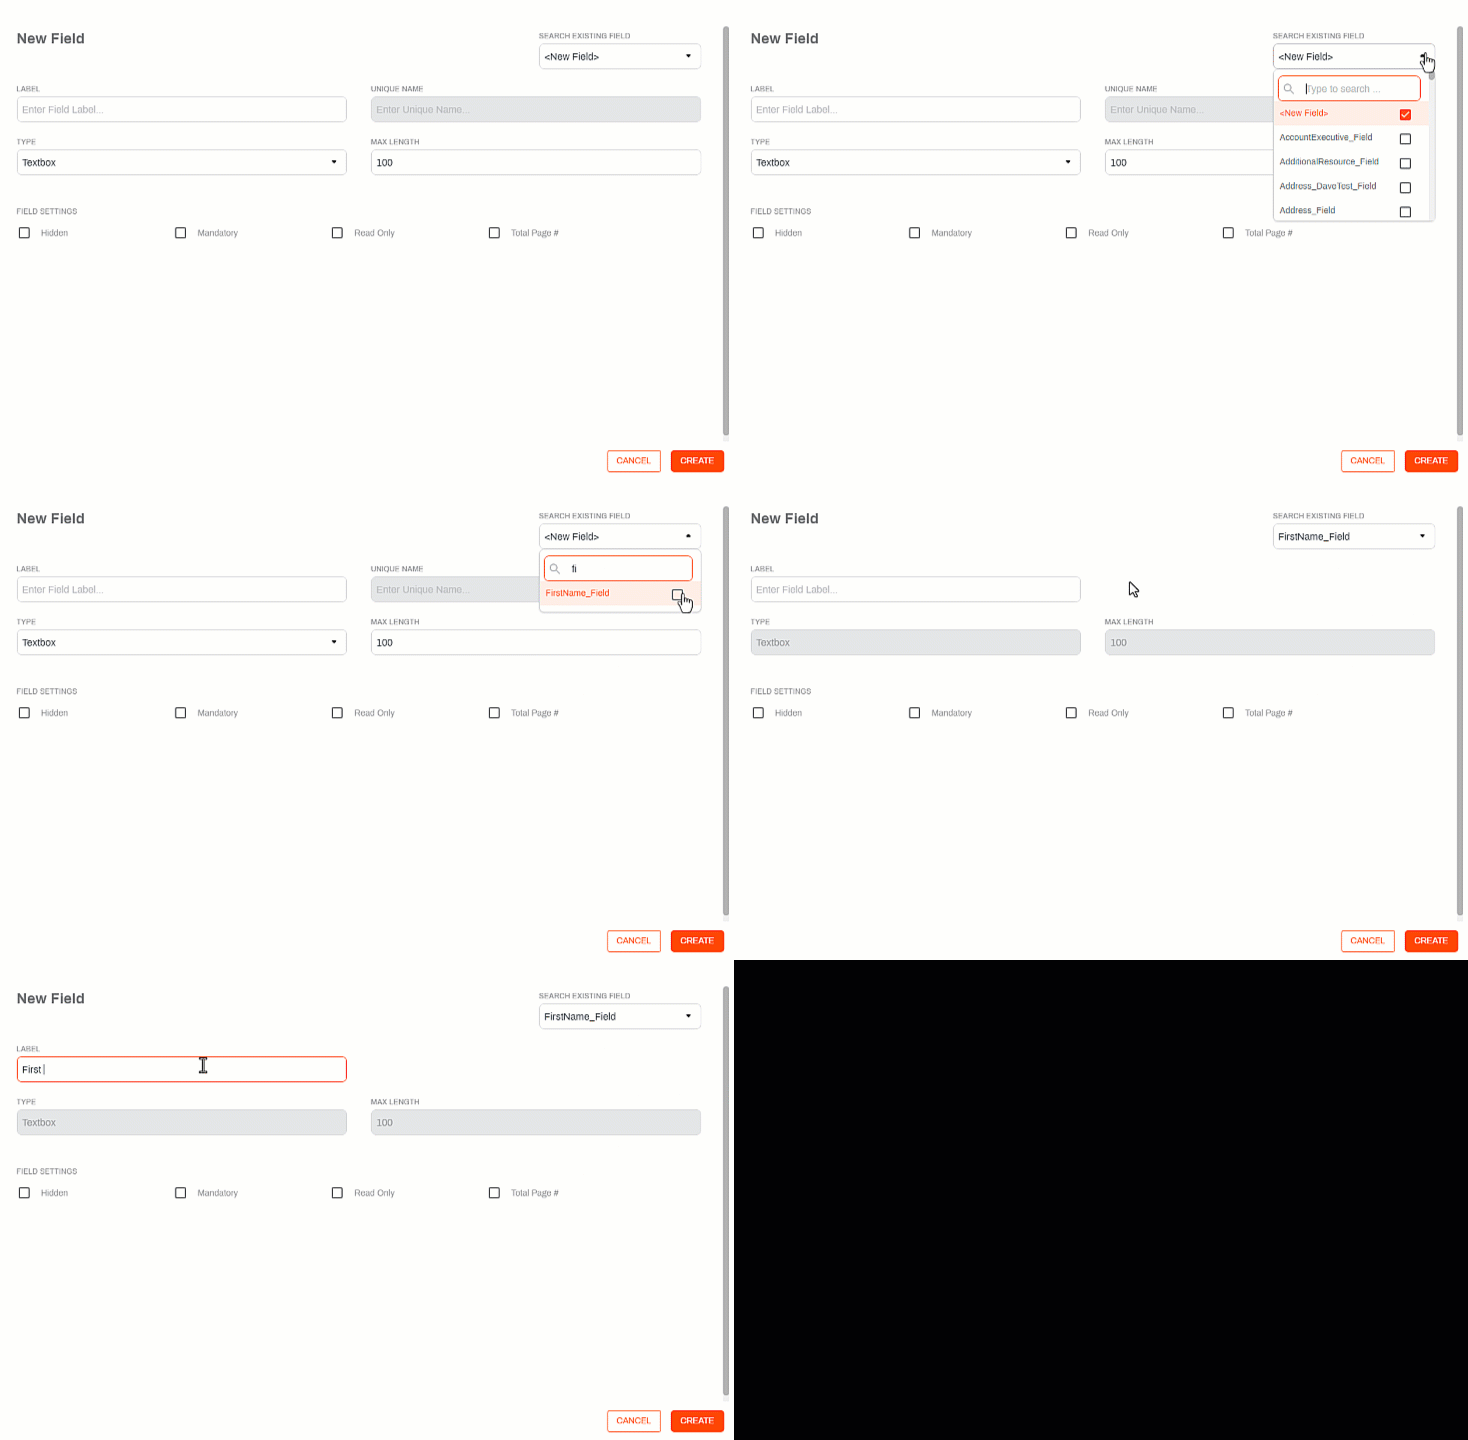
Because you cannot have two fields with the same name, even across objects, you can add a field that already exists in your Vasion Automate Pro instance to a new object.
- Select the Add Field button.
- In the New Field modal use the Search Existing Field drop-down to select a field.
- Scroll down to find the field you want, or
- Use the Quick Find to search for the field.
- Select the field.
- Enter a label for the field to display in your object.
- Adjust any field settings for the field in this object.
Create New Object Fields
-
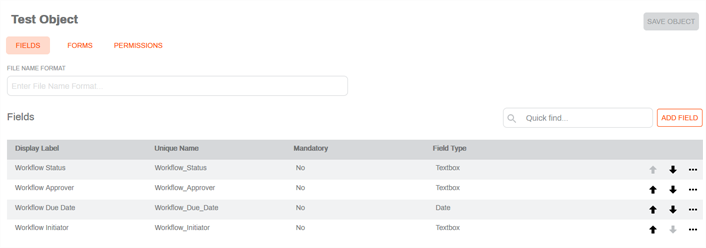
Select the Add Field button.
.
-
Complete the following:
-
Label — enter the label for the new field. The label is the field name that displays to users when they use the current object for a workflow, form or document. If you are creating a new field, Vasion uses the text entered in the table to create a new unique name and it is displayed in the Unique Name field.
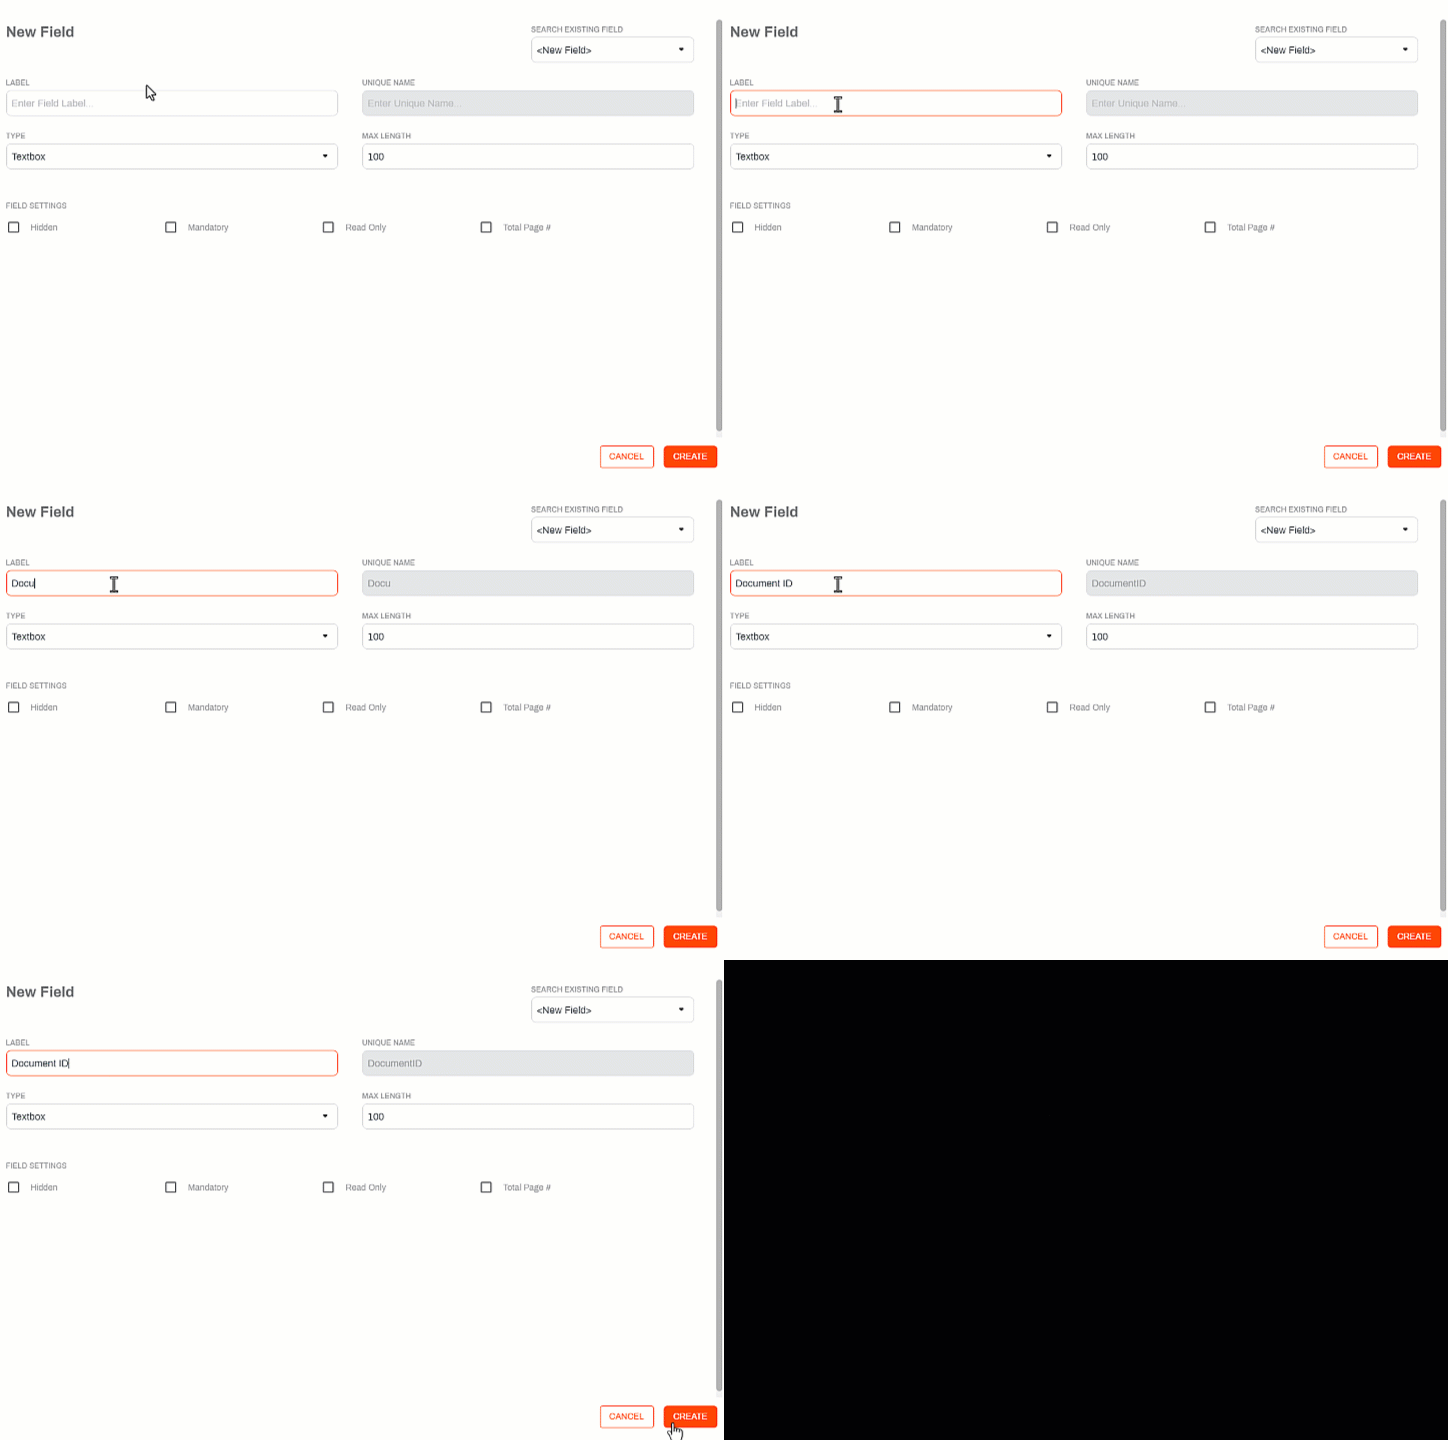
- Type — use the drop-down to select the type of field.
Textbox — use this option to allow users to enter any character value into the field. You can set a maximum number of characters a user can enter into the field.

When this option is selected, the Total Page # option is displayed at the bottom of the modal. This option is used when batching documents using an automation to automatically insert the total number of pages of the batched document in the object field.
Dropdown — use this option to create a drop-down menu from which the user can select a specified value. In the Value field enter the value you want to display in the drop-down and click Add. You can enter as many values as necessary. The drop-down values added are displayed in the Dropdown Values section.
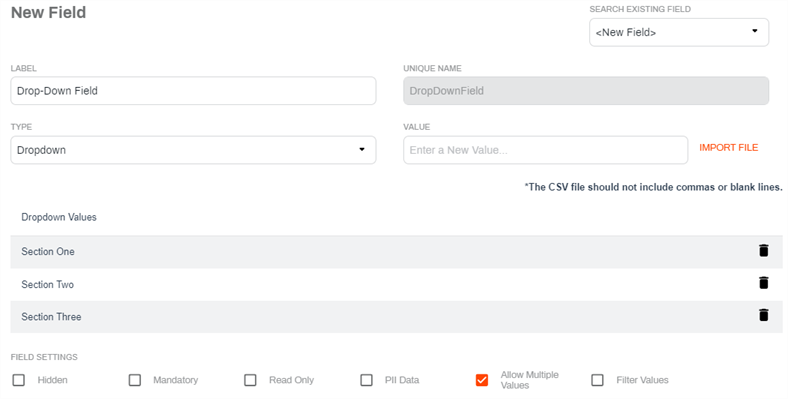
Additional Dropdown field settings:
Allow Multiple Values — when checked, users can select more than one value from the drop-down.
Filter Values — when checked, this field becomes a filter for another drop-fown field. For details on how to do this see Create a Drop-Down Filter.
- Date — use this option to create a date field. Users can use the date pricker or enter date values only. When this option is selected, the System Date option displays at the bottom of the modal. Check the box to automatically insert the system date into the field when the object field is applied to a document, form or workflow.
- Number — use this option to only allow numeric characters in the field.
- URL — use this option to only allow web address entries into the field.
- Email — use this option to only allow users to enter email addresses
Checkbox — use this option to create a list of options which the user can check a box to select. When you use this option, users can select more than one of the options listed. In the Value field, enter the value for each option and click Add. You can enter as many values as necessary. The check box options are displayed in the Checkbox Values section.
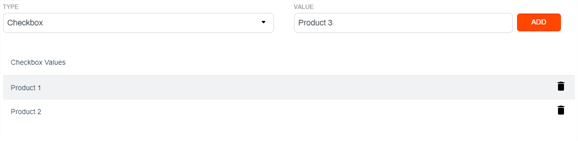
This type of field is used exclusively on forms and only displays in the document data view if selected values are saved to the object.
Radio Button — use this option to create a list of options from which the user can choose. When you use this option the user can only select one item. In the Value field, enter the value for each option and click Add. You can enter as many values as necessary. The radio button options are displayed in the Radio Button Values section.
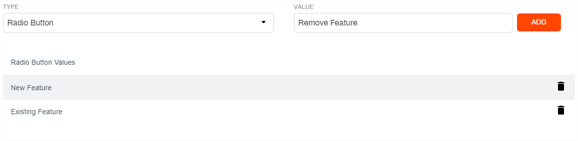
This type of field is used exclusively on forms and only displays in the document data view if selected values are saved to the object.
- Currency — use this option to only allow users to enter currency values. This field can be used for calculations.
- Signature Field — use this option to create a field to capture a signer's email. This field is used on objects that are associated with signature workflows and signature document templates, and it associates a signature zone with the email of the user that is assigned to that zone.
Address — use this option to create a field that captures address information. This is a text field and it is used in a form to validate a physical addresses using a provider, like Google maps. When the user enters an address, it displays real-time addresses as customers type.
The field validation only happens when completing a form. The address cannot be validated if a user enters data using Document Data View.
-
- Click the Create button.
Reorder Object Fields
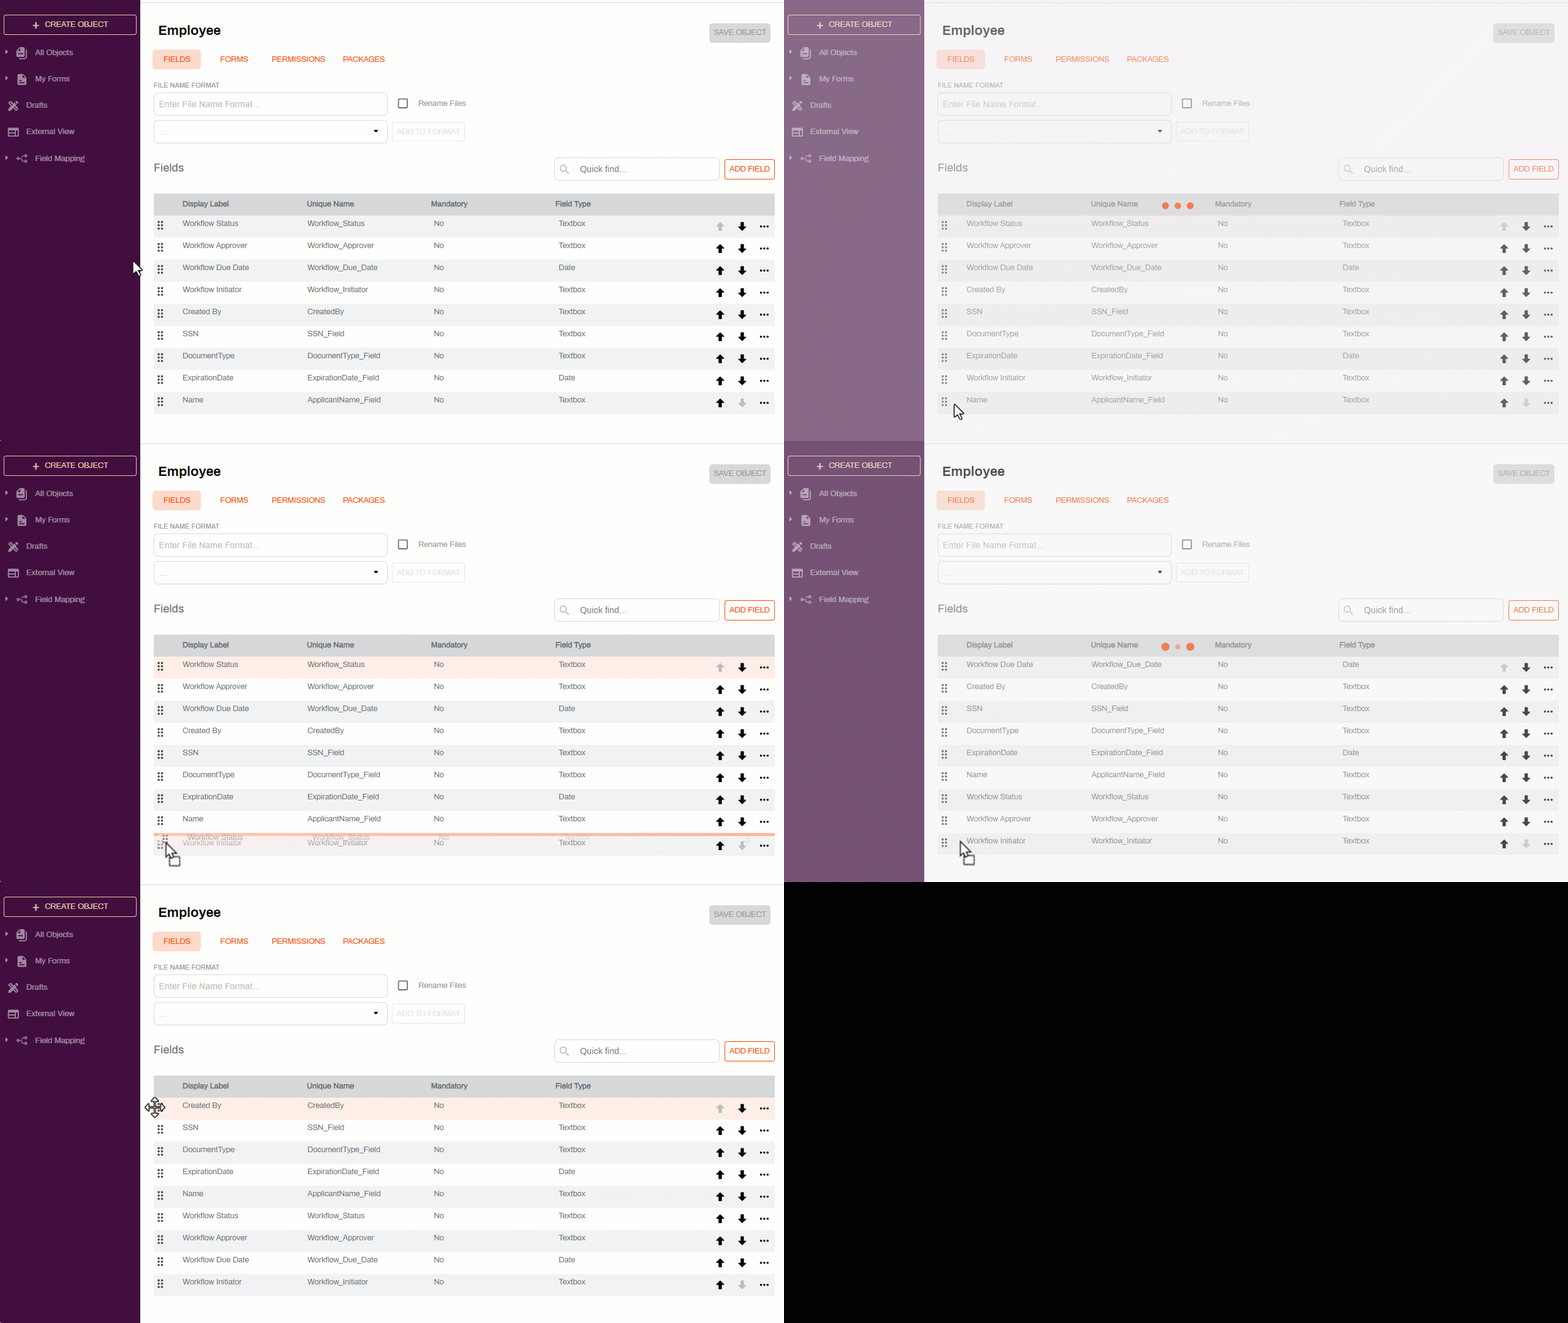
To reorder the object fields:
- In the object field list, find the field you want to move.
- Select the drag indicator, hold and drag the field to the new location,or
- Select the Down arrow for the field to move it down one row at a time.
- Select the Up arrow for the field to move it up one row at a time.
Find Existing Object Fields
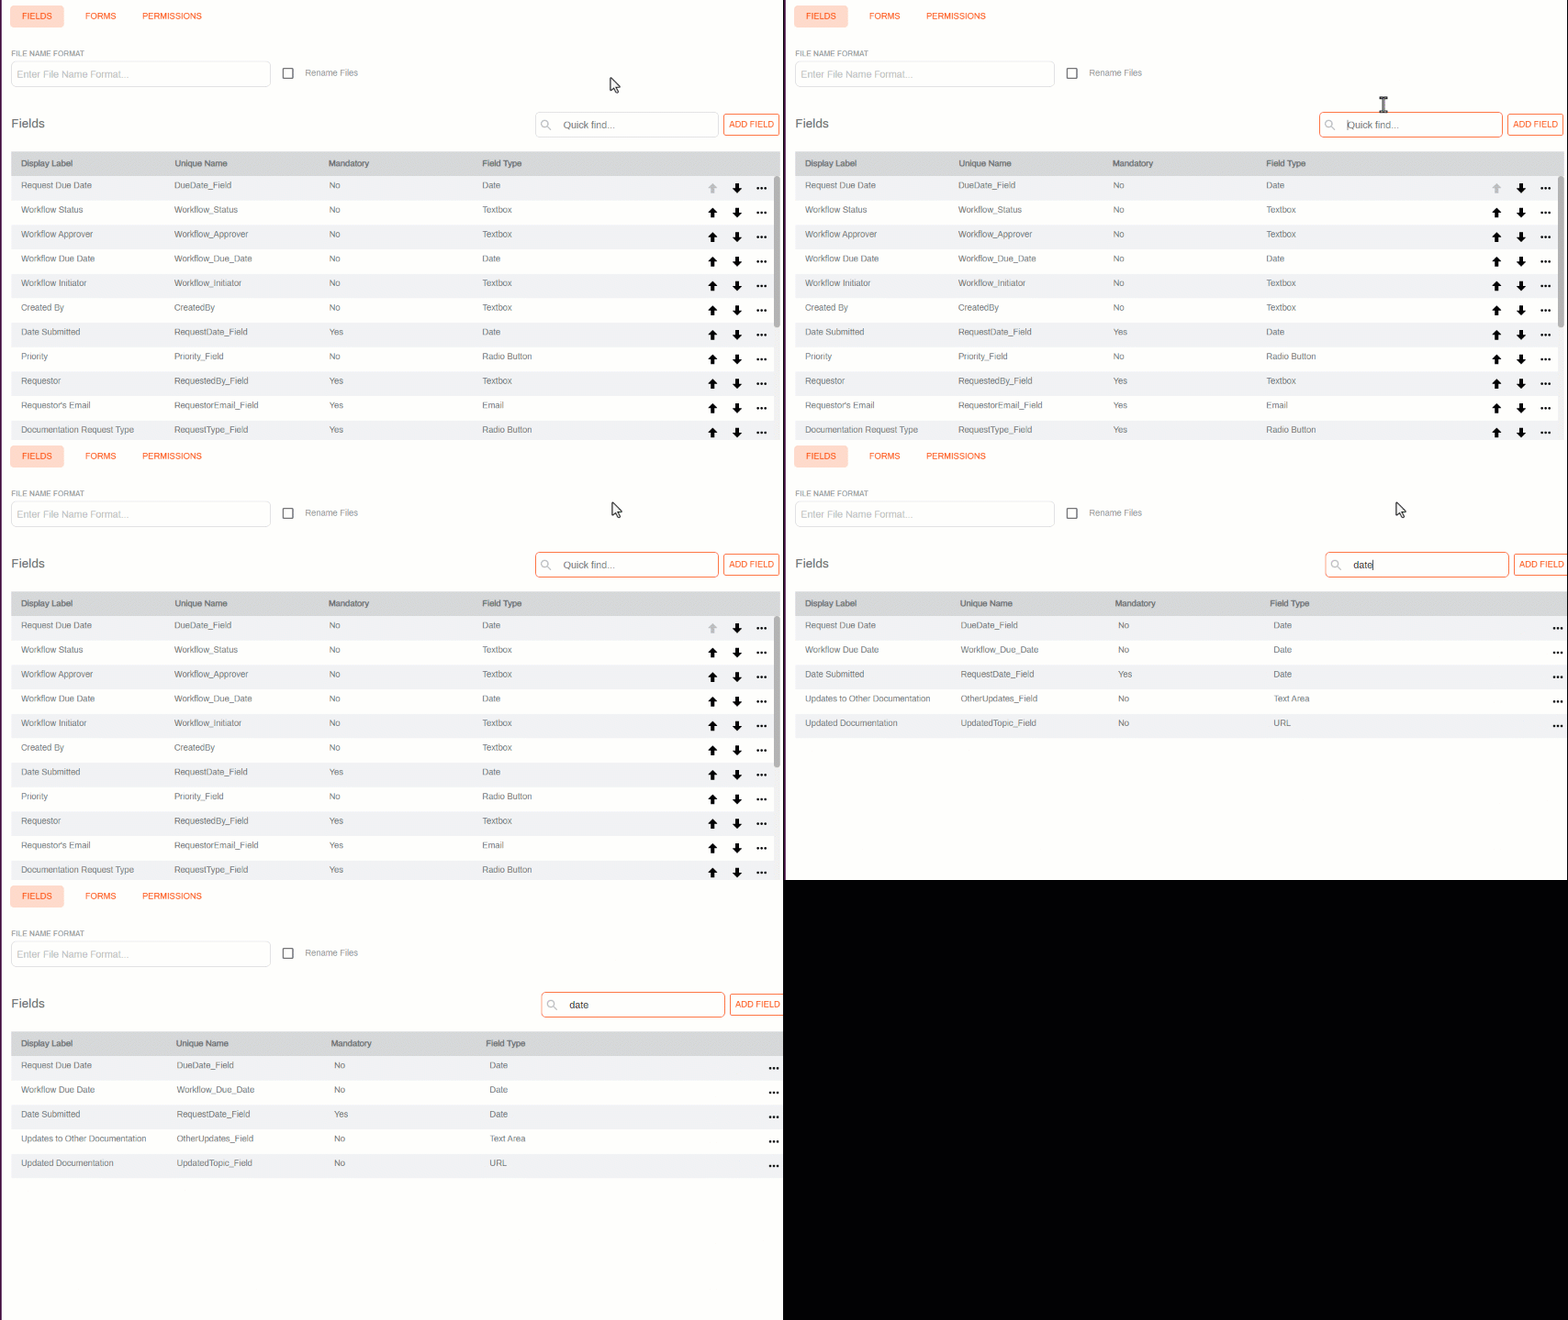
Use the Quick Find filter to easily locate an object field.
Create a Drop-Down Filter
You can configure a dropdown field to act as a filter for another dropdown to help users by narrowing a list of values to relevant options. To get started do the following:
-
Create a dropdown field with all the values from which a user can choose.
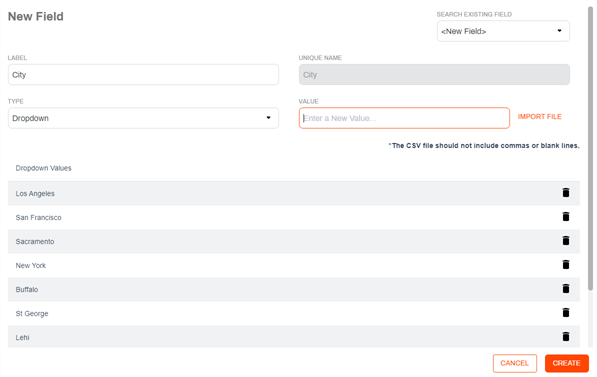
- Create a dropdown filter with values the user can use as a filter.
- Enter the values you want as filter.
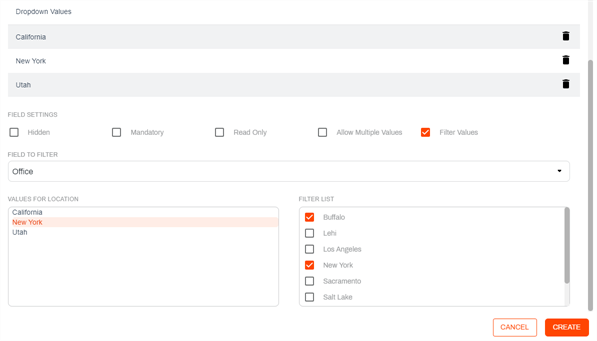
- In Field Settings Select the Filter Values option and configure the following:
- Use the Field to Filter drop-down to select the dropdown field. If you only have one dropdown field in your object, it's selected by default.
- In Values for {Field Name} select a value.
- In Filter List check the box next to each value you want to display when the value is selected.
- Repeat the above steps for each value in the current dropdown.
Select Create.
To see how the drop-down filter works on a form see Dropdown Filters.
Edit an Object Field
To edit an object field:
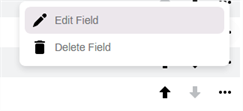
- In the object field list, click the More button
 for the field you want to edit
 -
From the drop-down menu, click Edit Field
-
Edit the fields as needed
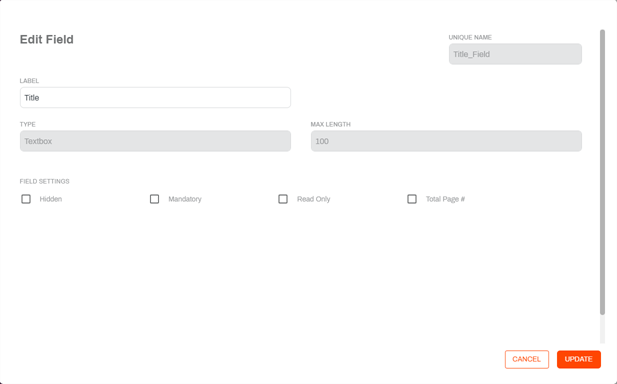
- Click the Save button
Edit an Existing Object
- Click on the More button for the object you want to edit
- From the drop-down menu, click Edit Object
- Make the necessary updates
When editing an existing object, any changes you make to object fields, like adding a new field, reordering fields or editing an object field, take immediate effect. Click on an item in the side navigation to exit the Edit Object page.