Last Updated: June 18, 2024
Group Management
A Group is a list of users who have similar capabilities, access security or workflow processes in Vasion. When you create a group, you assign roles to it. The roles are then applied to every user in the group, so you don’t need to assign the roles individually. This allows you to group similar users and save time.
You can group users in the following ways:
- Functional groups — users who have similar functional abilities. The user permissions are based on the functional needs of the group to perform their duties.
- Department groups — users who should have similar access to folders and documents. The users are often members of the same department or have the same security levels.
- Workflow groups — users who are assigned to process and move documents one or more steps for approval, denial or forwarding for the process to complete. These groups should only include users who should be assigned specific workflow steps.
Create a Group
- From the Admin app, click Security & Permissions in the side navigation
- Click Group Management
- From the drop-down, click on New Group
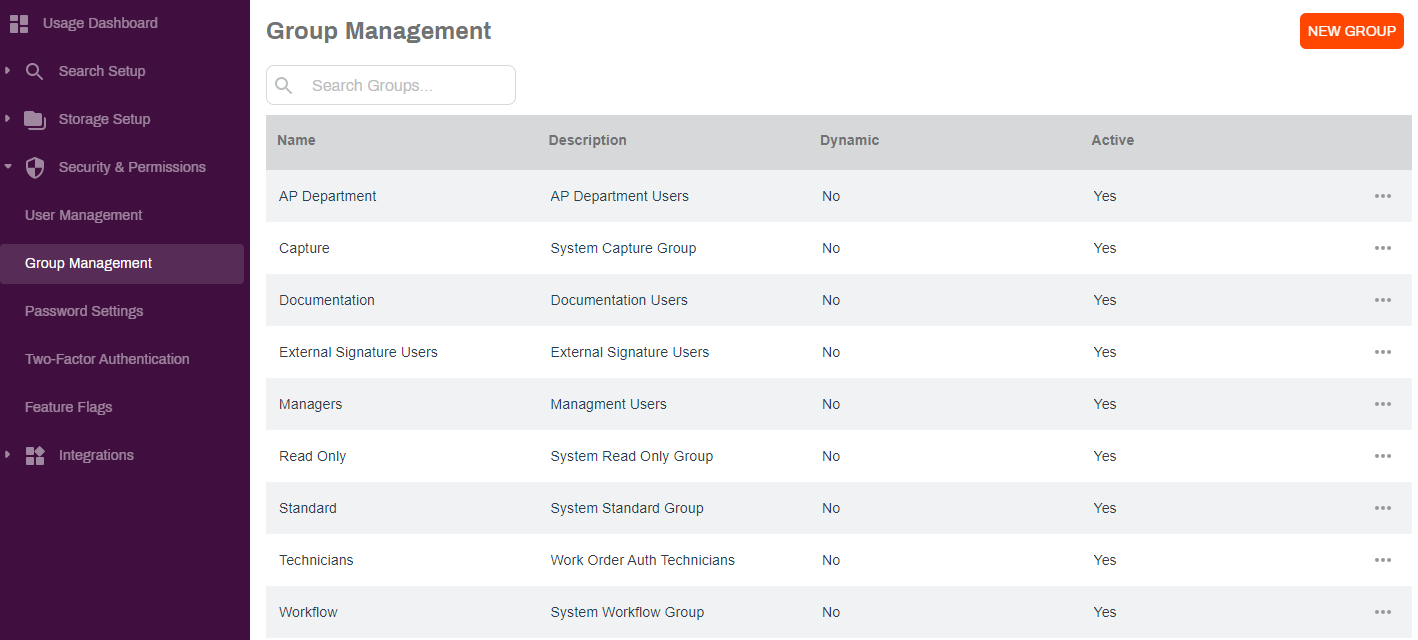
- In the Create Groups modal enter the following:
- Name — enter the name of the new group
- Description — enter a description for the group
- Dynamic Group — check this box if you are using an identity provider or LDAP type of login
- Active — check this box to make the group active so they can access Vasion Automate Pro
- LDAP Group — enter the LDAP group for syncing
-
Click the OK button.
Edit Group
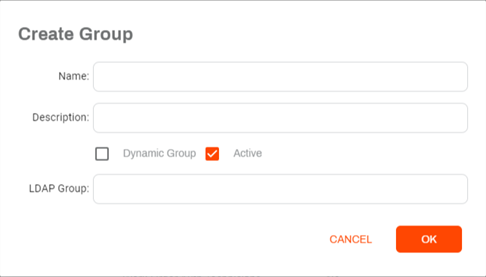
- On the Group Management page, click the More
 button for the group you want to edit
 - From the drop-down, click Edit Group
- In the Edit Group modal, make the changes you want to the group’s profile
-
Click the OK button
Assign Users to a Group
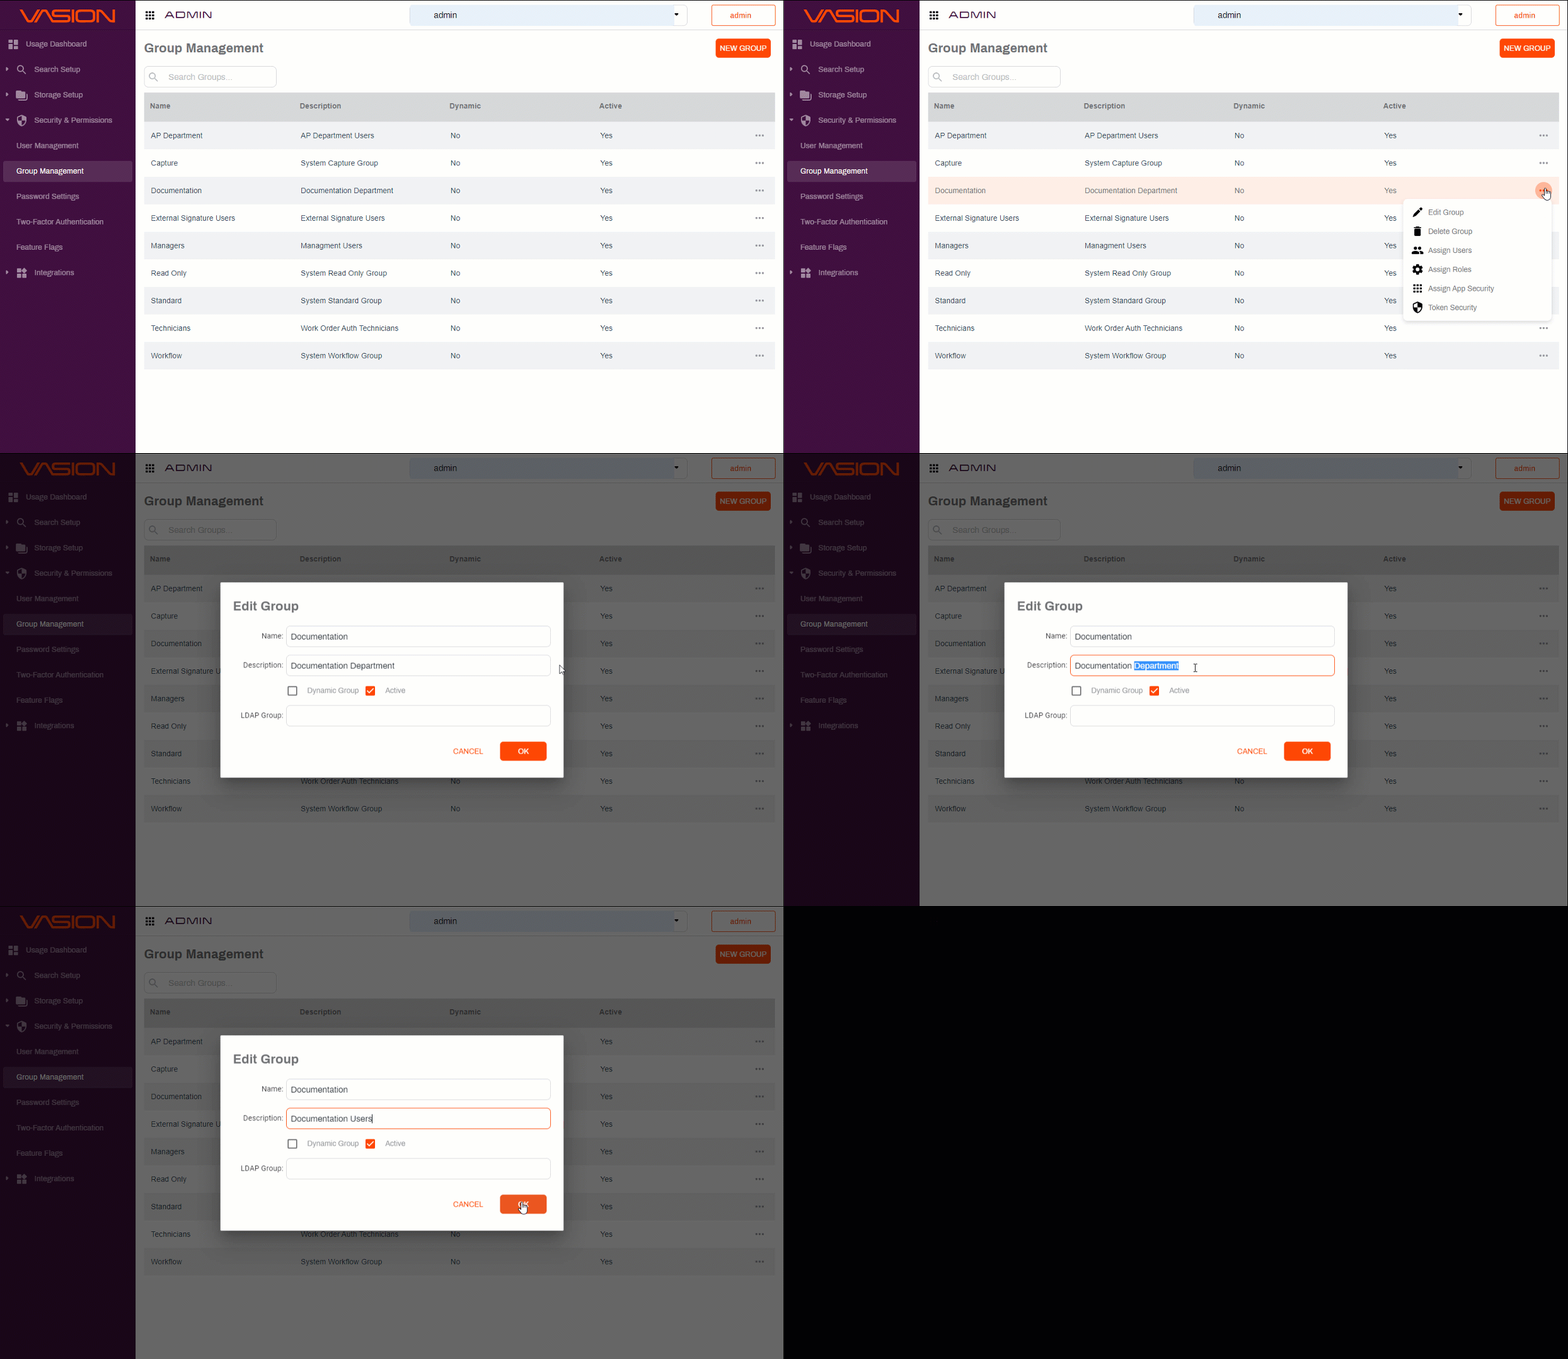
- On the Group Management page, click the More button for the group you want to edit
- From the drop-down, click Assign Users
- Select the user(s) in the Available Users list that you’d like to assign to the new group
- Click the right arrow button
 to move the selected user to the Assigned Users list.
 - Click the OK button
Make Group Inactive
- On the Group Management page, click the More button for the group you want to edit.
- From the drop-down, click Edit Group.
- Uncheck the Active box.
- Click the OK button.
Delete a Group
- On the Group Management page, click the More button for the group you want to edit.
- From the drop-down, click Delete Group.
- Click the Yes button to confirm that you want to delete the group.
Token Security for a Group
Token security is an additional level of security and a flexible way to limit access to documents by users or user groups based on object field values. It acts like an electronic key to access restricted documents. To learn more, see Token Security.
Follow these steps to add token security to a group.
- On the button for the
- From the drop-down, select Token Security.
- In the Token Security modal, complete the following:
- In the text field, enter the field value you want to use as the parameter for the security token. The text you enter here must match a value in the object field you select.
- Object — use the drop-down to select the object with the data you want to secure. The list only contains objects that have token security already enabled.
- Field — use the drop-down to select the field that contains the value used for the token. The list only contains objects that have token security already enabled.
- Select the Add button
 next to the token name.
- Click on the OK button to save