Split & Merge Steps
Last Updated: August 18, 2026
You use Split and Merge steps in Workflow to branch a workflow so that multiple steps can happen concurrently.
Requirements
Review these Requirements before you start.
Configure the Steps
You can add Split and Merge steps throughout a workflow. Use these steps to add efficiency to your workflows.
Add a Split Step
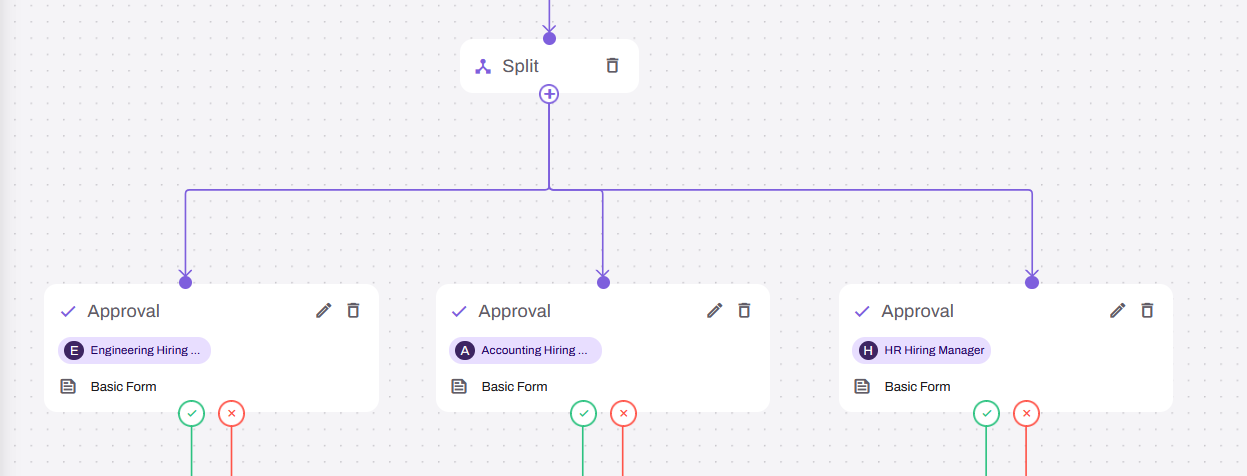
When an approval can be done by one of multiple people or needs to be approved by multiple people, use a Split step to route the workflow.
Follow these steps to configure a Split step:
- From the Advanced Steps section, drag the Split step onto the canvas.
- Drag the previous step connector to the new step.
- Drag connector dots from the Split step to as many steps as necessary.
Add a Merge Step
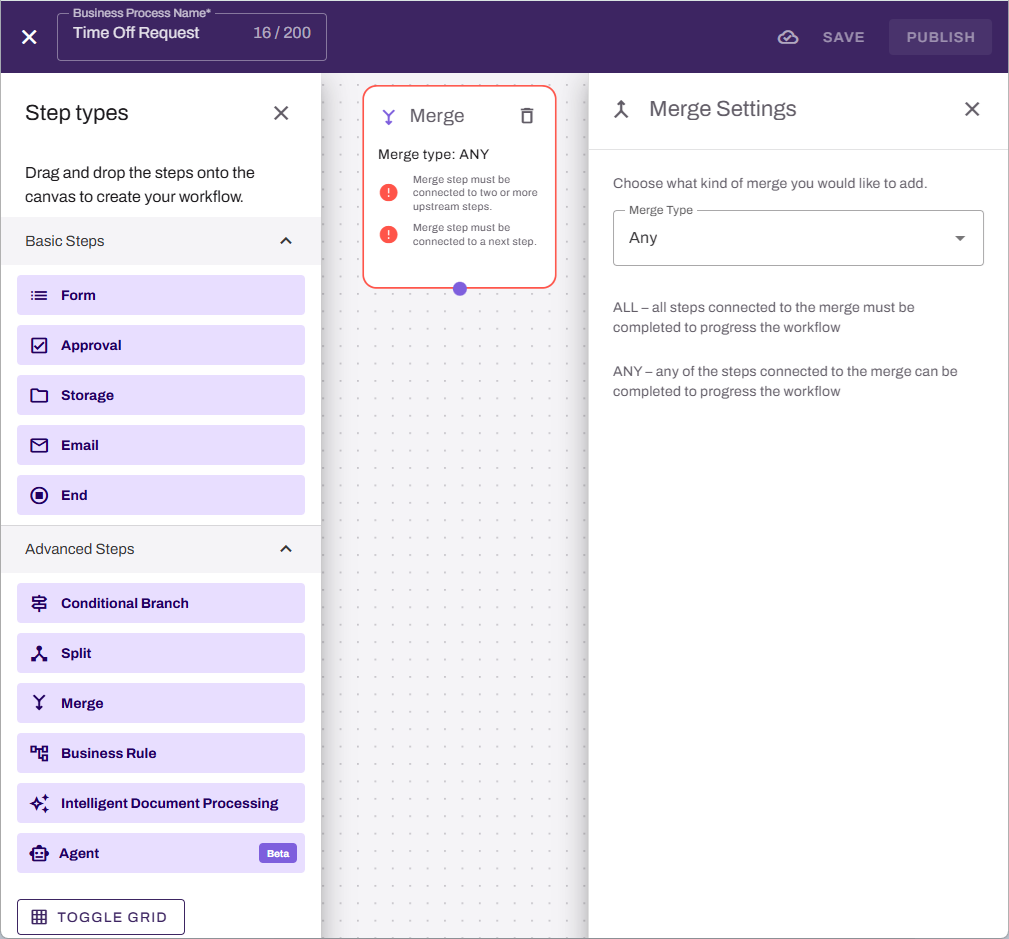
After multiple branches reach their conclusions, merge them back together for further steps or to end the workflow.
Follow these steps to merge branches:
- From the Advanced Steps section, drag the Merge step onto the canvas.
- Drag connector dots from previous steps to the Merge step.
- Select a merge condition from the Merge Type menu:
- All: All steps connected to the Merge step must be complete to progress the workflow.
- Any: Any of the steps connected to the Merge step can be completed to progress the workflow.
- Select the Continue button.
Next Steps
Refer to the following:
In this topic: