Manage Workflows
Last Updated: September 08, 2026
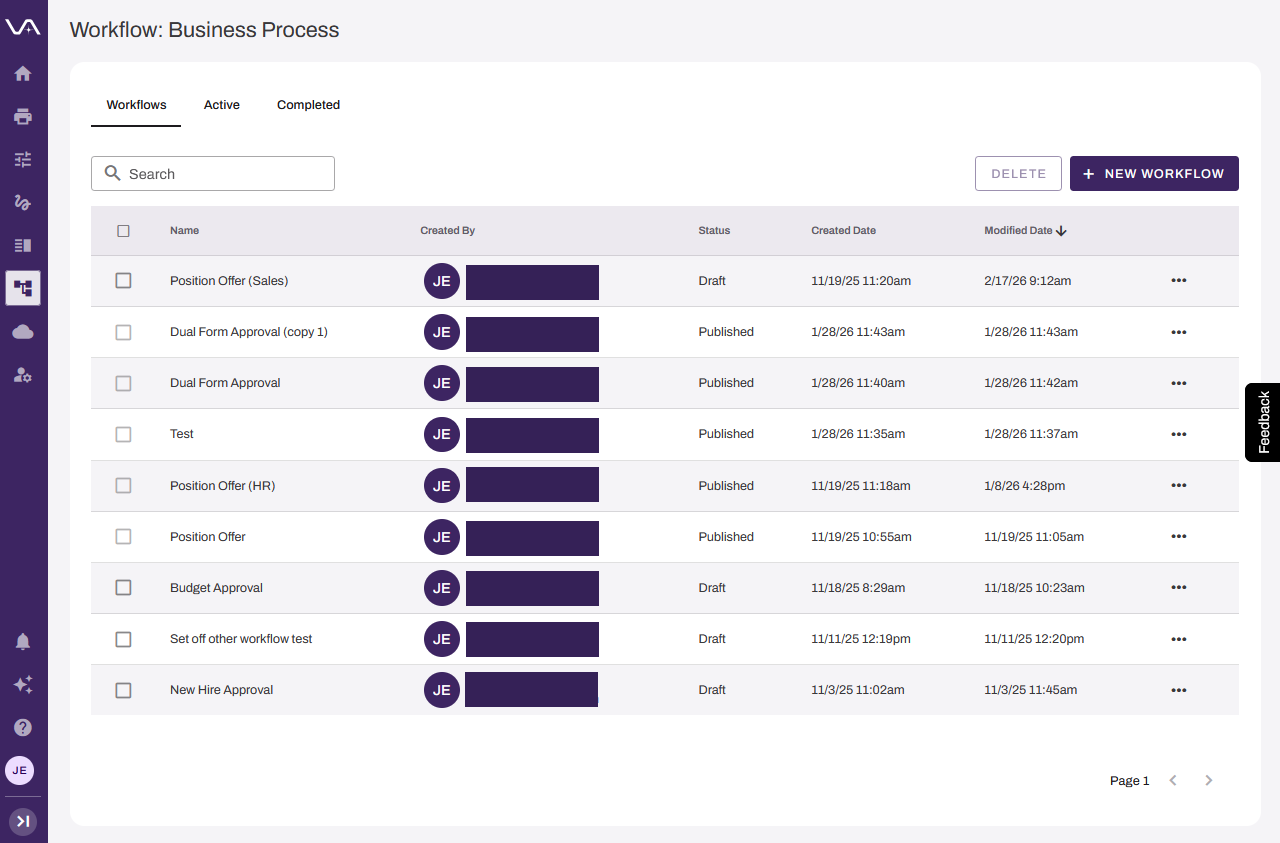
You can manage Business Process workflows on the Workflow: Business Process page. Create, copy, edit, delete, preview, share, initiate, and end workflows all from this page.
Requirements
Review these Requirements before you start.
Business Process Workflow Details
The Workflow: Business Process page has the following:
- + New Workflow: Select this button to create a new workflow.
- Workflows: Select this tab to view existing workflows.
- Active: Select this tab to view in-progress workflows.
- Completed: Select this tab to view workflows that are completed, rejected, or terminated.
Start a Workflow
There are multiple ways to configure a workflow to start. To start a workflow, refer to Start a Workflow
This option is available only after a workflow is published. To publish a workflow, refer to Save & Publish the Workflow.
A published workflow that is initiated by external actions does not have the Start Workflow option. To initiate this type of workflow, assign the form to a user.
Preview a Workflow
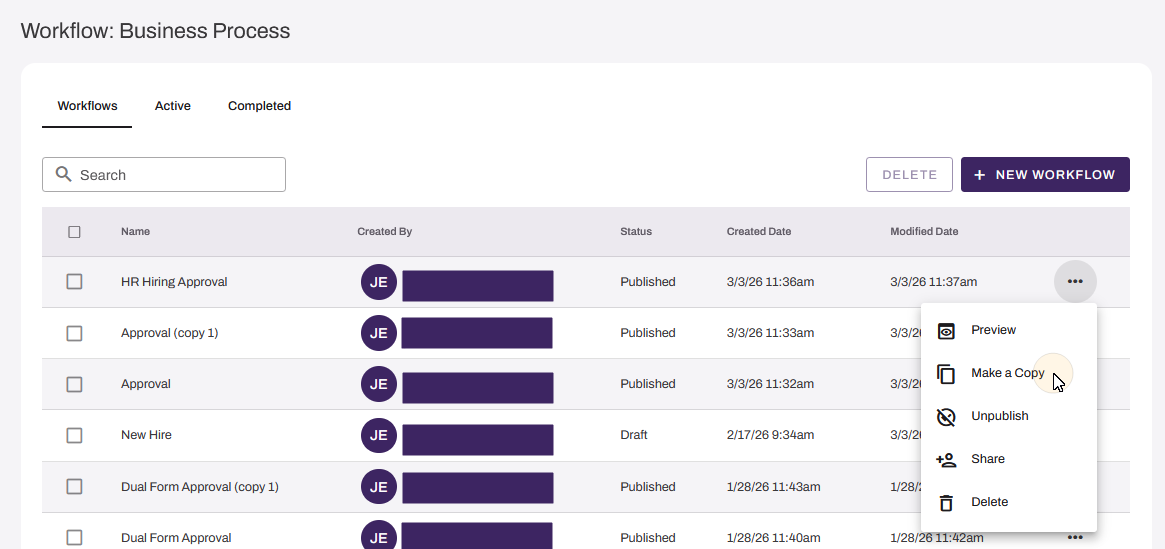
To view the workflow steps in the workflow builder, do the following:
- Select the More menu
 next to the workflow.
 - Select Preview.
Rename a Workflow
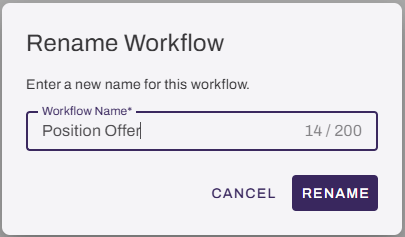
To rename a workflow, do the following:
- Select the More menu next to the workflow.
- Select Rename.
- Enter a new name in the Workflow Name field.
- Select Rename.
Copy a Workflow
After a workflow has been published and assigned at least once, you cannot edit it. Instead, make a copy of the workflow, and edit the copy.
To copy a workflow, do the following:
- Select the More menu next to the workflow.
- Select Make a Copy.
Edit a Workflow
To edit the workflow steps in the workflow builder, do the following:
- Select the More menu next to the workflow.
- Select Edit.
- Change the workflow as necessary. For more information on editing workflows, refer to Build a Workflow.
This option is available only when the workflow is in Draft status. To change a workflow status from Published to Draft, refer to Unpublish a Workflow.
Unpublish a Workflow
To remove the Published status from a workflow, do the following:
- Select the More menu next to the workflow.
- Select Unpublish.
This option is available only if a published workflow has never been assigned to a user.
Share a Workflow
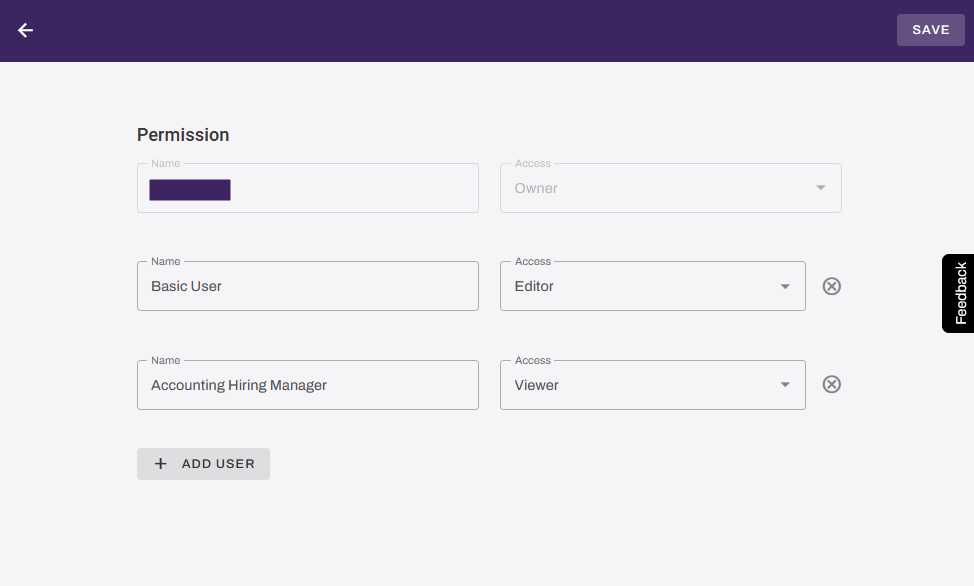
For a user other than the workflow creator to manage a workflow, you must assign them a role for the workflow.
To assign a role to a user for a specific workflow, do the following:
- Select the More menu next to the workflow.
- Select Share.
- Select the + Add User button.
- Search for and select the user in the Name field.
- Select a role for the user from the Access menu:
- Owner: Grants the user full control over the workflow.
- Editor: Grants the user the Start Workflow, Preview, Unpublish, and Share options.
- Viewer: Grants the user the Start Workflow and Preview options.
- Select Save.
Delete a Workflow
To delete a workflow, do the following:
- Select the More menu next to the workflow.
- Select Delete.
- In the Delete this workflow modal, select Delete.
Delete Multiple Workflows
To delete multiple workflows, do the following:
-
Select the checkbox next to each workflow.
-
Select the Delete button or the Delete option from the More menu
.
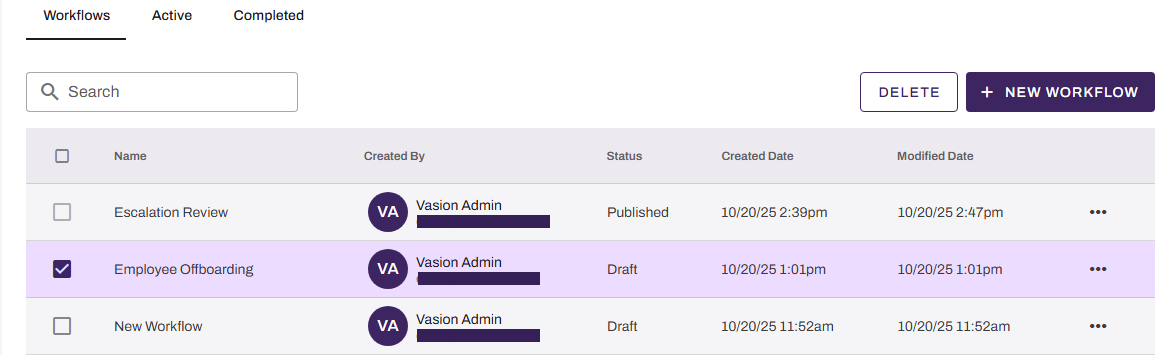
You can delete only a draft workflow or a published workflow that has not been started.
Stop a Workflow
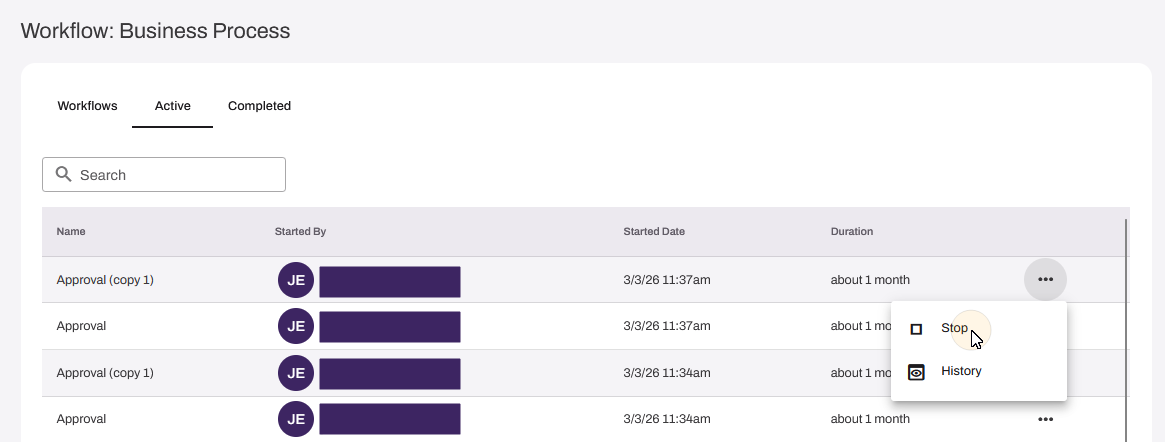
To stop a workflow that is in progress, do the following:
-
Select the Active tab.
- Select the More menu next to the workflow.
- Select Stop.
- In the Are you sure you want to stop this workflow modal, select Stop.
This option is available only for workflows that have already been started.
View a Workflow's History
To view the history of a workflow, do the following:
- Select the Active tab.
- Select the More menu next to the workflow.
- Select History.
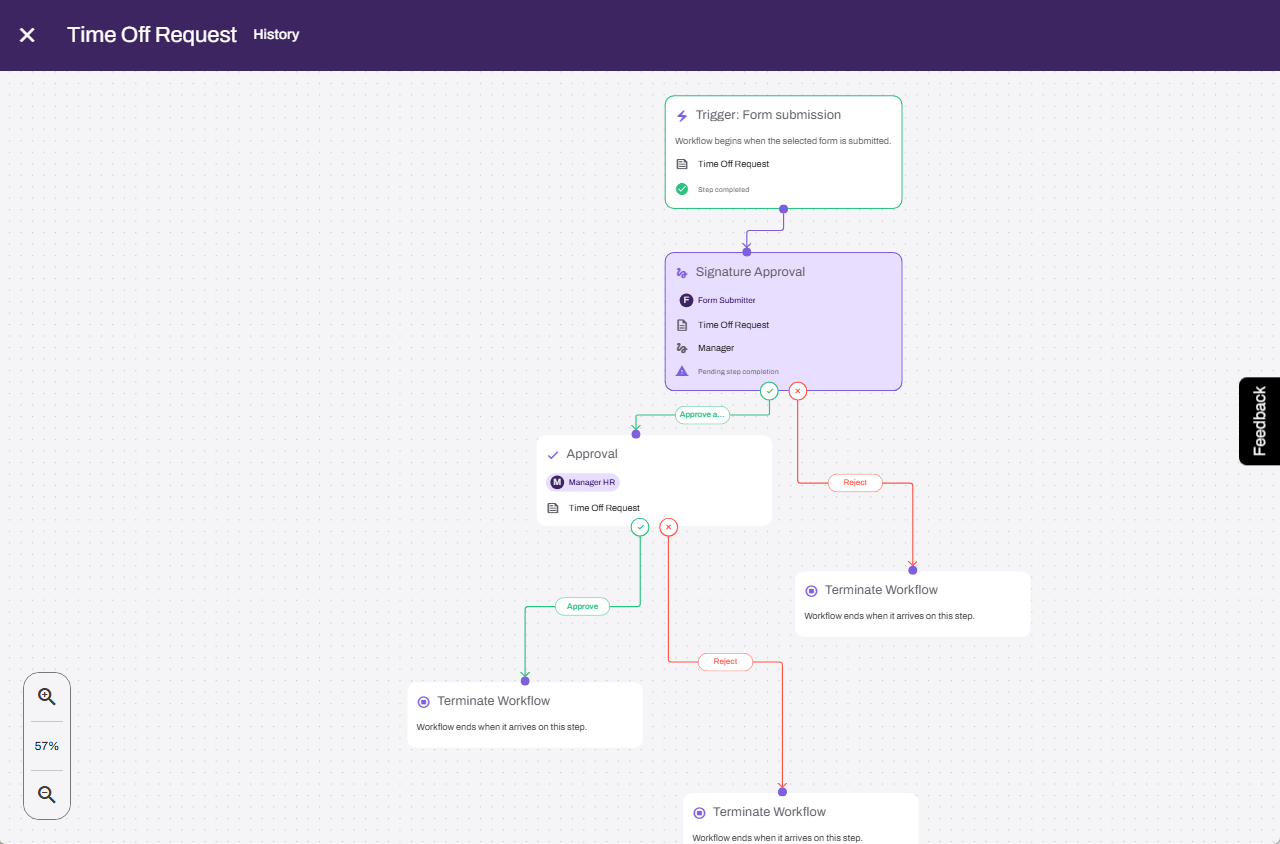
This option is available only for workflows that have already been started and had an action taken.
History Details
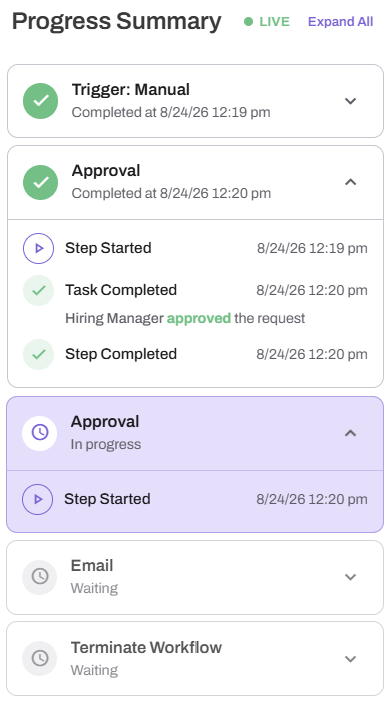
When you select History for a workflow, the Progress Summary panel appears.
This panel shows the workflow steps in chronological order and whether they are complete, in progress, or waiting. Expand a step to view more details. Select Expand All to expand all steps.
For an in-progress workflow, the Progress Summary panel shows a Live indicator and updates in real time. The automatic updates stop when the workflow reaches a Terminate Workflow step.
Next Steps
Refer to the following:
In this topic: