Last Updated: October 20, 2025
XML Import
With the XML Import automation,
1. General Settings
- In the Automation app, select XML Import in the side navigation.
-
Select the New XML Import button.

- In the General tab, enter the name for the new XML Import automation in the Import Name field.
-
If you have an on-premises instance of Vasion, you may enter a value on the Run On Machine filed otherwise leave blank.
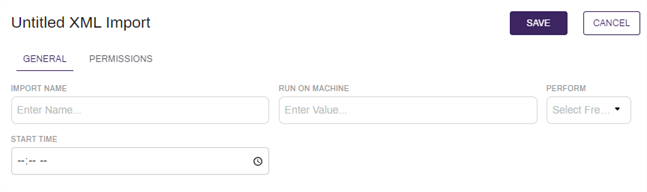
The value in this field determines the server used to run the automation and is only required where there are multiple Vasion clients and/or client services running for the environment.
- Use the Perform drop-down to select the frequency you want the automation to run. The next fields that display depend on what you select here.
- Once — select this option to only run the automation once. The next field display updates to Start Date. Enter the date in the format shown or select the Calendar icon
 to pick the date.
 - Daily — select this option to run the automation every day. The only remaining option is the Start Time.
- Weekly — select this option to run the automation once a week. The next field updates to Weekdays. Use the drop-down to select one or more days of the week by selecting the appropriate box.
- Monthly — select this option to run the automation once a month. The next field updates to Months. Use the drop-down to select one or more months by selecting the appropriate box.
- Frequency — select this option to run the automation at a specified time interval in minutes.
- In the next field, enter the number of minutes for the time interval.
- Once — select this option to only run the automation once. The next field display updates to Start Date. Enter the date in the format shown or select the Calendar icon
- In the Start Time, enter the time of day to run the automation in the format shown or select the Clock icon
 to pick the time.
 - If the Monthly option is selected, a Day of Month field is shown. Enter the day of the selected month(s) when you would like to run the automation.
2. Build XML Import
- Use the Import From drop-down to select whether the import file is stored in a connected cloud storage drive or in an external location.
Cloud Storage — select Browse to navigate to the cloud storage location where the file is stored.

External Source — enter the UNC path in the Folder field.

-
To select a import destination, select the Browse button next to the Import To field to select a Vasion Automate Pro storage folder.
-
Select the desired destination for the import from the Select 'Import To' Folder dialog.
-
Select the Select button.
-
-
Select the desired XML import configuration from the Configuration Name drop-down. For more information on XML import configurations, see XML configuration.
-
If using a Bates label, select the object field that should be used for the Bates label.
-
If the documents that are imported through this XML Import automation are to be sent directly to a workflow, select the workflow from the Workflow drop down.
-
If using a Bates label that will be static, select the Static Bates Label option, then enter the label value in the Enter Static Bates Label... field.
-
Select the Delete Original Documents option to delete the documents from the source location once they have been imported.
-
Select the OCR Document option to OCR the documents after import. For more information on OCR processes, see Schedule OCR.
