Create & Manage Templates
Last Updated: September 08, 2026
Use the Sign template builder to configure a document template.
Requirements
Review the following requirements:
- Access to Vasion Automate and Sign.
- A user account with appropriate permissions.
- A PDF to upload.
Process Overview
You perform these high-level procedures:
- Upload a PDF.
- Add Placeholder and Fixed Signers.
- Add Fields and Assign Signers.
- (Optional) Select Storage
- Save the Template.
1. Upload a PDF
Follow these steps:
- In Vasion Automate select Sign from the left-side navigation.
-
On any of the tabs, select Create New Template from the + Document dropdown menu.
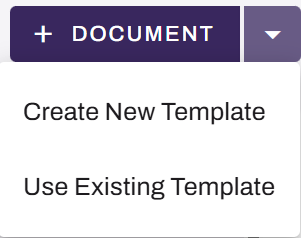 Selecting the + Document button opens the document builder. For more details about building a single-use document, refer to Create & Manage Documents.
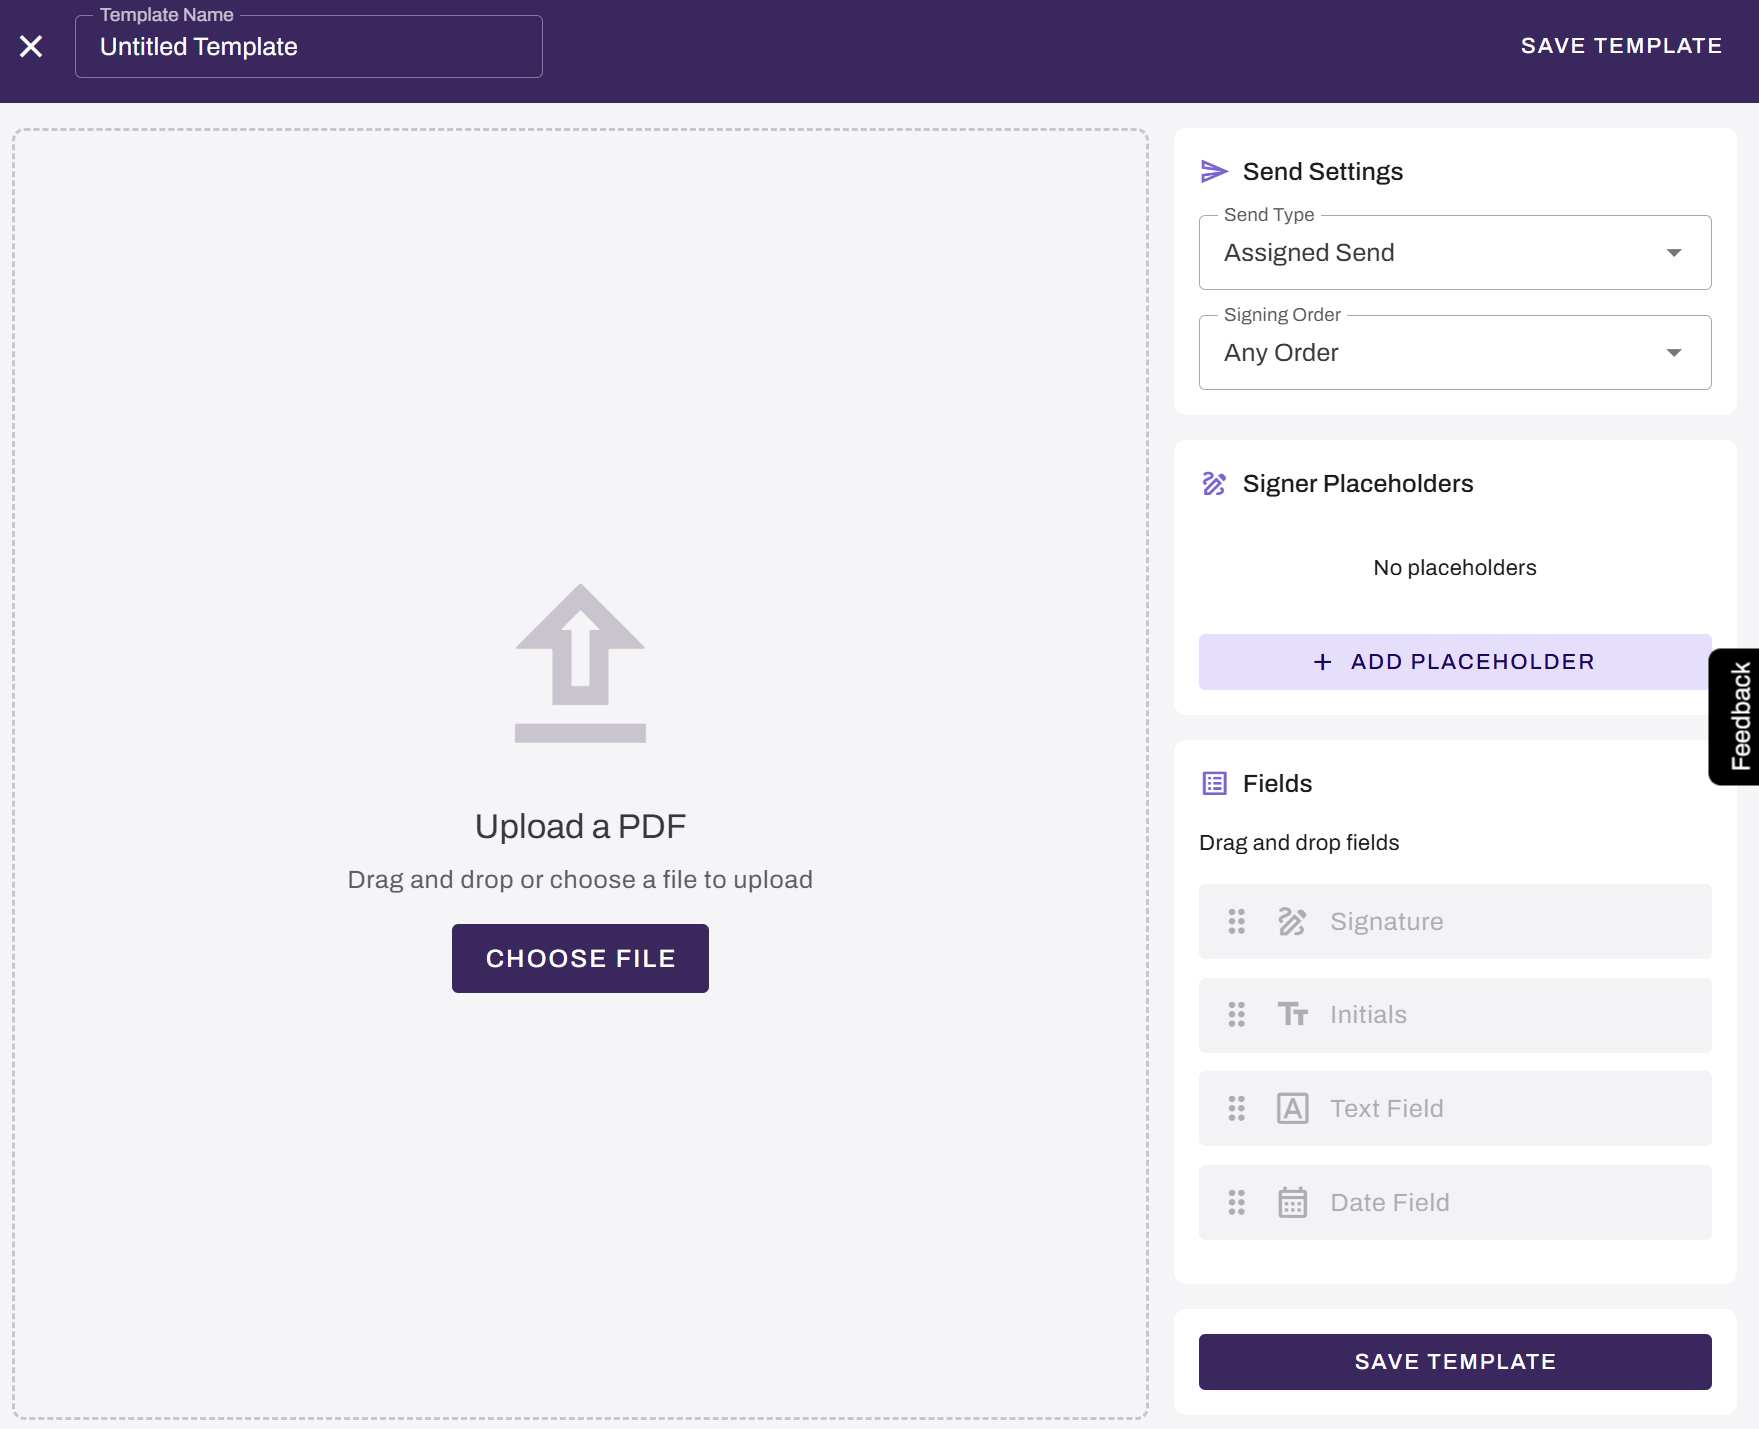
 - In the template builder, enter a name in the Template Name field. The name cannot exceed 100 characters.
- Do one of the following to upload a PDF:
- Drag a PDF onto the page.
- Select Choose File, and select your file.
2. Add Placeholder & Fixed Signers
Follow these steps in the template builder:
- In the Signer Placeholders section, select + Add Placeholder.
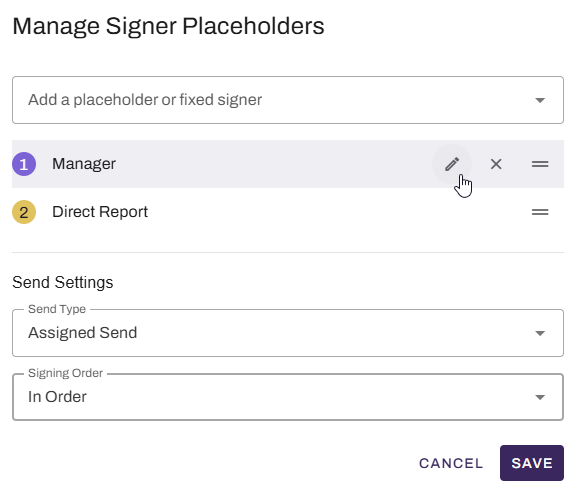
- In the Manage Signer Placeholders modal, you can add one or more of the following:
- Placeholder signer: In the Add a placeholder or fixed signer field, select Add New Placeholder. Enter a name for the placeholder, and select the check mark.
Fixed signer: In the Add a placeholder or fixed signer field, search for and select a signer. The fixed signer's name and email appear in the list. Fixed Signer also appears to the right of their name.
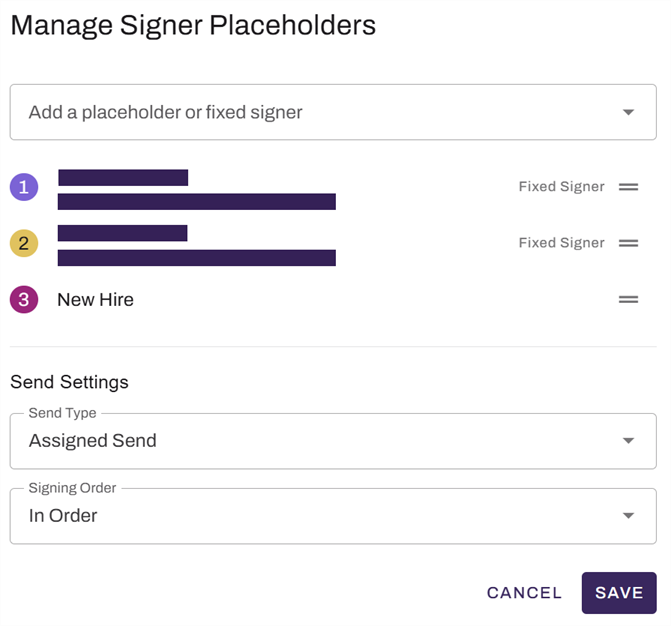
Fixed signer emails appear only in the Manage Signer Placeholders modal; they do not appear in the Signer Placeholders section in the template builder.
- Placeholder signer: In the Add a placeholder or fixed signer field, select Add New Placeholder. Enter a name for the placeholder, and select the check mark.
- If you have more than one signer, do the following:
- In the Send Type field, select the following:
- Assigned Send: Each signer completes their assigned fields.
- Bulk Send: You can send to any number of signers. Everyone completes the entire document.
- In the Signing Order field, select one of the following:
In Order: Signers receive the document in the order listed. Each signer must complete their signature before the next is notified.
The order of signers in this modal determines which order the document sends to signers. For more details about reordering signers, refer to the Reorder Signers section below.- Any Order: All signers are notified at the same time and can sign in any order.
- In the Send Type field, select the following:
- Select Save.
3. Add Fields & Assign Signers
Follow these steps in the template builder:
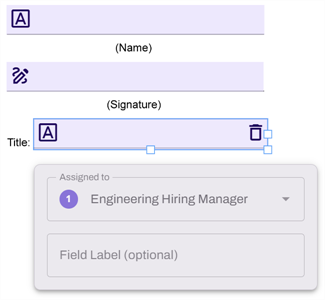
- Drag a field from the Fields section onto the template.
- From the Assigned to dropdown menu, select a signer.
-
(Optional) Enter a label in the Field Label (optional) field.
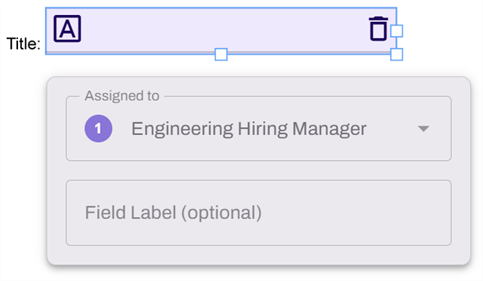
- Repeat these steps to assign signers to more fields.
For more information on each type of Sign field, refer to Sign Fields Reference.
4. (Optional) Select Storage
Follow these steps in the document builder:
-
In the Storage (optional) section, select the Edit
 icon.
icon. -
Search for and select the destination folder. If it is your first time connecting to a third-party integration, complete the authentication steps to view folders.
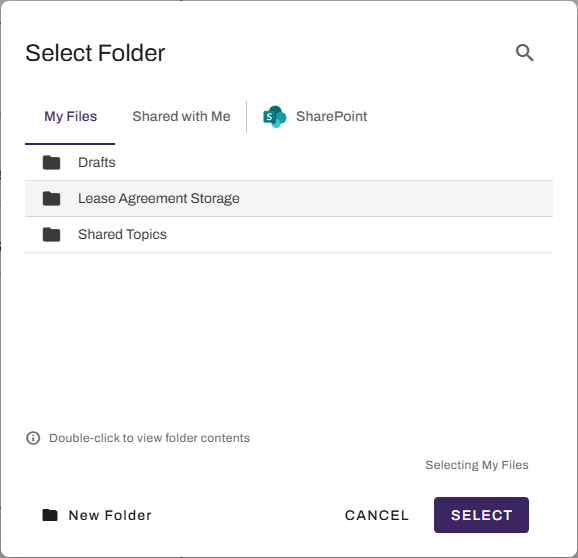
The New Folder option is available only for Storage and not third-party storage providers.
- Use the Select button after locating the desired folder location.
5. Save the Template
Select Save Template, and close the template builder.
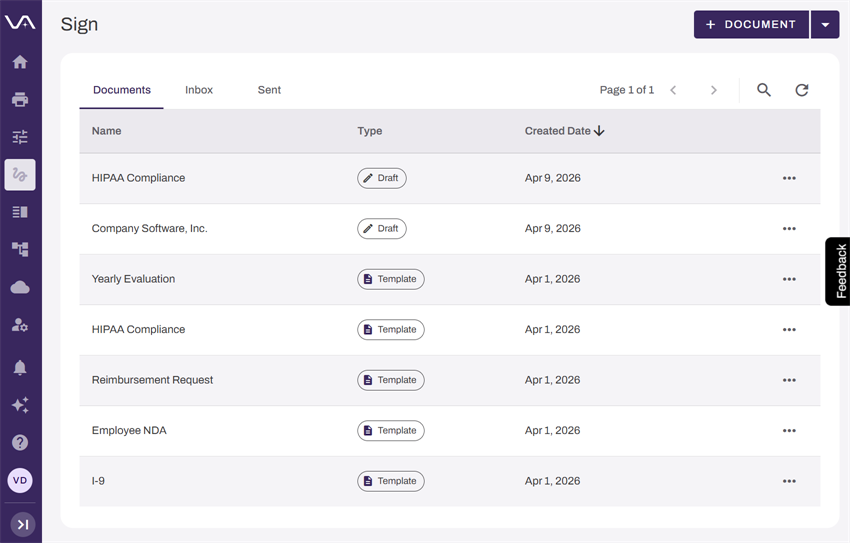
The template is ready for use and appears in the Documents tab with the Template status in the Type column.
Manage a Template
Templates are fully editable, including the template name, send type, signing order, signer placeholders, fields, etc.
Editing a template makes it temporarily unavailable to send; it becomes available again after you save the changes.
Manage Signers
Follow these steps:
- Select Sign from the left-side navigation.
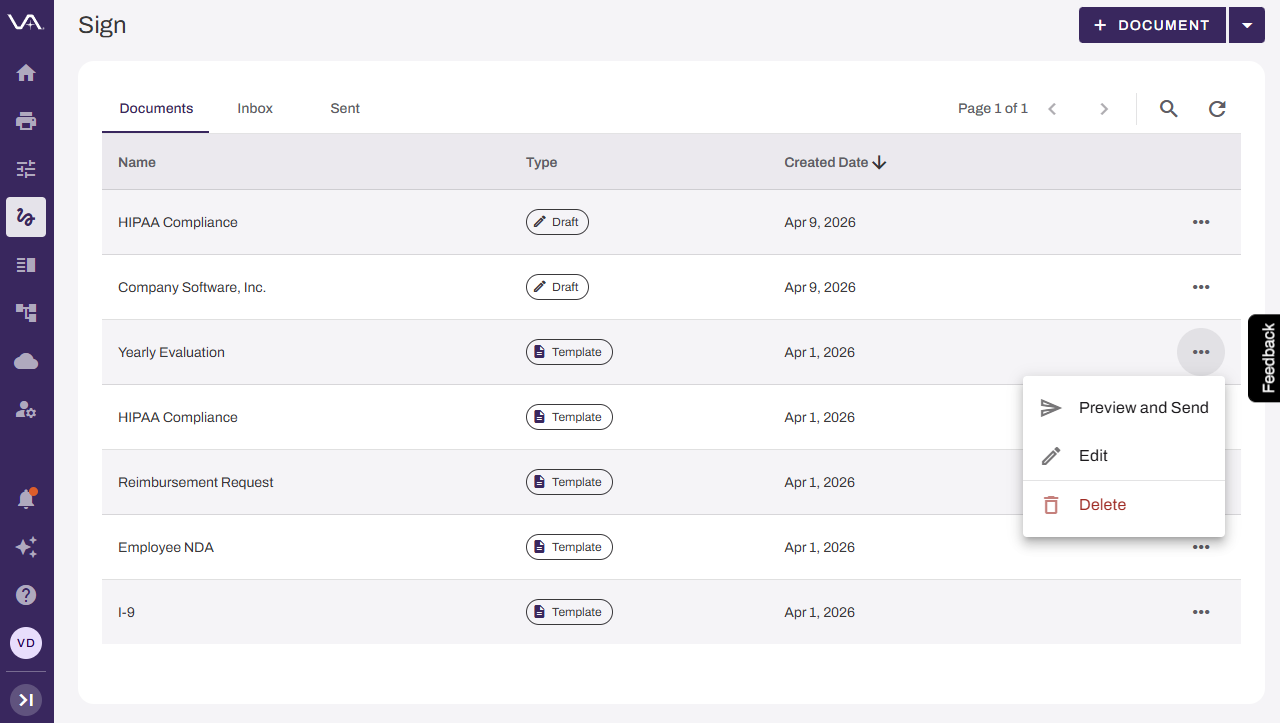
- On the Documents tab, do one of the following:
- Select the template line item.
- Select the More menu
 to the right of the template, and select Edit.
- Make your changes in the template builder.
- Select Save Template.
Add a Signer
To add a placeholder or fixed signer, refer to the 2. Add Placeholder & Fixed Signers section above.
Edit a Signer
Follow these steps in the template builder:
-
Select the Manage Placeholders button.
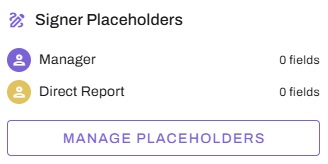
- Hover over the signer, and select the Edit button
 .
. - Enter a new placeholder name, or select a new fixed signer.
- Select the check mark.
- Select Save.
Reorder Signers
Follow these steps in the template builder:
- Select the Manage Placeholders button.
- Ensure that In Order is selected in the Signing Order field.
- Select the Reorder icon
 to the right of a signer, and drag the signer to a new location in the list.
 - Select Save.
Delete a Signer
Follow these steps in the template builder:
- Select the Manage Placeholders button.
- Hover over the signer, and select the X button.
- Select Save.
Edit a Template
Follow these steps:
- Select Sign from the left-side navigation.
- On the Documents tab, do one of the following:
- Select the template line item.
- Select the More menu to the right of the template, and select Edit.
- Make your changes in the template builder.
- Select Save Template.
Change the PDF
Follow these steps in the template builder:
-
Select the trash can icon in the Template section.

- In the modal select Remove.
- Upload a new PDF.
Changing the PDF removes any fields you added but does not remove signers.
Add Fields & Assign Signers
To add fields and assign signers, refer to the 3. Add Fields & Assign Signers section above.
Delete a Field
Follow these steps in the template builder:
- Select the field.
-
Select the trash can icon in the upper-right corner of the field.
Delete a Template
Follow these steps:
- Select Sign from the left-side navigation.
- On the Documents tab, select the More menu to the right of the template.
- Select Delete.
- In the modal select Delete.
Next Steps
Refer to the following:
In this topic: