Print to Sign Guide
Last Updated: September 08, 2026
This topic guides you through using the Print to Sign option from the print dialog.
Key Points
- Print to Sign keeps documents digital and routes them to your Sign tab. There is no physical job printed.
- If you do not see the Send to Vasion Sign object in your print dialog, it may not be deployed.
1. Print To Sign
-
When selecting Ctrl + P or File
 Print, use the print dialog to choose Send to Vasion Sign.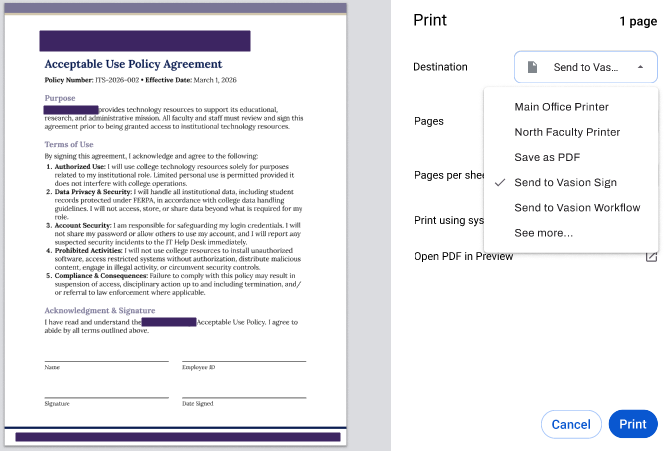
- Select the Print button when done.
- A browser window opens asking you to authenticate to your instance.
Once authenticated, the job you sent appears in your Sign tab where you can add fields and send for others to sign.
2. Edit and Send
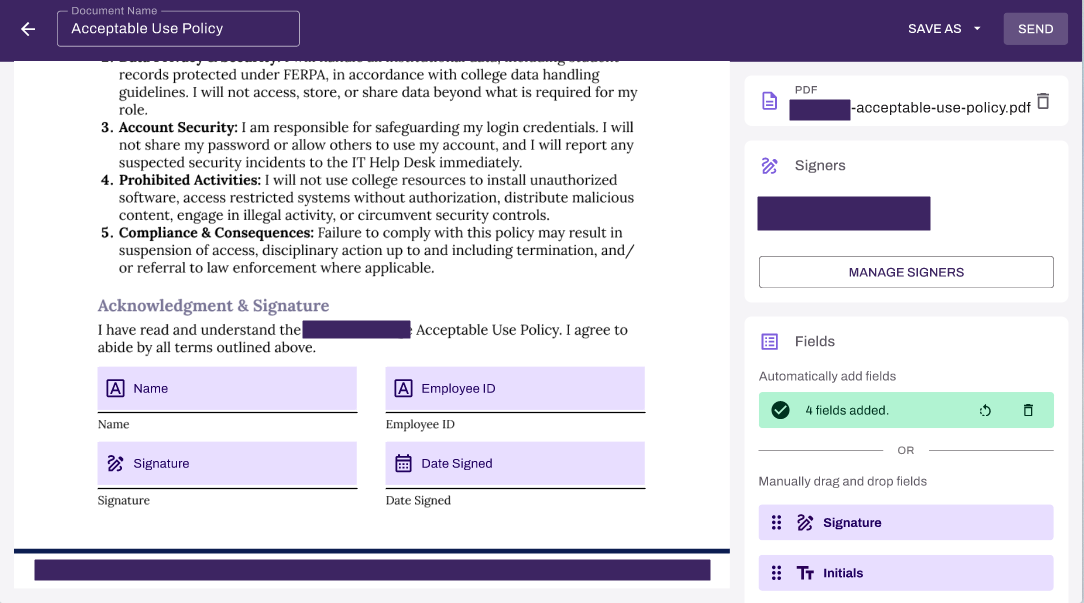
- Select the Send to Vasion Sign job, or use the more icon
 and select Edit.
 - Use the options on the right to:
- Add signature related fields to the document.
- Add and manage signers.
- Use Save As to update the file name and save additional copies.
- When finished with your edits, select Send to send the job to the signers.
-
In the Store Document After Completion modal, select:
- Send Without Storing:The document sends to the signers without storing the completed form.
- Store: Opens a modal to select the storage location for the completed form.
- Select the storage location for the file.
- Select Send & Store to send the form.

The document sends to the selected signers and, if a storage option was selected, stores the completed form in the folder location.
In this topic: