Add an IDP Step
Last Updated: September 11, 2026
Add an Intelligent Document Processing step to a workflow to allow document classification and field extraction.
This feature is in beta. Capabilities, configuration, and availability might change as development continues. Contact your Vasion representative with feedback to help shape this feature.
Requirements
Review these Requirements before you start.
Edit a Workflow
You cannot edit a workflow that has the Published status.
Do the following to unpublish a workflow:
- In Vasion Automate select Workflow from the left-side navigation.
- Select Business Process.
-
Select the More menu
 to the right of the workflow.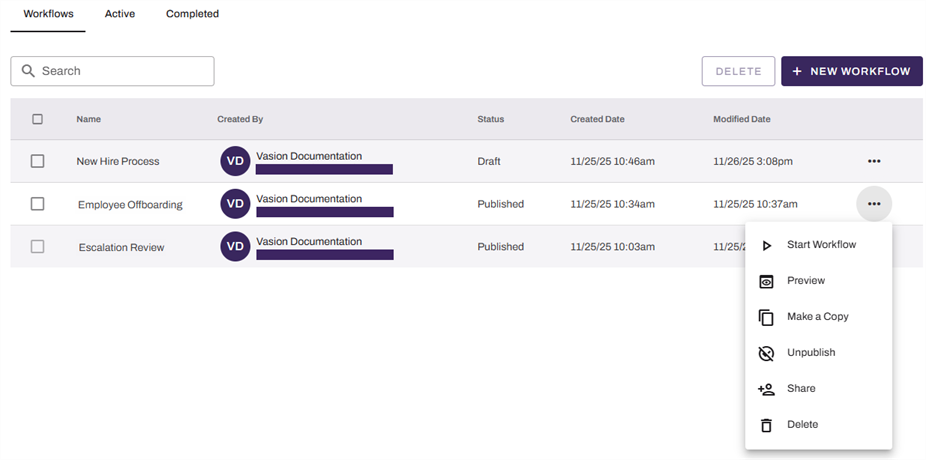
- Select Unpublish.
- Select Unpublish in the Unpublish Workflow modal.
The status changes to Draft, and you can now edit the workflow.
Add an Intelligent Document Processing Step
Follow these steps:
- In Vasion Automate select Workflow and then Business Process.
-
Select the draft workflow to open it, or select the More menu
to the right of the workflow and select Edit.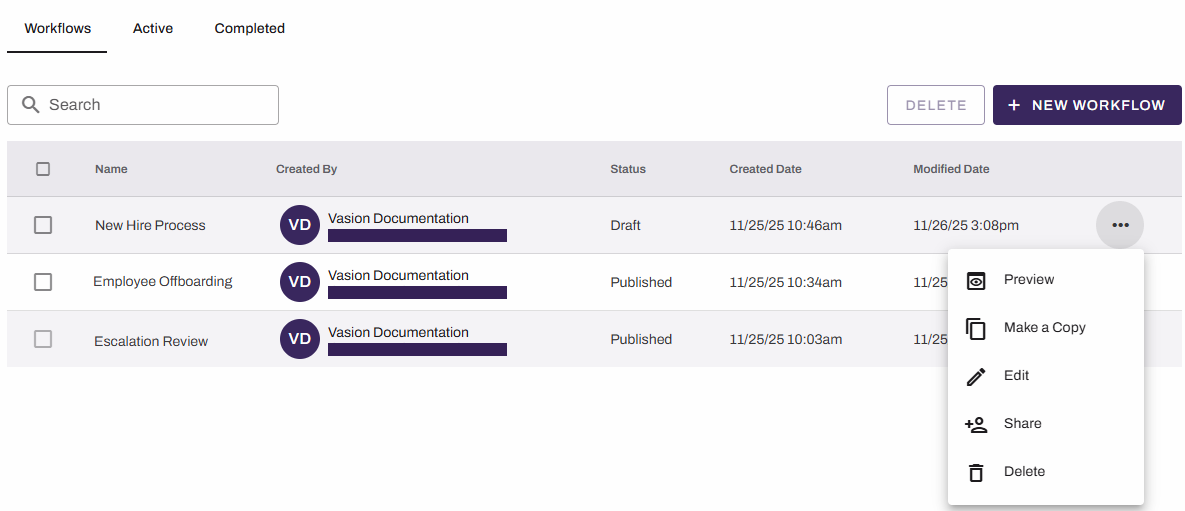
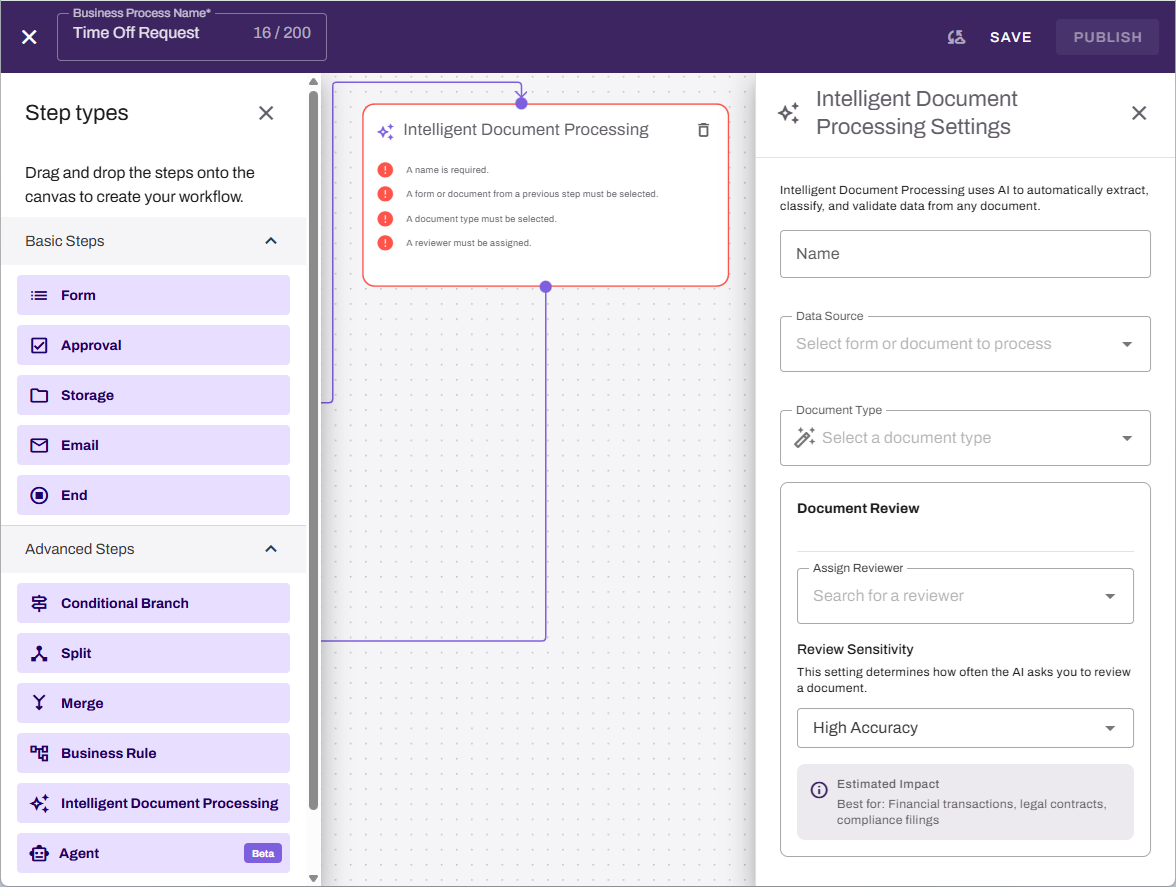
- From the Advanced Steps section, drag the Intelligent Document Processing step onto the canvas.
- Drag the previous step connector to the new step.
-
On the Intelligent Document Processing step, complete the following:
- Data Source: Select the output from a prior workflow step to use as input for the step.
- Document Type: Select an existing document type, or select Manage Document Types.
- Assign Reviewer: Select a reviewer for the results. Enter at least three characters to filter internal users.
- Alternatively select the Add external user button to add an external user for review.
- Review Sensitivity: Select a confidence level from the menu.
- Add additional workflow steps.
- Select Save or Publish.
Manage Document Types
The sections below explain how to manage document types.
Create a Document Type
Follow these steps:
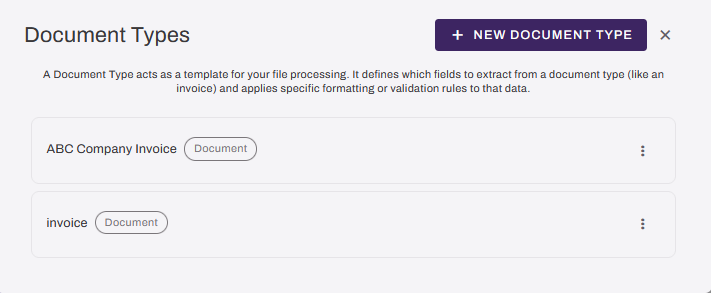
- On the Intelligent Document Processing step, select Manage Document Types from the Document Type menu.
-
In the Document Types modal, select + New Document Type.
-
Enter a description for the document type, and list the fields to be extracted.
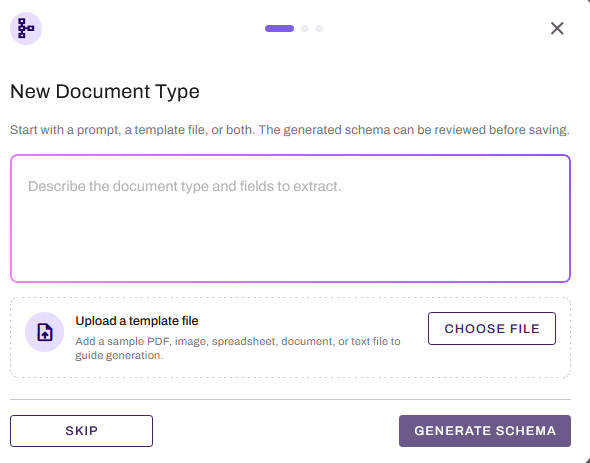
- Select Choose File to upload a template. Upload a file that is similar to, or an example of, the documents that the workflow will process.
- Select Generate Schema.
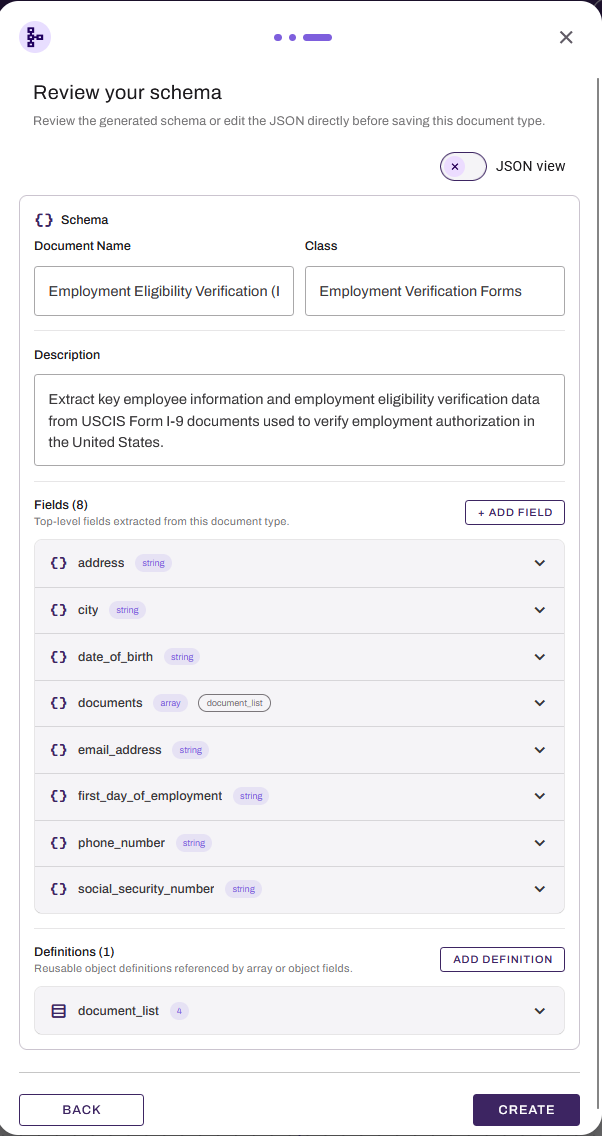
- Review the generated schema.
- Edit the schema, if necessary.
- Select Create.
Edit a Document Type
Follow these steps:
- On the Intelligent Document Processing step, select Create or Edit Document Type.
-
In the Document Types modal, select the Edit button
 next to the document type.
- Adjust the name and type as needed, and then select Next.
- You can do the following in the modal:
- Select the line items to expand the field information.
- Update the field values as needed.
- Select + Add Field to another field.
- Field Name: Give the field a unique name.
- Type: Select the value type. Options include string, array of string, boolean, number, and array of number.
- Inference: Select the type of inference.
- Instructions: Enter a natural language explanation of what the field represents.
- Select Delete to remove a field.
- Select Update when finished.
- Adjust any surrounding steps affected by the change.
- Select Save or Publish.
Delete a Document Type
Follow these steps:
- On the Intelligent Document Processing step, select Create or Edit Document Type.
-
In the Document Types modal, select Delete next to the document type.
-
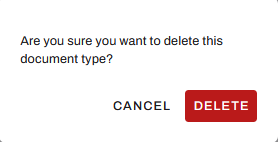
Select the Delete button in the modal.
Next Steps
Refer to the following:
In this topic: