Configure Basic Steps
Last Updated: August 18, 2026
Workflows streamline complex business processes. Use basic workflow steps to automate time-consuming, repetitive tasks.
Requirements
Review these Requirements before you start.
Configure Basic Steps
Complete the following to configure basic steps.
Form Step
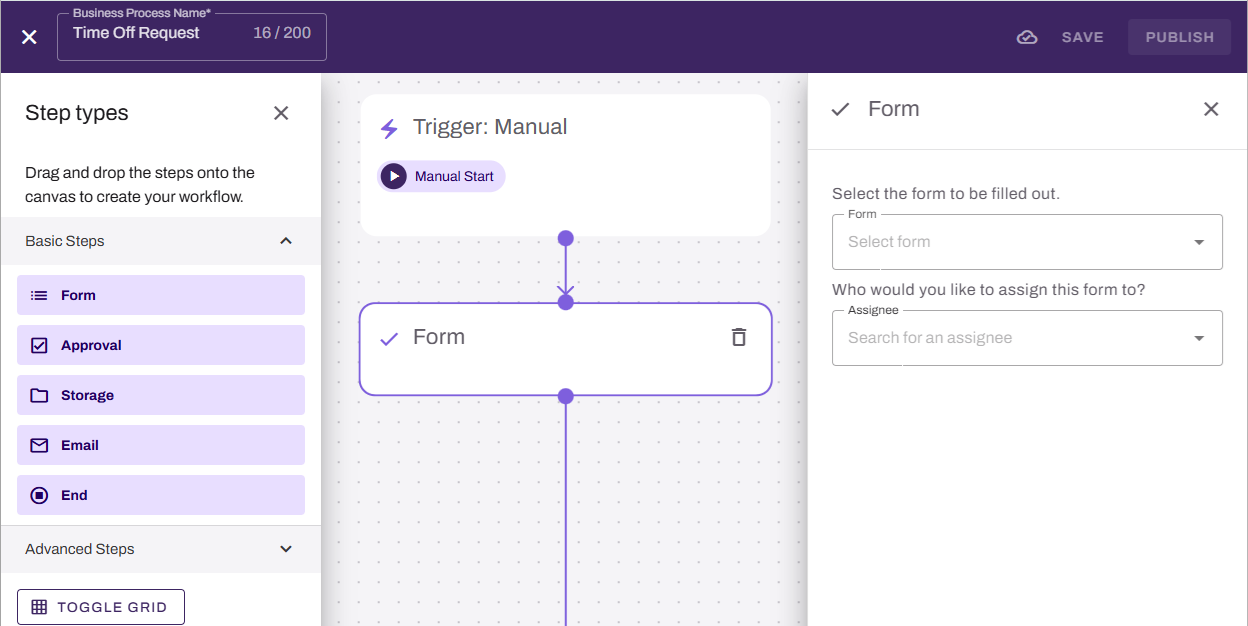
To add a Form step, complete the following:
- From the Basic Steps section, drag the Form step onto the canvas.
- Drag the previous step connector to the new step.
- On the Form step, complete the following:
- Use the Form menu to select the form that needs to be filled.
- Use the Assignee menu to select the user who needs to complete the form. You can start typing to filter the list.
Approval Step
To add an Approval step, complete the following:
- From the Basic Steps section, drag the Approval step onto the canvas.
- Drag the previous step connector to the new step.
- On the Approval step, complete the following:
- Use the Source menu to select the form from the trigger.
- Use the Assignee menu to select the person who needs to approve the step. You can start typing to filter the list.
-
(Optional) Enter a description or instructions for the approver in the Description (optional) field.
- In the Approval Button field, enter the text that should appear on the button. If you leave this field blank, the button shows Approve.
- If you want to require the approver to enter a comment when they complete the step, turn on the Require Comment option.
- In the Rejection Button field, enter the text that should appear on the button. If you leave this field blank, the button shows Reject.
If you want to require the approver to enter a comment when they complete the step, turn on the Require Comment option.
-
Select the Allow send back to submitter option if you want the approver to send the form back to the submitter to provide more information.
If you turn on this option, the approver must enter a comment for the submitter. This requirement lets the submitter make changes to the form without having to complete a new form to restart the workflow.
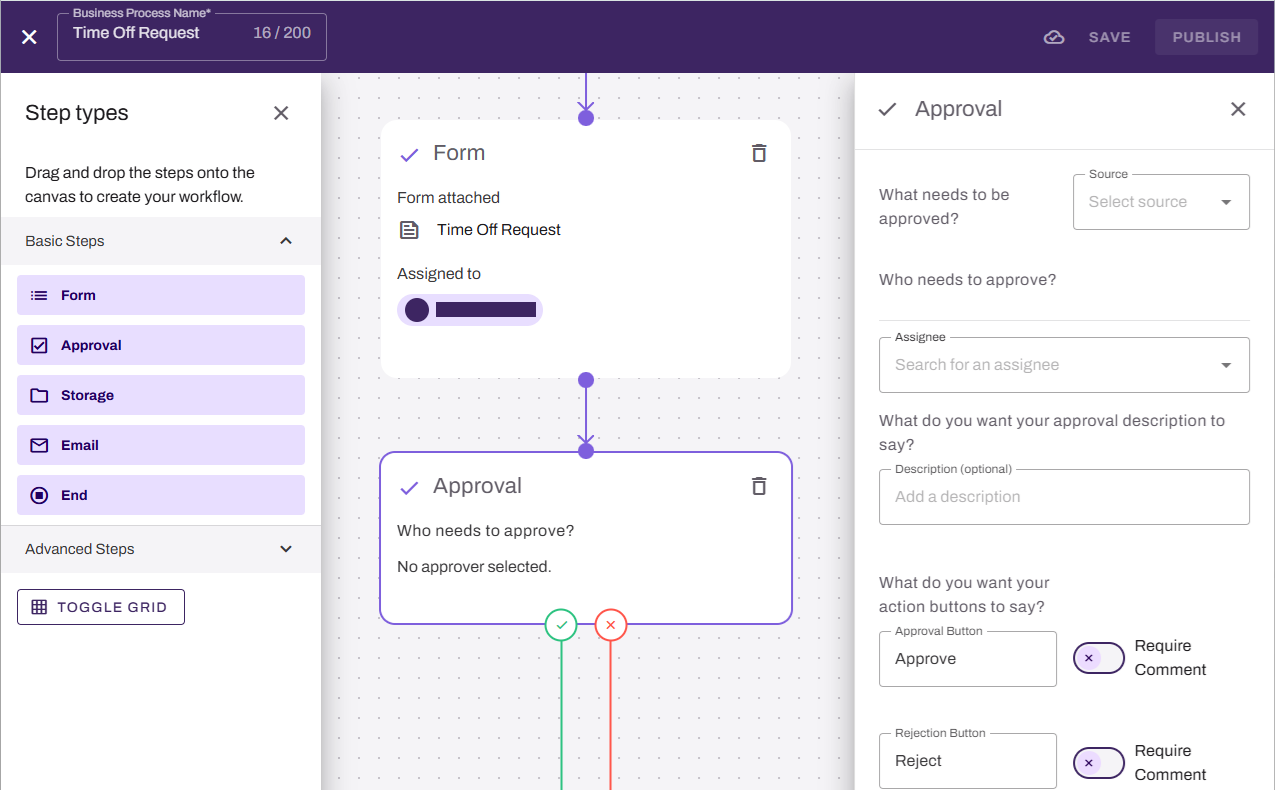
Each approval step creates two branches: One for approval  and one for rejection
  . All branches must connect to a later step to complete the workflow.
Storage Step
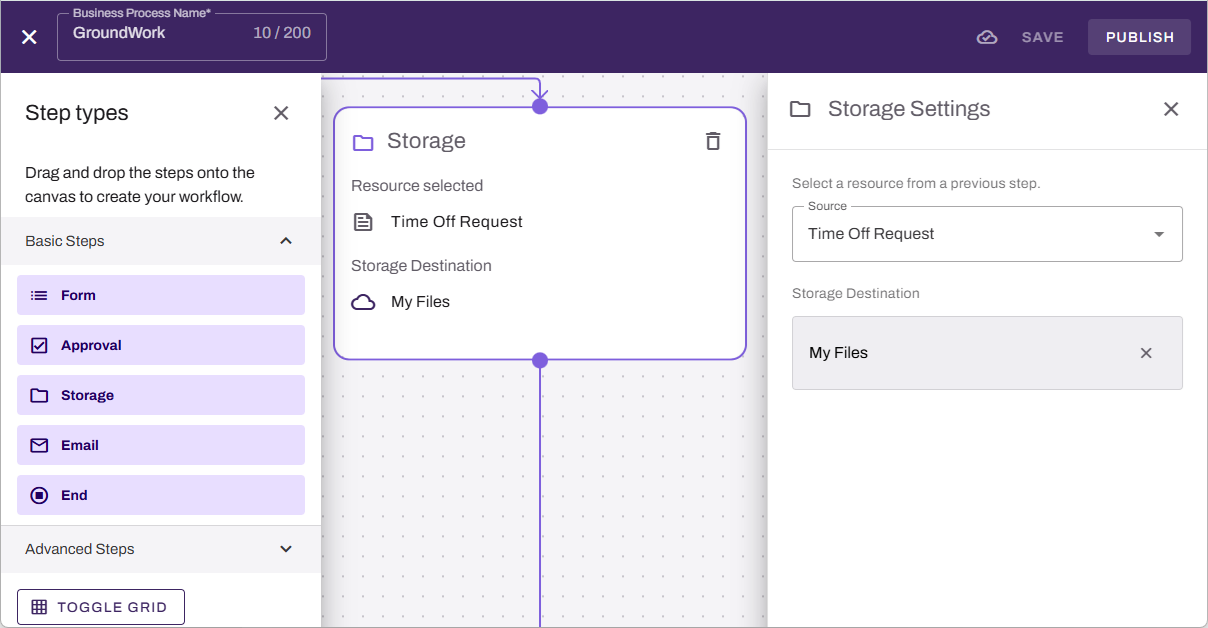
To add a Storage step, complete the following:
- From the Basic Steps section, drag the Storage step onto the canvas.
- Drag the previous step connector to the new step.
- On the Storage step, complete the following:
- Use the Resource menu to select the resource to store.
- Select the Select Folder button to choose a storage folder. You can add a new folder with the New Folder button.
- Select the Select button.
Email Step
To add an Email step, complete the following:
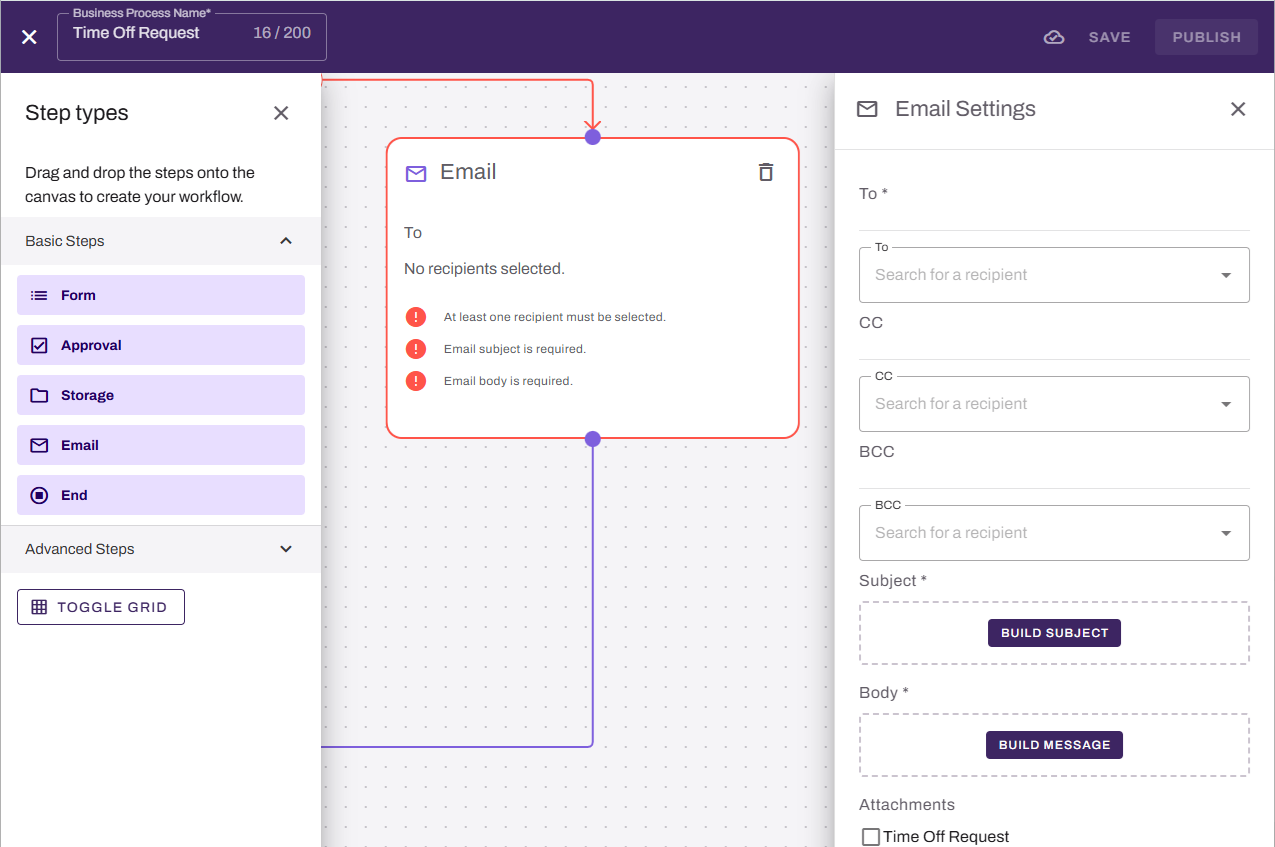
- From the Basic Steps section, drag the Email step onto the canvas.
- Drag the previous step connector to the new step.
- On the Email step, complete the following:
- Use the Assignee menu to select the user to email. You can start typing to filter the list.
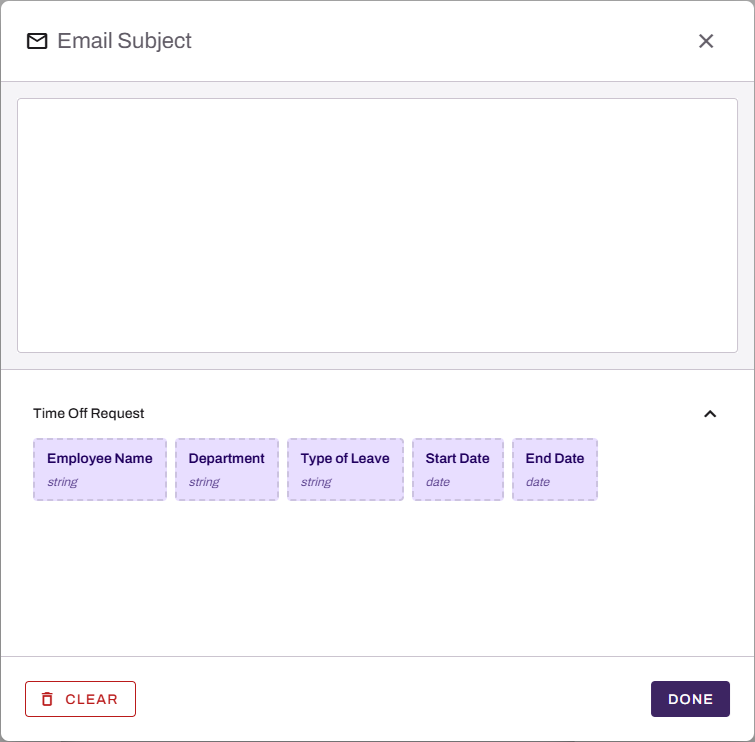
- Select the Build Subject button to configure the subject line.
- Enter text in the Email Subject modal. To add dynamic information from previous steps, select a data field from the lower part of the modal.
- (Optional) Select the Clear button to clear the Subject field.
When finished select the Done button.
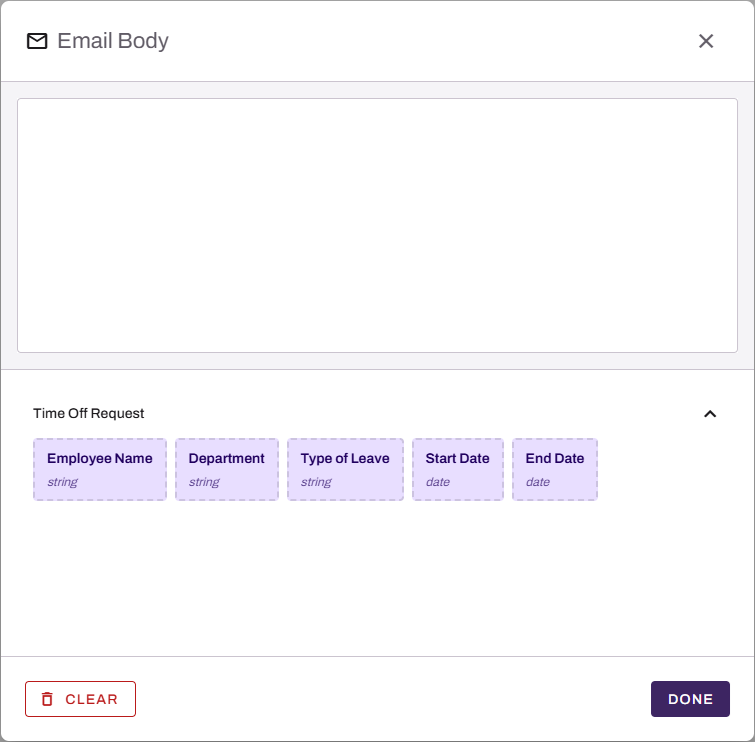
- Select the Build Message button to configure the email body.
- Enter text in the Email Body modal. To add dynamic information from previous steps, select a data field from the lower part of the modal.
- (Optional) Select the Clear button to clear the Body field.
When finished select the Done button.
-
Select the corresponding checkbox in the Attachments section for each source that should be attached to the email.
End Step
To add an End step, complete the following:
- From the Basic Steps section, drag the End step onto the canvas.
- Drag the previous step connector to the new step.
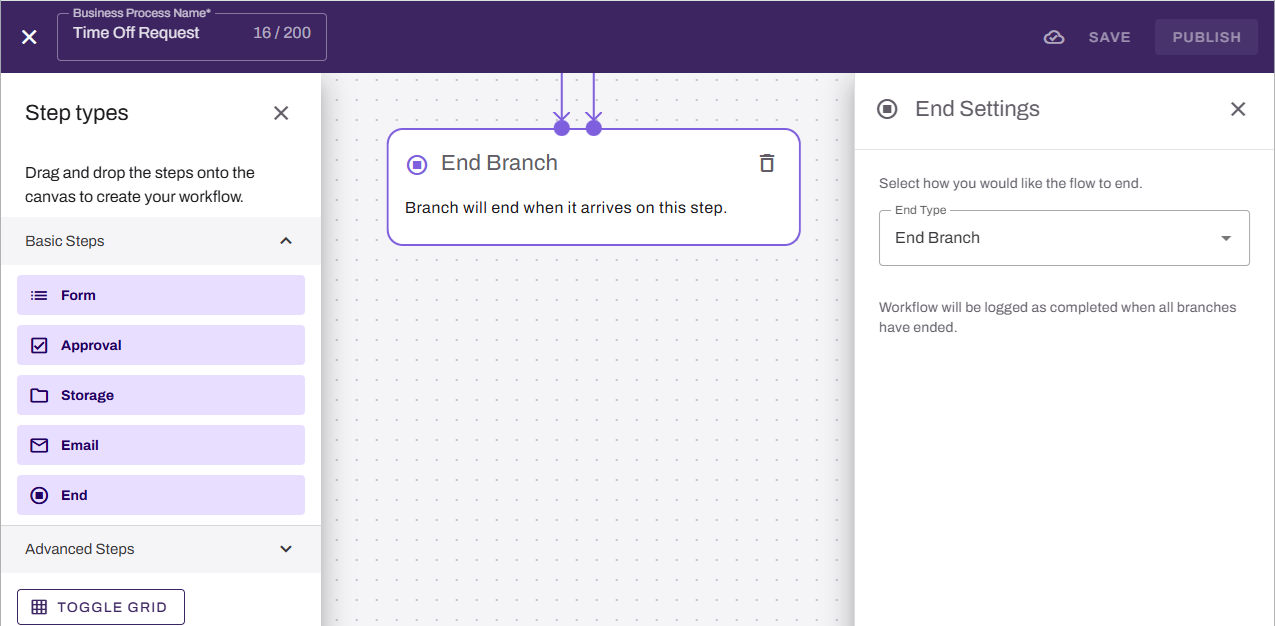
- On the End Branch step, complete the following:
- Select the type of end step from the End Type menu:
- End Branch: This branch of the workflow ends, but any in-progress branches continue.
- Terminate Workflow: The workflow stops completely. Any in-progress branches also end.
- Select the type of end step from the End Type menu:
An End step is required at the end of every branch.
Next Steps
Refer to the following:
In this topic: