Scan To Home
Last Updated: September 11, 2026
Scan to Home enables end users to scan a document and save it to a personal folder on the network. The save location is determined by the user who initiates the scan, using Lightweight Directory Access Protocol (LDAP) attributes to resolve each user's destination.
Requirements
Review the Scan to Network Requirements before configuring this feature.
Process Overview
You perform these high-level procedures:
- Active Directory (AD) Steps.
- Delegate Service Agent Rights.
- Configure Home Directory Attribute.
- Admin Console Steps.
- Enable Higher Security.
- Enable Scan to Network.
- Install Scan to Storage.
Active Directory Steps
This initial setup allows PrinterLogic to create files on behalf of end users.
1. Delegate Service Agent Rights
If you are using the Service User option in the 2. Enable Scan to Home section below, rights do not need to be delegated.
- Open Active Directory Users and Computers on a Windows machine that has access to your AD environment.
-
Find the Service Agent machine's computer account.
This is the Service Agent running the Printer Apps service.
- Go to Properties
 Delegation.
 - Select Trust this computer for delegation to specified services only.
- Select Use any authentication protocol.
- Add the file server machine (hosting the network share) and select the CIFS service.
- Save your changes.
2. Configure Home Directory Attribute
Add or configure the Home Directory Attribute to route scanned files to the defined path.
- Open Active Directory Users and Computers on a Windows machine that has access to your AD environment.
-
Navigate to the user or group you want to configure.
You can apply the Home Directory attribute to individual users or to a group, depending on how you want to deploy it.
-
Open the Attribute Editor for the selected user or group and locate the Home Directory attribute.
This attribute is built into Active Directory but may need to be surfaced if it hasn't been used before.
- Set the value for the Home Directory attribute using the path to the destination folder. The path follows this structure:
\\ServerName\SharedDirectory\%username%\FolderName.- \\ServerName: The address of the machine hosting the shared directory
- SharedDirectory: The root shared folder
%username%: A wildcard that dynamically inserts the user's SAM account name, routing each user to their own personal directory.
The wildcard character is optional. If you want all users to scan to a single shared location rather than individual directories, you can omit it and specify a static path.
- FolderName: The subfolder within the user's directory (optional, depending on your setup)
- Save your changes.
PrinterLogic queries this attribute at scan time and automatically routes the scanned file to the path defined in the Home Directory attribute. End users do not need to configure anything, and admins do not need to enter this path in the Admin Console.
Admin Console Steps
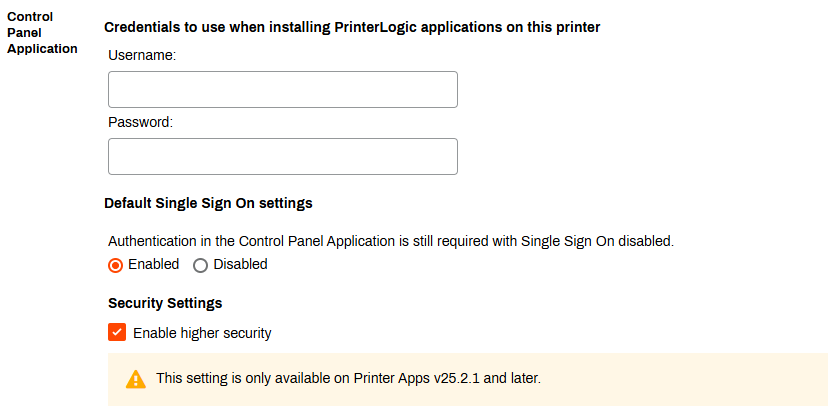
1. Turn on Higher Security
- Log in to the Admin Console.
- Go to Tools
 Settings General.
 - Scroll to the Control Panel Application section and select the Enable higher security setting.
- Select Save in the upper-right corner.
2. Turn on Scan to Home
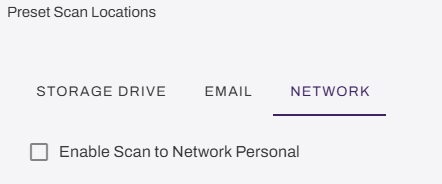
- Go to Tools Settings Scanning.
- Expand the Preset Scan Locations dropdown.
- Select the Enable Scan to Home option.
- Select from:
- User Impersonation: Scans write to the home directory as that user. Delegation required.
- Service User: Scans write to the home directory using a service account. Delegation not required.
- Select Save in the upper-right corner.
3. Install Scan to Storage
Follow these steps:
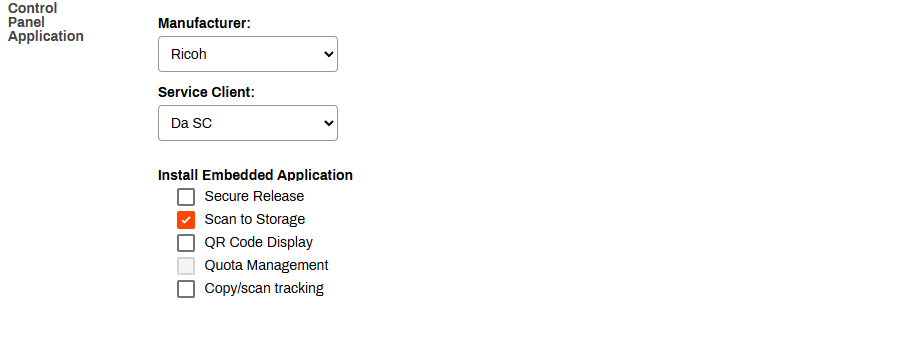
- In the Admin Console, go to the printer on which you want to install Scan to Storage.
- Select the Apps tab.
- Ensure that the correct manufacturer, CPA version, and Service Agent are selected.
-
In the Install Embedded Application section, select the Scan to Storage option.
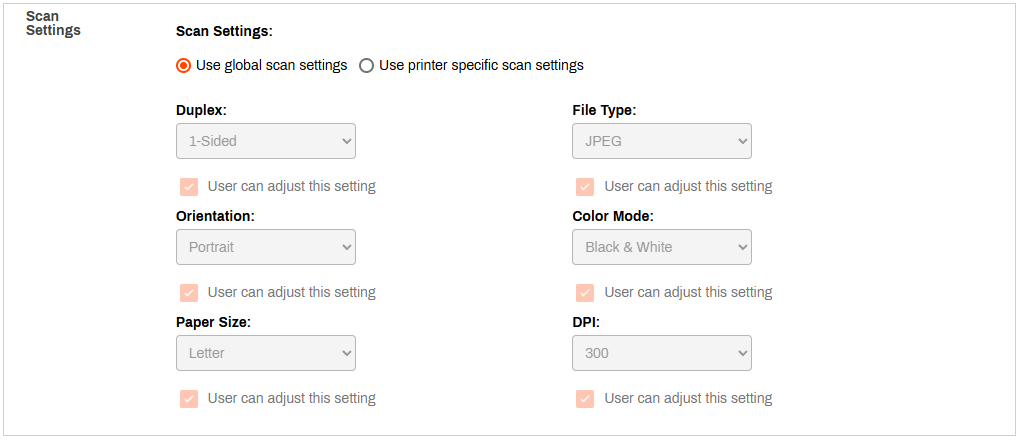
- In the Scan Settings section, select from the following:
- Use global scan settings: This option is the default. You configure these settings in the Global Scan Settings.
- Use printer specific scan settings: This makes the dropdown menus available so that you can adjust the printer-specific settings as needed.
- Select Save in the upper-right corner.
Scan to Home is now available as a destination in CPA. When a user scans, it saves to the storage location configured for your environment, accessible through File Explorer. If the storage location is unreachable, verify that the storage instance is running.
Next Steps
In this topic: