Scan To Network Shared
Last Updated: September 09, 2026
Requirements
Review the Scan to Network Requirements before configuring this feature.
To connect PrinterLogic to your network drive, you need the following:
- Shared drive and folder structure.
- Admin credentials to access the network drive.
- At least one Service Agent running the Printer Apps service.
- Preset Scan Locations configured.
Process Overview
You perform these high-level procedures:
- Connect the Network Drive.
- Test the Connection.
- Configure Preset Scan Locations.
- Install Scan to Storage.
1. Connect the Network Drive
Follow these steps:
- In the Admin Console, go to Tools
 Settings Scanning.
 -
Expand the Storage Connections section, and select Add Connection.
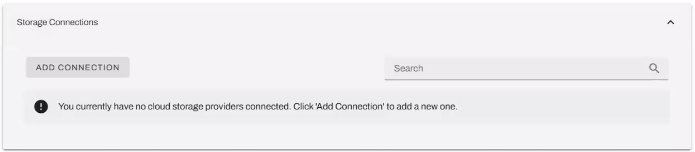
- Select Network, and then select Next.
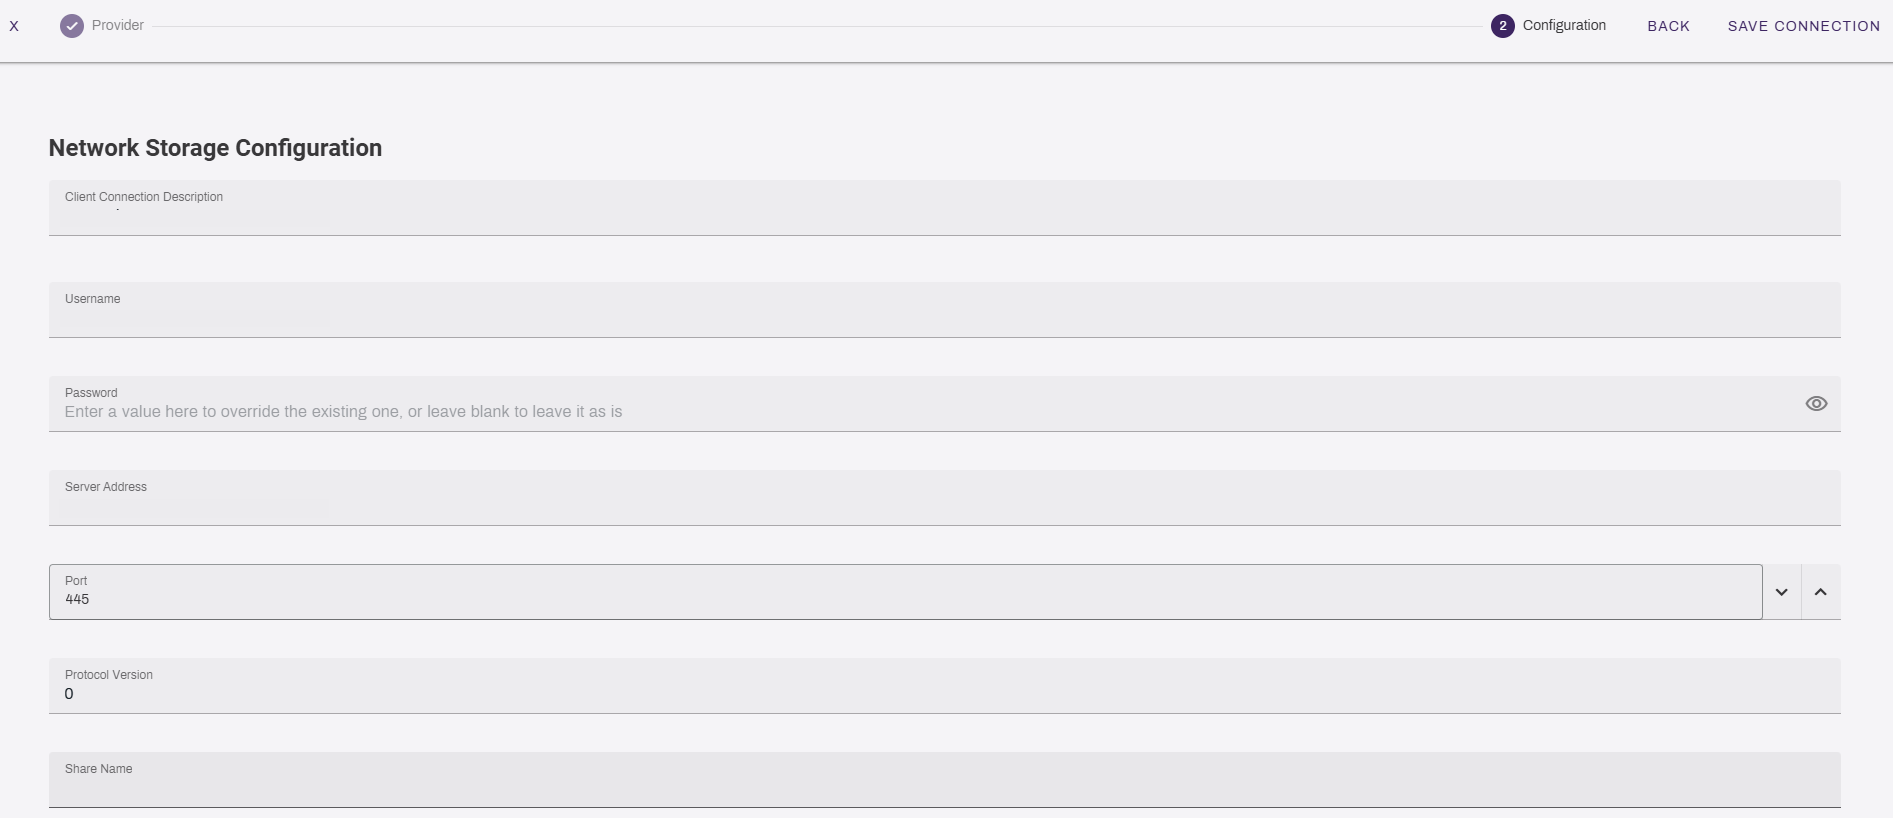
- Complete the following:
- Client Connection Description: Enter a description for the connection. This description appears in the Preset Scan Locations section and on the CPA.
- Username: Enter the username that you use to connect to the network drive.
- Password: Enter the password that the same username uses to connect to the network drive.
- Server Address: Enter the Fully Qualified Domain Name (FQDN) of the server that is hosting the shared drive. For example,
fileserver.domain.com. - Port: Enter the port used to connect to your network drive. Port 445 is the default.
- Protocol Version: Enter the protocol version.
- Share Name: Enter the name of the network share.
- Select Save Connection in the upper-right corner.
2. Test the Connection
The connection test includes all Service Agents running the Printer Apps service. Follow these steps:
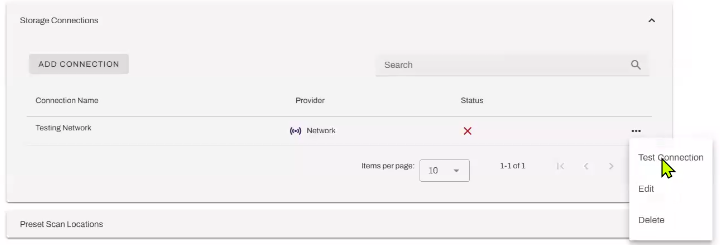
- In the Global Scan Settings, expand the Storage Connections section.
- Select the More menu
 next to the network connection.
 -
Select Test Connection.
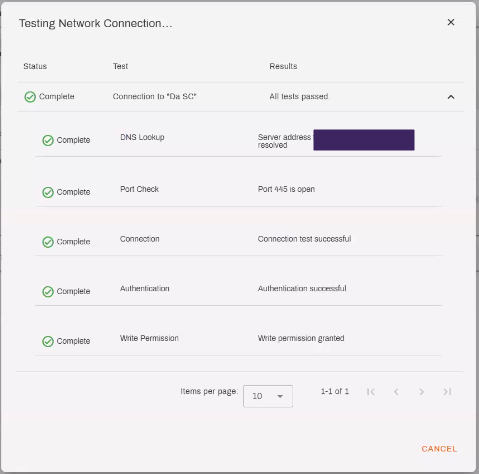
- Allow at least 1 minute for the test to finish.
- If the test fails, select the More menu next to the network connection, and select Edit.
- Review and adjust the network connection information, and then select Save Connection.
- Test the connection again, following the steps above.
- If the test fails, select the More menu
- A checkmark appears if the test is successful.
- Close the modal.
3. Configure Preset Scan Locations
You can set up multiple connections to your preferred storage provider, but you can configure a connection to a folder only once. When you connect a preset scan location, you assign a unique name, which appears in the Preset Destination menu on the screen. For Mobile Scan the unique name appears in the Export options for users.
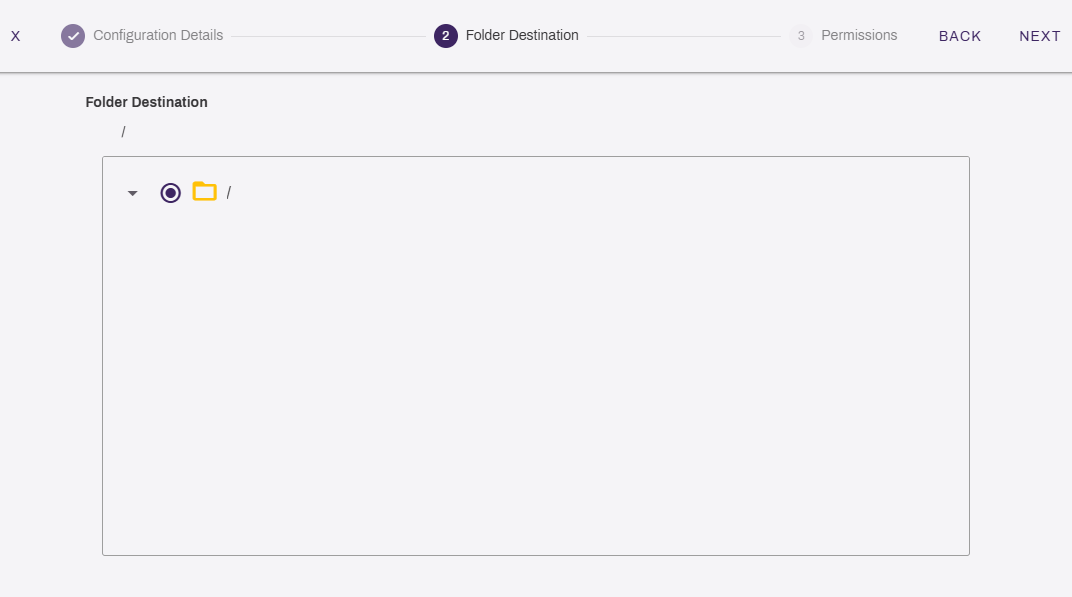
To configure a folder destination, you must have already created the folder in the storage location.
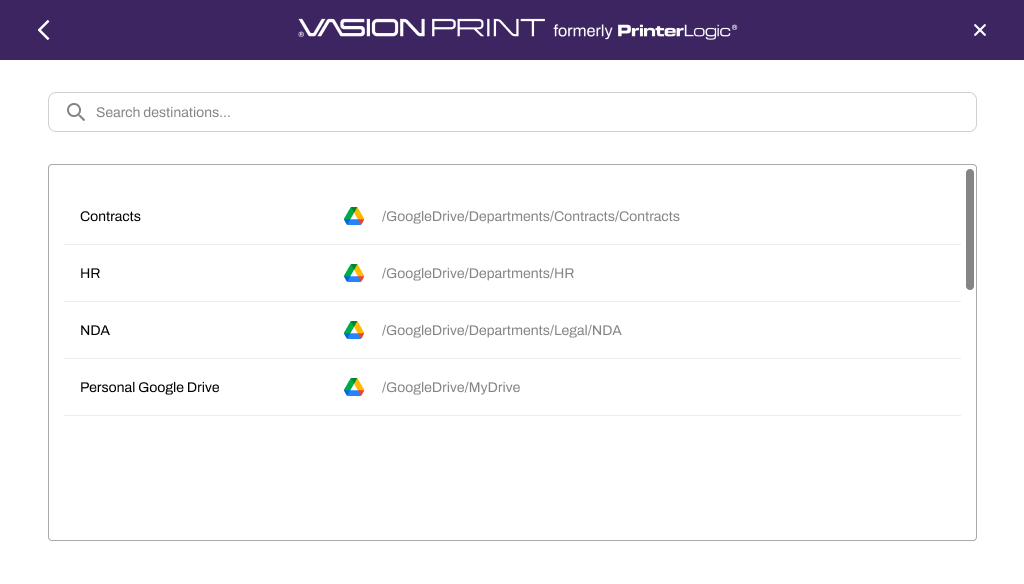
Preset Scan Locations
Follow these steps:
- In the Admin Console, go to Tools Settings Scanning.
- Select Preset Scan Locations.
- Select the Storage Drive tab.
- Select Add Configuration.
-
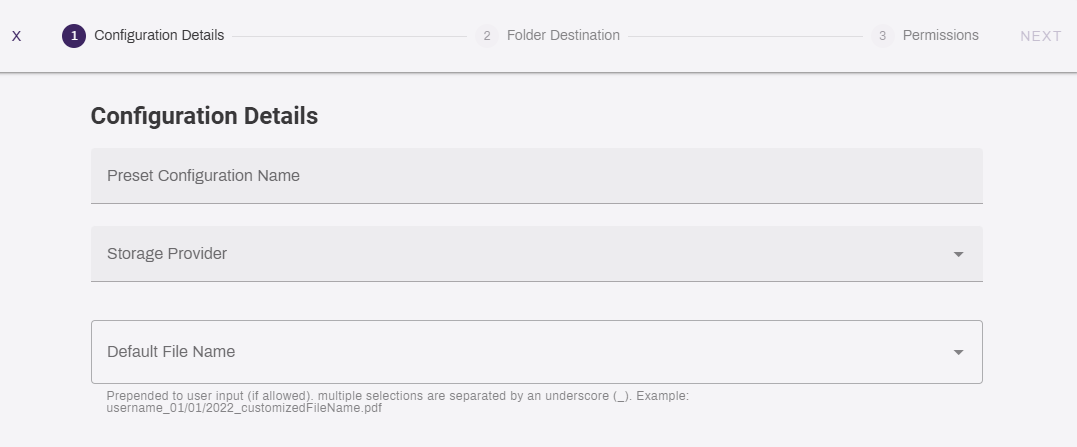
On the Configuration Details page, complete the following:
- Preset Configuration Name: Enter a name to identify the scan destination.
- Storage Provider: From the dropdown menu, select the storage provider that contains the folder.
- Default File Name: You can define which name is applied to the file when it is scanned. Select from the following:
- Select one or more options from the list. If you select more than one, they appear in the order that you selected.
- Manually enter a default file name. You can enter a manual input and preset selections.
- Leave the field blank. The end user can enter or modify this name at the CPA.
- Select Next.
-
On the Folder Destination page, select the folder that you want to use for the preset location. You can also search to locate the folder.
- Select Next.
-
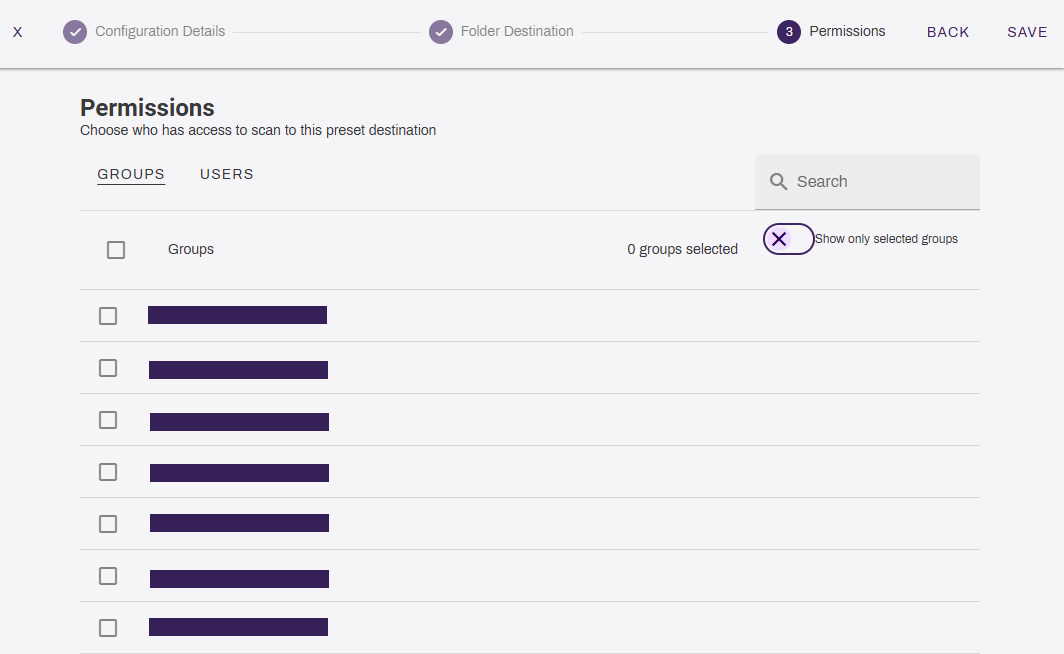
On the Permissions page, select the users and groups that should have access to the preset destination.
- Select Save.
After you configure the storage location and preset scan location, the storage location appears on the end user's mobile device when they use the Export option.
4. Install Scan to Storage
The following steps are only for customers using the Scan to Storage features, including Scan to Shared (Cloud) and Scan to Network, for the CPA. The printer object's Apps tab allows for single installation. For bulk installation refer to CPA Manager.
Follow these steps:
- In the Admin Console, go to the printer on which you want to install Scan to Storage.
- Select the Apps tab.
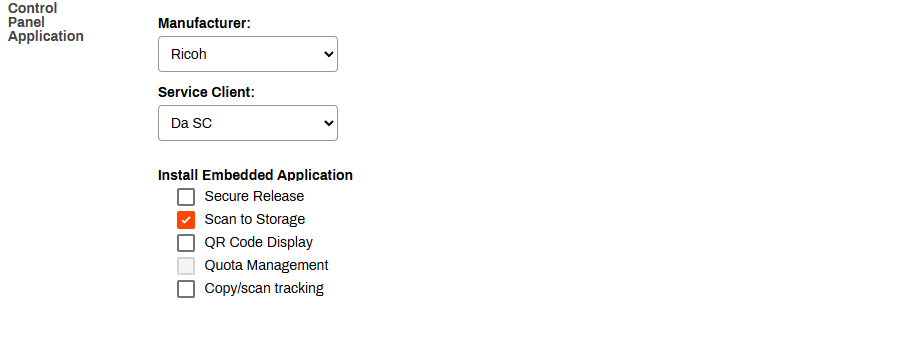
- Ensure that the correct manufacturer, CPA version, and Service Agent are selected.
-
In the Install Embedded Application section, select the Scan to Storage option.
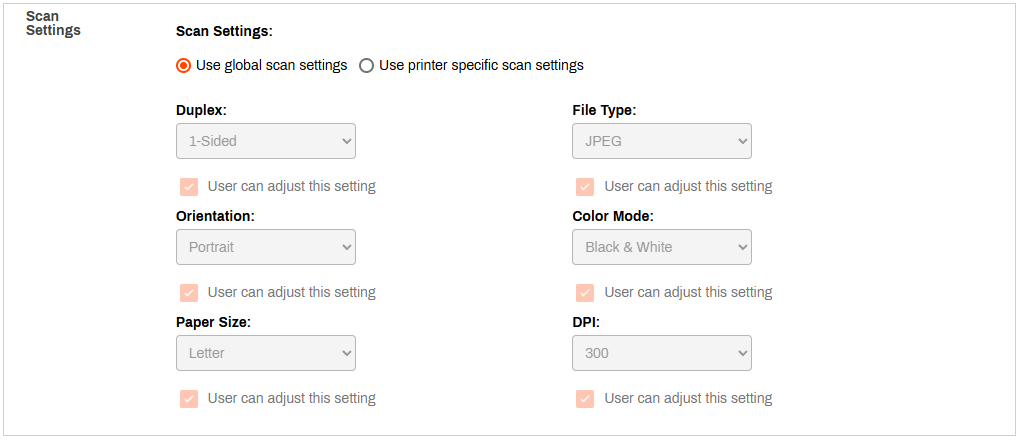
- In the Scan Settings section, select from the following:
- Use global scan settings: This option is the default. You configure these settings in the Global Scan Settings.
- Use printer specific scan settings: This makes the dropdown menus available so that you can adjust the printer-specific settings as needed.
- Select Save in the upper-right corner.
The preset scan destination is now available as a destination in CPA. When a user scans, it saves to the shared storage location configured for your environment, accessible through File Explorer. If the storage location is unreachable, verify that the storage instance is running.
Next Steps
In this topic: