Configure Print To Workflow
Last Updated: August 19, 2026
Use this topic to configure Print to Workflow so that end users can route documents into Vasion Automate workflows directly from the print dialog.
Requirements
Review the Requirements before configuring this feature.
- The Send to Vasion Automate object reaches users through deployments or self-installing from the Self-service Portal. For more details refer to Printer Deployment.
- The specific workflows a user sees when selecting the workflow object are based on workflow permissions. Users only see the workflows they have Viewer permissions for.
Configure Print to Workflow
1. Configure Send To Vasion Automate Object
To configure the Send to Vasion Automate object:
- Create or locate the Send to Vasion Automate object in the tree structure.
- Select Hide from Portal if you only want the object to be available through deployments.
-
Select the Drivers / Profiles tab, and assign a driver for the desired operating system(s).
The Use Internet Printing Protocol (IPP) driver option is not supported by this object. Use a universal or generic driver from your print environment.
- Select the Security
 Portal Security tab.
- Select the Add button to define the users, groups, or devices that can see this object on the Self-service Portal.
- Select Save.
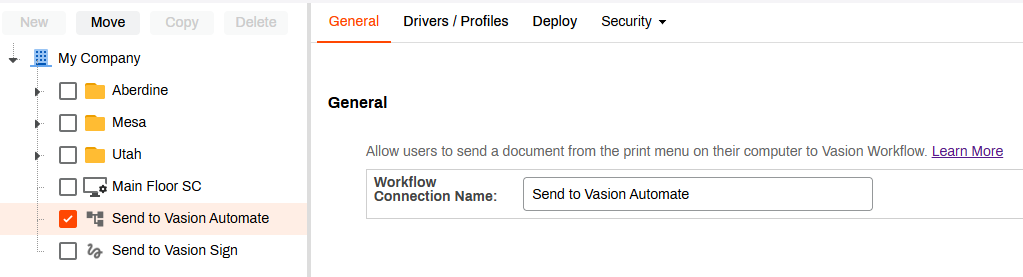
2. Add Deployments
Deployments control which users, groups, and devices automatically see the Send to Vasion Automate object in their print dialog. Alternatively, users can self-install the object from the Self-service Portal if they are included in the portal security assignments.
To add an object deployment:
- Select the Deploy tab on the object.
- Select the Add button to define the users, groups, or devices.
- Save your changes.
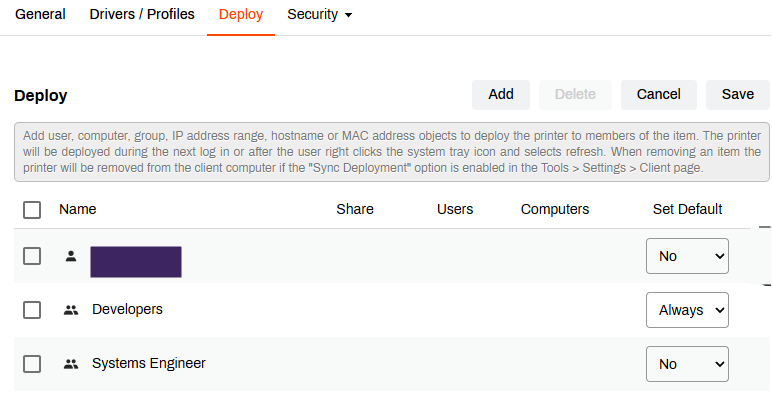
Object deployments automatically install for the defined users, groups, and devices during the next client check-in.
If a user has the Send to Vasion Automate object deployed but no workflow permissions assigned, they see the object in their print dialog but receive a No workflows available message when they select it.
3. Assign Workflow Permissions in Automate
Separately, you must assign workflow Viewer permissions in Vasion Automate so that specific workflows appear in a user's selection dialog when they select Send to Vasion Automate.
To assign Viewer permissions for workflows:
- Select Workflow from the side navigation, then select Business Process.
-
Select the three dots to the right of the workflow, then select + Share.
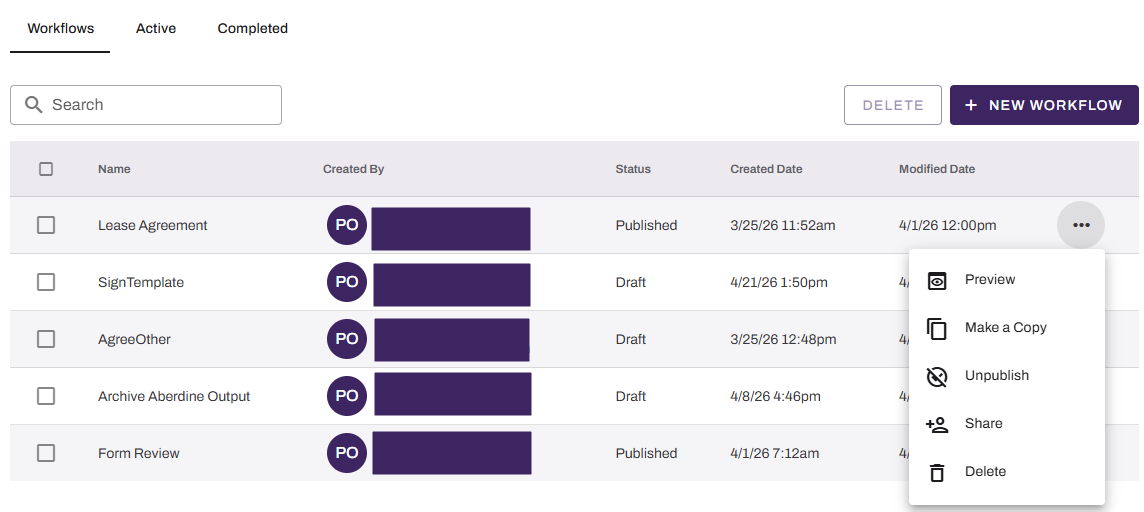
-
Add Viewer permissions for Users or Groups you want to have access to this workflow option.
Users have access to only the workflows they have Viewer permissions for.
- Use the + User or Groups button to add additional users and groups.
- Select Save in the upper-right corner.
- Repeat for each workflow you want to surface to end users.
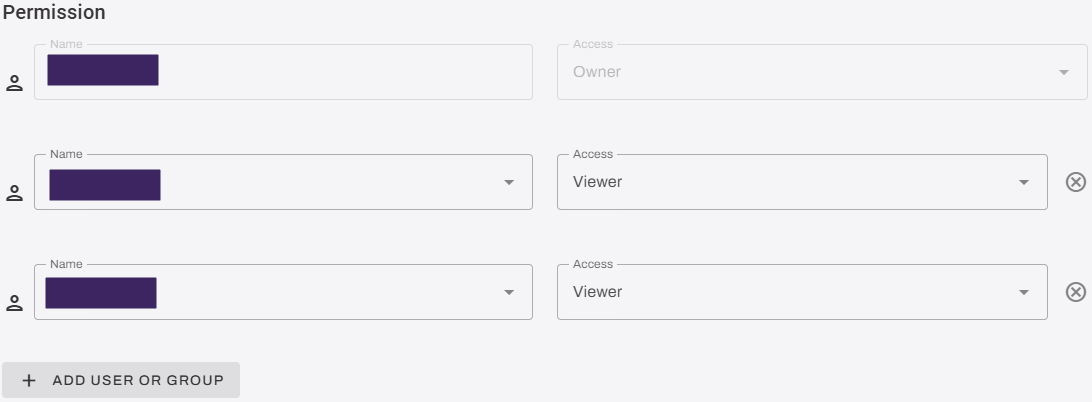
Adding the Viewer permissions above displays the available workflows for a user when they select the Send to Vasion Automate object in the print dialogue. Selecting this destination routes the document to Vasion Automate rather than to a printer. No physical copy is produced.
Next Steps
In this topic: