Menu Navigation
Last Updated: September 11, 2026
The tool bar at the top-right of the Print page displays the following options:
- Advanced Search
- Reports
- Tools
- Support & Training
- Username

With the exception of Advanced Search, each of those options displays a menu with various options to view details about your instance or to configure settings. This section provides a brief overview of these options. Depending on your role and licensing, some options may not be available.
Advanced Search
Select the search button  to access the Search field. You can search for search for specific items using variable fields to narrow search results. This is useful for environments that have a deep subfolder structure. Select the top right-corner of the Search field to open the Search In modal and specify the folder to search in the tree, or search the whole tree by leaving it on the top-level domain.
The search icon appears in the Admin Console header only in tree view mode.
The Field items are the variables you can select. By default, one variable option shows, and you can add or remove more using the corresponding +/- sign. The variable type you select determines the type of the Value field. Most variables have a text entry Value field, but for some variables the Value field is a dropdown you can use to select preset options.
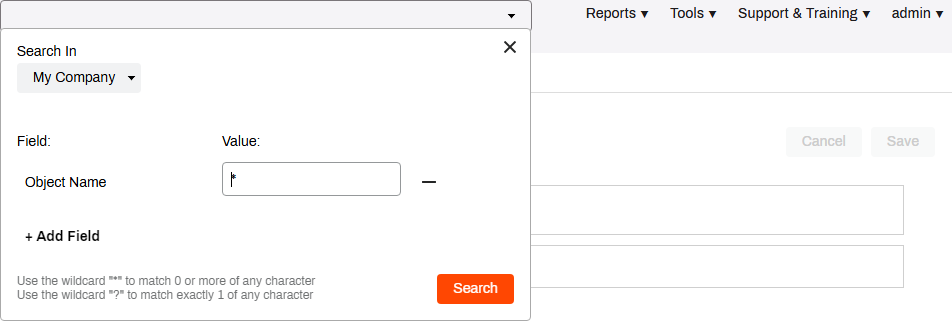
Advanced Search Variables include:
- Folder Name
- IP Address Range Name
- Object Name
- Printer
 General tab: Printer Name, Location, Comment, Server Name, custom fields
 - Printer Port tab: Port Name, Protocol, Port Number, SNMP Status, Community Name, SNMP Dev Index
- Printer Deploy: Deployment Associations
- LDAP A lightweight client-server protocol for accessing X-500-based directory services. LDAP runs over TCP / IP or other connection-oriented transfer services. Printer Deployments
- Printer Capabilities: Supports Color, Supports Duplex
- Printer Profile Settings: Duplex Configured, Quality Configuration
Search Results
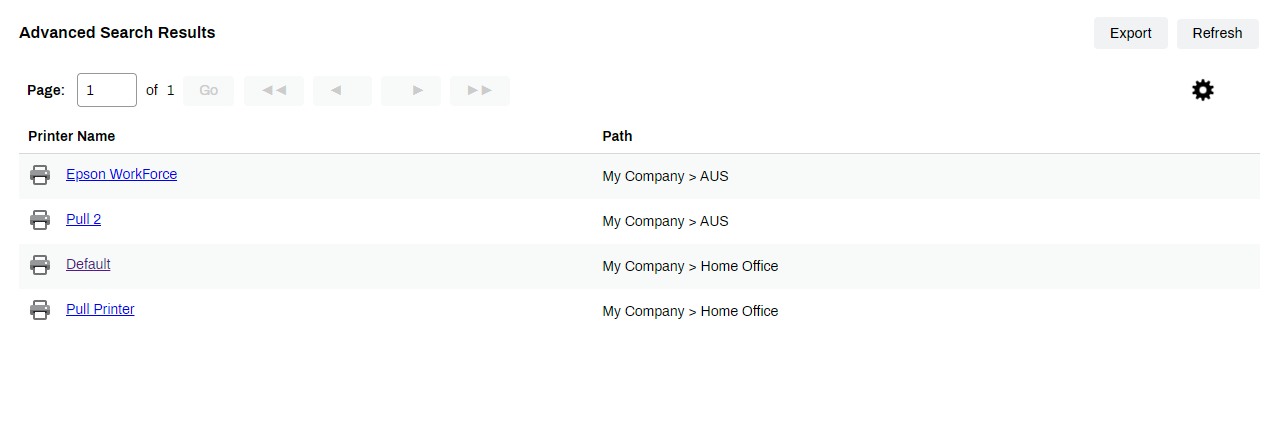
The search results display on a table format. Select an item to go directly to the tree. and you can use the Export button in the upper-right corner to export your search results to a .csv file.
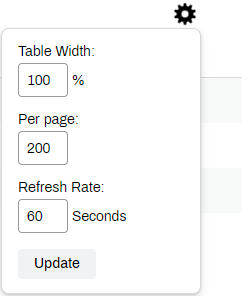
If your environment returns a large amount of results, use the Settings button  to configure the table width and the number of search results per page.
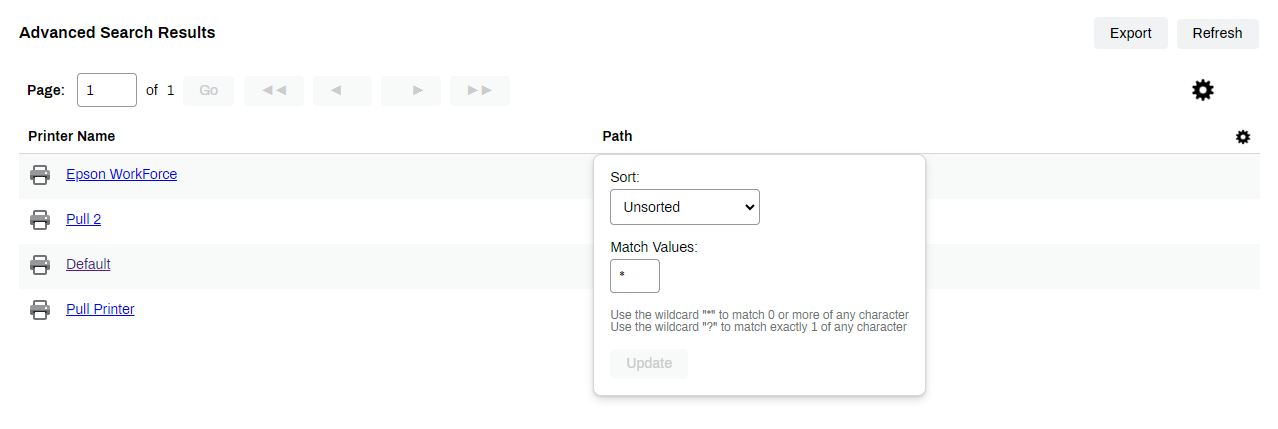
You can also select the column heading to further sort or filter the results.
Reports
The Reports menu provides links to the following reports:
- Administrative Audit Records: Details on Admin Console setting changes and the user who made the adjustments.
- Workstations Report: Shows basic device information from workstations with the Agent installed.
- Print Job Records: Amount of printing, usage patterns, and tracking for charge back purposes.
- Simplified Scanning Report: Scanning usage in your environment.
- Scheduled Reports: Configure Print Job Records reports to automatically send data sheets to the defined email address(es).
- Printer Status Reports.
- Printers w/ Errors Only: Display printers reporting errors or warnings.
- All Printers: Displays all printers along with the SNMP data gathered for it.
- Printers w/ Active Print Jobs: Displays real-time view of printers that currently have at least one active job in the system.
- Quota Management Report: Provides a quick way to export quota data for users and groups into a CSV file.
For more details refer to Reports.
Tools
The Tools menu provides links to the following tools and settings:
- Release
- Print Jobs: Search for held print jobs by printer name, document title, user, or computer. You can select and release any print job returned from the Print Jobs Release page.
- Release Stations: Create and manage release stations. A release station is a dedicated device stationed at the printer to release print jobs if the printer does not have a digital display.
- Delegated Release: Delegate others to release held print jobs on your behalf. For more details refer to Delegated Release.
- Settings
- General: Configure various default settings, including:
- Operating Systems Supported: Define which operating systems display on the Driver / Profile Repository window and on the printer object's Drivers / Profiles tab. For more details refer to Adjust the Operating System (OS) List.
- Cache: Designate a Cache Manager to keep copies of drivers, driver profiles and Agent installation files using file share. For more details refer to Cache Manager.
- Tree Settings: Option to require unique names for TCP / IP printers to prevent duplicate names. For more details refer to Require Unique Printer Names.
- OM Plus: Define servers and authentication for OM Plus integrations. For more details refer to OM Plus Printing.
- Identity Provider Settings: Options to set up different identity providers (LDAP / IdP). For more details refer to Identity Providers (IdPs).
- Control Panel Application: Global setting for the credentials to install the CPA and the default Single Sign-On (SSO) settings. For more details refer to Control Panel Application (CPA).
- SNMP Settings: Options to set up SNMP status monitoring. For more details refer to SNMP Status Monitoring.
- Custom Printer Fields: Option to add additional text fields to further customize printer objects in the Admin Console. For more details refer to Custom Printer Fields.
- Localization Settings and Timezone Settings: For instance and reporting localization. For more details refer to Reports.
- Password Settings and Login Settings: For local PrinterLogic and root accounts. For more details refer to Local Account Settings.
- Off-Network Print A feature that provides a way to keep printers on secure networks while still allowing all users to print regardless of which network they use. ONP gives printer access to remote employees and contractors without the need for virtual private networks (VPNs) or web portals.: Settings used to configure Off-Network Print and Off-Network Cloud Print. For more details refer to Off-Network Printing.
- Printing
- Print Jobs: Settings used in Print Job Records reports. For more details refer to Print Job Records.
- Pull Printing and Purging: Settings used to configure Pull Print and Direct Secure Release/Offline Secure Release Print/Purging. For more details refer to Secure Release Print.
- Email Pull Printing: Settings used to configure Email Printing. For more details refer to Configure Email Printing.
- Direct Email Printing: Send emails directly to printers where they automatically release after user authentication. For more details refer to Direct Email Printing.
- Web Print: Settings used to configure Web Print. For more details refer to Web Print.
- Scanning: Where you can configure global settings to enable Simplified Scanning features. For more details refer to Simplified Scanning.
- Scan Settings: Enforces the default global settings for every printer.
- Duplex.
- Orientation.
- Paper Size.
- File Type.
- Color Mode.
- DPI.
- Mobile Scan Settings: Enable mobile scanning.
- Allow native phone scan functions: Lets users send files using native scan apps, such as email and SMS.
- Storage Connections: Configure third-party storage connections.
- Preset Scan Locations: Configure predetermined folder locations within your third-party storage for easy end user scanning.
- Scan Settings: Enforces the default global settings for every printer.
- PrinterLogic Output: Settings for PrinterLogic Output options.
- Rules and Routing: Enable rules and routing.
- Output Automation: Set the default print language globally.
- Confirmed Delivery: Allow and enable confirmed delivery to ensure print jobs are successful.
- Portal: Where you can view the Self-service Portal URL, configure portal options, and add a custom header to the Self-service Portal A web portal where end users can install printers and drivers, manage printer settings, and access the Release Portal.. For more details refer to Portal Security, Portal Settings, and Self-service Portal Setup.
- Client
- Client Check-in: Enable the automatic Agent check-in and set the check-in interval. For more details refer to Agent Refresh.
- TCP/IP & Windows Shared Printer Settings and Printer Settings: Settings used to keep printers in sync with Admin Console changes and manage existing printers. For more details refer to Sync Options and Manage Existing Printers.
- Windows Shared Printer Settings: Settings to create network shared printers. For more details refer to Windows Shared Printer Settings.
- Shortcut Options: Settings that enable additional options for the installed Agent. For more details refer to Agent Refresh.
- Automatic Client Update and Deployable Client Packages: Settings used to update the Agent from the Admin Console or download the Agent packages for third-party deployments. For more details refer to Agent Updates.
- Independent Service Manager: Section to download the Independent Service Manager (ISM) files. For more details refer to Independent Service Manager (ISM).
- Home URL Security: Settings for admins managing multiple instances. For more details refer to Home URL Security.
- Microsoft Printer Conversions: Settings used to convert existing printers into managed printers. For more details refer to Conversion Settings.
- Write Filter Settings: Setting used to adjust the Agent on write-filtered devices. For more details refer to Deploy the Agent.
- General: Configure various default settings, including:
- Driver / Profile Repository: The management hub for all drivers and profiles in your environment. For more details refer to Driver / Profile Repository.
- Tokens
- Authorized Devices: Where you generate and manage authorization codes and active devices. For more details refer to Device Authorization.
- API Keys: Where you can generate an application programming interface (API) key and manage active API A set of rules or protocols that can be used to communicate with an app, providing the ability to read or modify data in that system. keys. For more details refer to EDW Configuration.
- Identity Management and Identities: Where you can review the identity ID string, how many users are associated with that ID, and any user detail information from any connected IdP. For more details refer to Identity Management.
- Users: Where you manage users with access to the Admin Console. For more details refer to Admin Console Users.
- Print Job Costs: Where you can configure printing cost templates for charge back purposes, reporting, and Quota Management. For more details refer to Print Job Costs.
- Quota Management: Where you can configure Quota Management settings. For more details refer to Quota Management.
- Badge Management: Where you can register and manage user badges. For more details refer to PrinterLogic Badge Management.
- Windows Print Server Links: Where you can manage links to any Windows print servers, if you continue to use them. For more details refer to Windows Print Server Links.
- Advanced Groups: Where you can create and manage printer groups for deployments. For more details refer to Advanced Groups.
- PrinterLogic Portal: Link to the Self-service Portal.
- Import / Export
- Import Microsoft printers into PrinterLogic as Direct IP printers: Launches the printer import tool to quickly and easily import printers into your instance. For more details refer to Import Microsoft Printers.
- Server Scanner: Launches the server scanner tool to find out how many SNMP enabled printers are on the defined server. For more details refer to Server Scanner.
- Network Scanner: Launches the network scanner tool to find out how many SNMP enabled printers are currently running on a network. For more details refer to Network Scanner.
- Data Manager: Launches the Data Manager which you can use to perform various actions in bulk. For more details refer to Data Manager.
Support & Training
The Support & Training menu provides links to the following:
- Knowledge Base: Link to the Vasion library of knowledge base articles.
- Product Guide: Link to the PrinterLogic documentation.
- Product Feedback: Link to a form where you can submit feedback or feature requests.
- Support Request: Link to a form where you can submit a support ticket.
- About PrinterLogic: Link to the about page that lists the current version of various PrinterLogic components.
Username
The last option displays your user name and provides the following options:
- My Account: View an account summary that shows the total number of licenses, how many are consumed, how many are available, and your subscription expiration date.
- Sign Out: Use this option to log out of the Admin Console.
In this topic: