Configure Send to Storage
Last Updated: September 09, 2026
This topic explains how to add a Storage step to a workflow.
Key Points
Review the Send to Storage topic to understand the requirements and how this feature works. Review the following key points:
- You cannot edit a published workflow. You must either create a copy or unpublish the workflow to edit it.
- There must be a form or document to use as a resource.
- There must be a storage location, either Storage or a third-party storage provider.
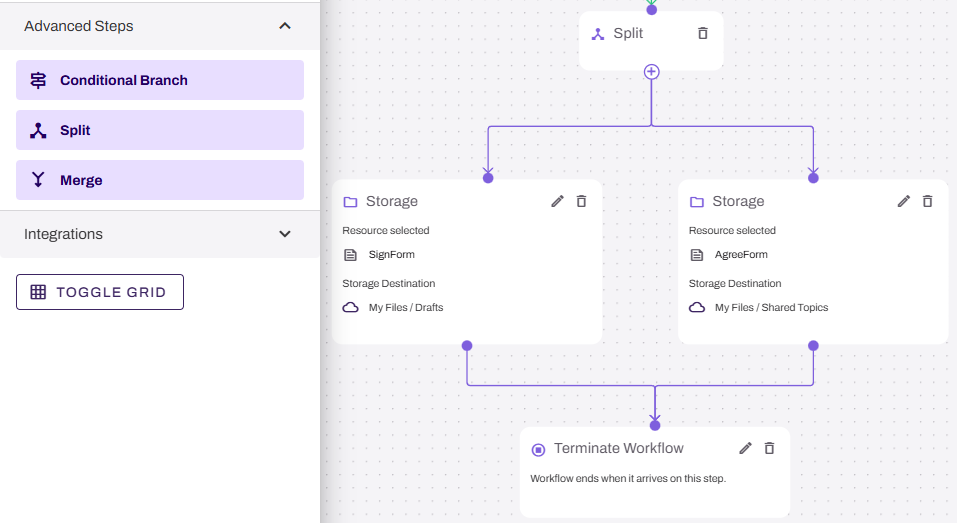
- To send a file to multiple folder locations, use a Split step in Workflow.
Edit a Workflow
You cannot edit a workflow that has the Published status.
Do the following to unpublish a workflow:
- In Vasion Automate select Workflow from the left-side navigation.
- Select Business Process.
-
Select the More menu
 to the right of the workflow.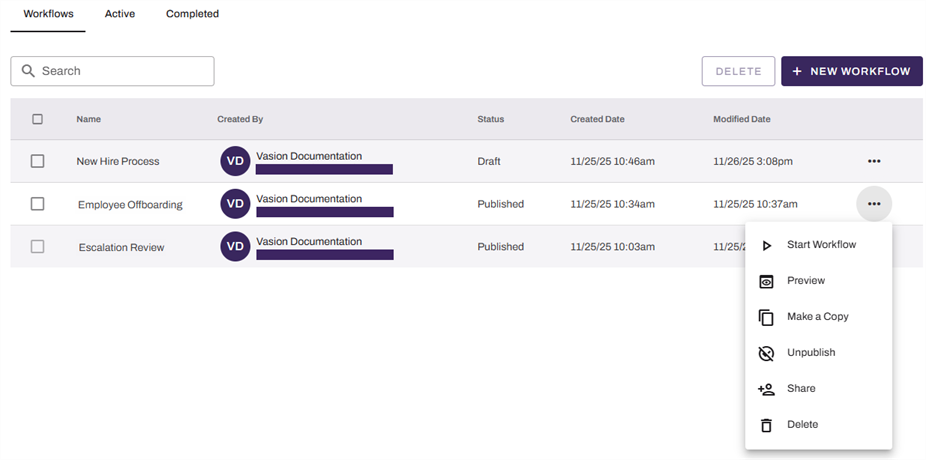
- Select Unpublish.
- Select Unpublish in the Unpublish Workflow modal.
The status changes to Draft, and you can now edit the workflow.
Add a Storage Step
For details on building a workflow, refer to Build a Workflow. Do the following to add a Storage step to a workflow:
- In Vasion Automate select Workflow from the left-side navigation.
- Select Business Process.
-
Select the draft workflow to open it, or select the More menu
to the right of the workflow and select Edit.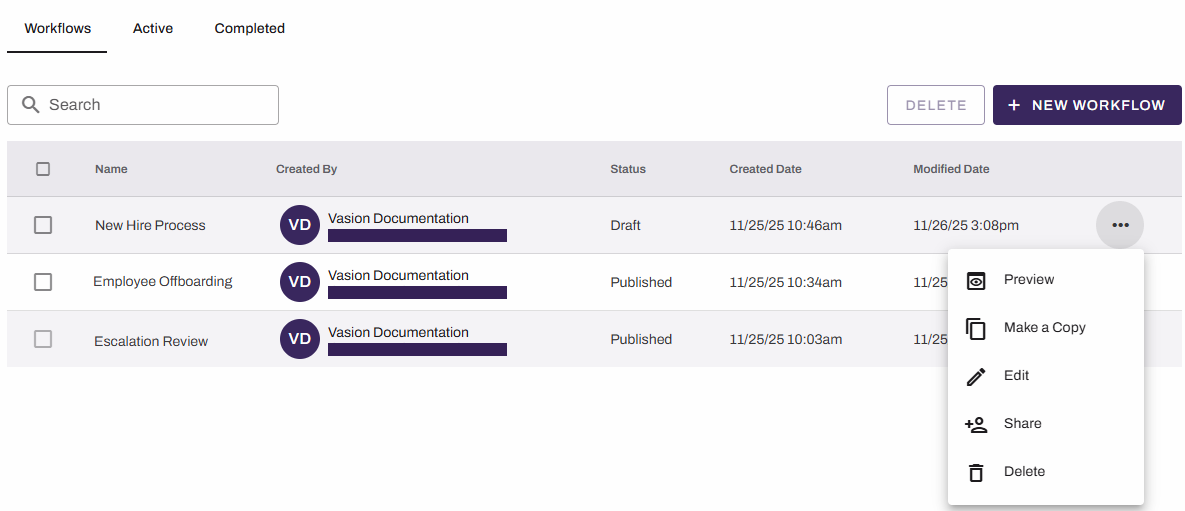
- From the Basic Steps section, drag the Storage step onto the canvas.
- Drag the previous step connector to the new step.
- On the Storage step, complete the following:
- Use the Resource menu to select the document or form.
In the Storage Destination section, select Select Folder.
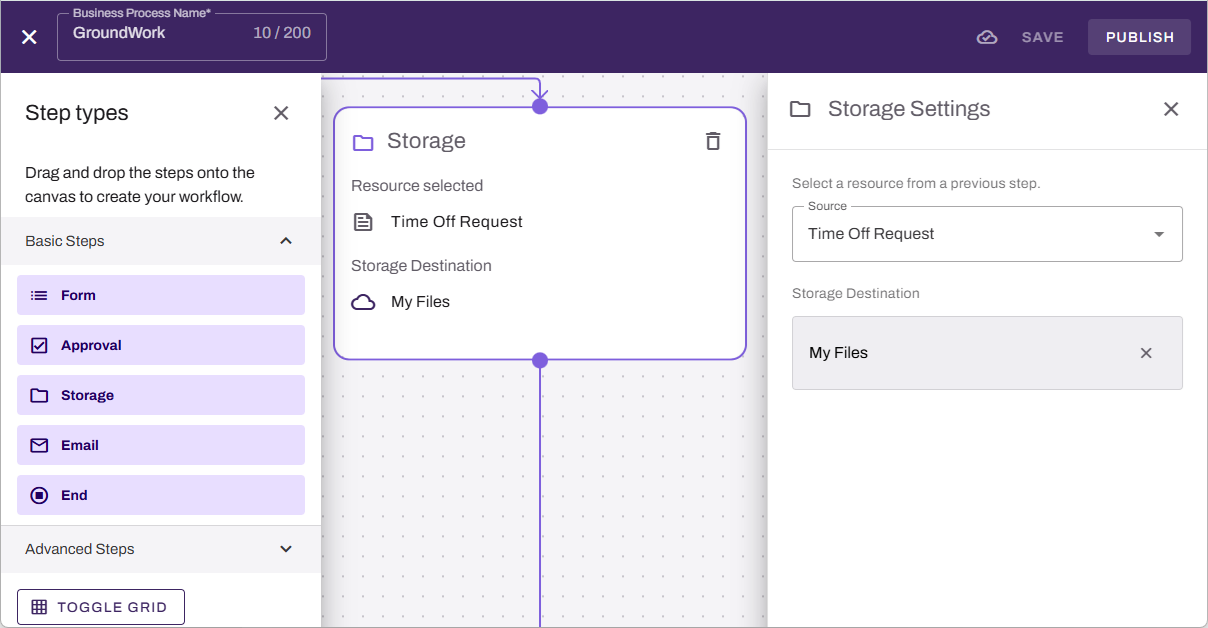
Browse to the destination folder, or select New Folder to create a new location.
The New Folder option is available only for Storage and not for third-party storage providers.
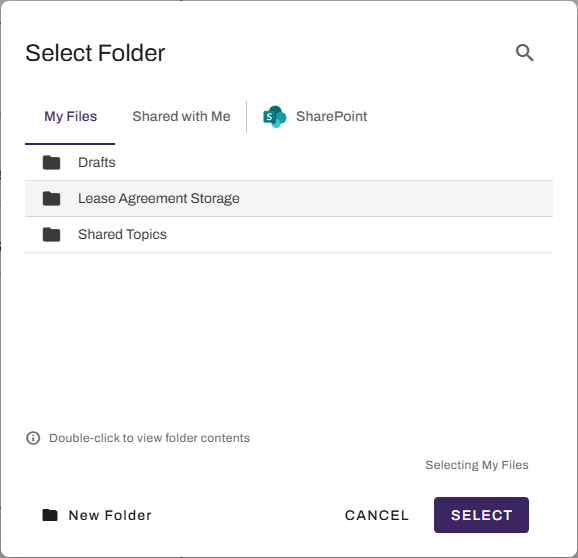
- Select the Select button.
- Add any additional steps.
- Select Save or Publish in the upper-right corner.
After the workflow step activates, the file saves in the chosen location.
Add Multiple Storage Locations
If you need to store the same workflow file in multiple places, use the Split step in the Advanced Steps section. This step lets you add a branch to assign another storage option in the workflow.
Related Topics
Refer to the following:
In this topic: