API Cloud Link for Epic
Last Updated: September 11, 2026
The API Cloud Link for Epic integration enables organizations to submit print jobs from Epic (EHR) directly to Vasion's cloud connector. This eliminates the requirement for an on-prem Service Agent, providing functional parity with on-prem Output Automation printing.
Key Points
- This feature is available only by request. Contact your Vasion representative for more information.
- Cloud-native Epic printing: Epic submits print jobs directly to Vasion's cloud connector without requiring an on-premises Service Agent.
- Functional parity with on-premises: Open Batch, Close Batch, and Receive Job operations behave identically to the existing on-prem Output Automation experience, minimizing retraining for Epic admins.
- Centralized credential management: Epic Basic Auth credentials are managed in a single location in the Vasion Admin Console, rather than distributed across Service Agents.
- Reduced infrastructure overhead: Eliminating the on-premises Service Agent dependency lowers maintenance burden and infrastructure costs for healthcare IT teams.
Endpoints
When adding endpoints, the {site-id} is your instance name. For example, acmecorp.printercloud.com would be /epic/acmecorp/RecieveJob.
1. Configure E0A Record in Epic
Add the endpoint and confirm the Basic Authorization username and password in the Epic E0A Record.
- Access the E0A Record in Epic.
- Add the Receive Jobs endpoint listed above.
- Confirm or add a Basic Authorization username and password. You will use these credentials in a later step.
2. Enable API Cloud Link
To enable API Cloud Link:
- In the Admin Console, go to the API Cloud Link section on Tools
 Settings Output.
 - Select API Cloud Link Enabled.
- Select Save in the upper-right corner.

3. Configure Epic Credentials
To configure your Epic credentials in the Admin Console:
- In the API Cloud Link section, select Enable Basic Authentication.
- Enter your Basic Authentication Key credentials that match your E0A record.
- The format is username:password.
- The format is username:password.
- Select Save in the upper-right corner.

Verify that Epic can successfully submit a test job through the connector.
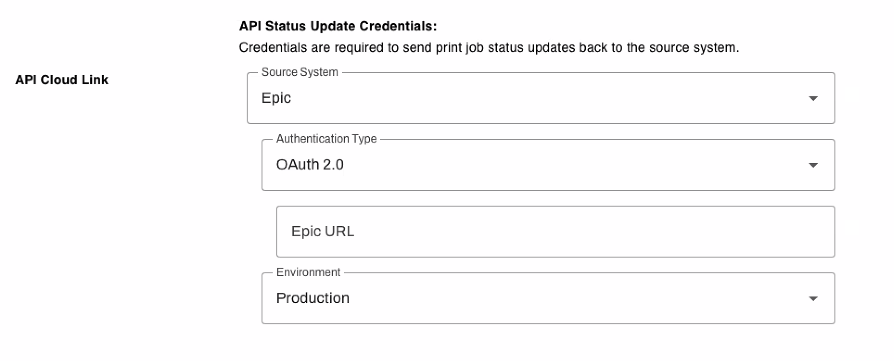
4. Configure Print Job Status Update Credentials
To configure credentials for the Print Job Status update:
- In the API Status Update Credentials section, select Epic as the Source System.
- Select OAuth 2.0 as the Authentication Type.
- In the Epic URL field, enter the base URL of your Epic instance.
- Select Production or Non-Production for the environment.
- Select Save in the upper-right corner.
In this topic: