Configure Epic
Last Updated: September 08, 2026
Give Epic print administrators control of their print environment inside and outside of Epic with PrinterLogic. Eliminate the need to install print queues on the Epic print servers altogether and move to a driver-less print model, reducing the work required to maintain the print environment.
There are two places you need to configure settings for the Epic connector, in the PrinterLogic Admin Console and inside Epic's administrative settings.
To use the Epic Connector functionality, contact your PrinterLogic representative.
Requirements
-
You must have a functional Service Agent that meets the minimum required specifications. Refer to Service Agents.
Running IPv6 on your Windows Service Agent may cause conflicts. You may need to disable IPv6 on the Service Agent's network adapter to resolve the conflict.
- Your Service Agent must be able to access the following service URLs .
https://agent-api.app.printercloudnow.com.https://agent-api-grpc.app.printercloudnow.com.ofn.app.printercloudnow.com.ofn-gw.app.printercloudnow.com.
- Have a certificate signed by a certificate authority (CA) A trusted entity that issues and validates digital certificates. The primary purpose of a CA is to verify the authenticity and trustworthiness of a website, domain, and organization. trusted by your Epic instance.
-
Obtain an Epic master file A subset of Epic's integrated production database. record for use when configuring the Epic service that has system login access.
Epic credentials are required to send detailed print job status updates back to the Epic server.
- Collect the Epic endpoint record (E0A) basic authentication username and password to use during the configuration.
Endpoints
Here are the endpoints for this feature. The <ServiceAgentName> is the IP address or hostname of your Service Agent.
Ubuntu Service Agent
Customers with an Ubuntu (LTS) 22.04 Service Agent must run an additional command on the Service Agent after configuring the steps below. The command initializes the service.
sudo ln -s "$(cat /etc/pl_dir)/service_client/service-output-management/bin/libmako-adapter-lib.so" "$(cat /etc/pl_dir)/service_interface/lib/libmako-adapter-lib.so" Turn On the Epic Connector Service
- In the Admin Console, select the Service Agent where you want to configure Epic.
- Select the Output Automation tab.
-
Enter the Domain Name of the Service Agent machine.
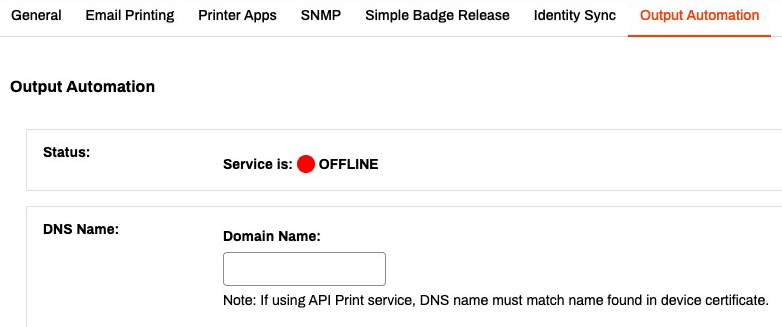
This Domain Name must match the device certificate name and the Service Agent must map this Domain Name to its local IP address. If this field is empty, the service will fail to start, and adds a "Failed to get host address" to the log.
-
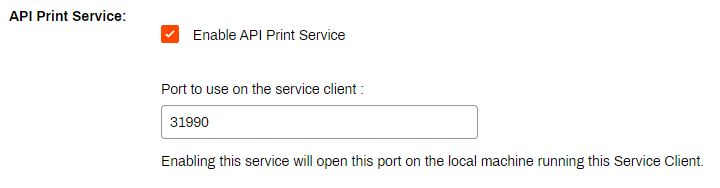
Scroll down to the API & IPP Print Service section and select Enable API Print Service.
-
If needed, change the port number to match your Epic settings. The Epic default port is 31990.
-
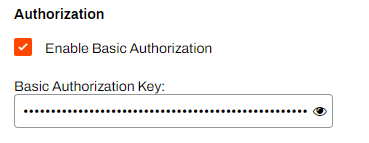
Select Enable Basic Authentication.
- Select and delete the generated code.
- Enter the Epic endpoint record (E0A) basic authentication username and password.
- Use the format username:password
-
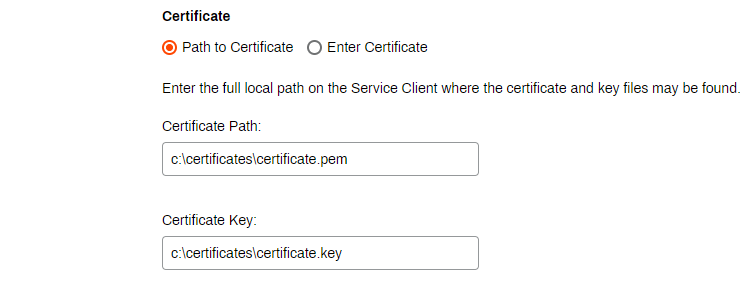
Enter the information for your certificate using one of the following options:
-
Path to Certificate: Enter the file path to where your .pem and .key files are stored on the Service Agent.
-
Enter Certificate: Paste the contents of the certificate and key files into the corresponding fields.
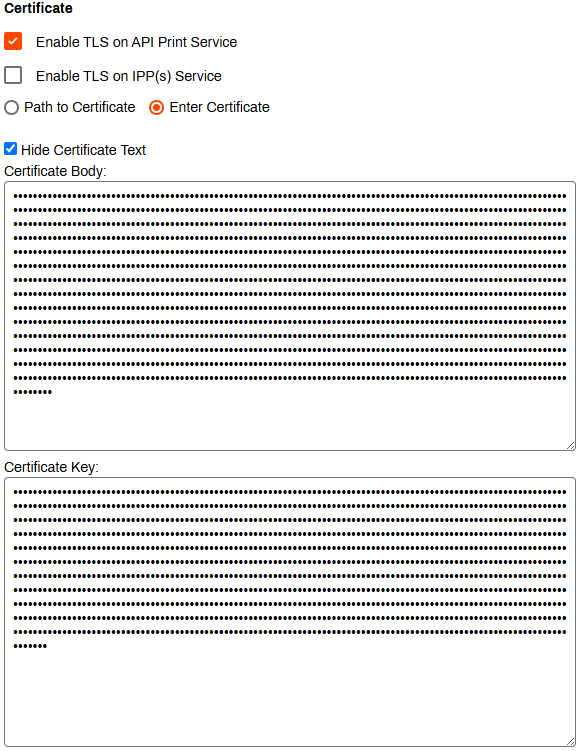
-
-
- In the API Status Update Credentials section, use the Source System dropdown to select Default or Epic.
Default: Enter the Username and Password for the EMP Record credentials.
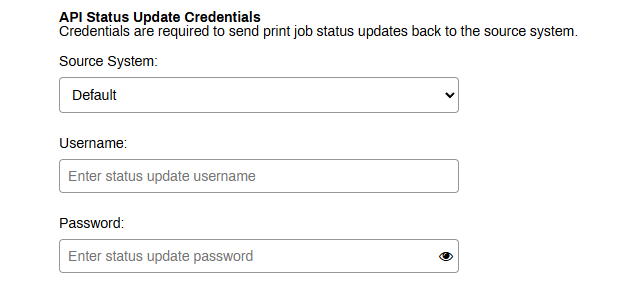
Epic: Use the Authentication Type dropdown to select OAuth 2.0 or Username/Password.
Username/Password
- Enter the Username and Password, prepending the username with emp$ for Epic.
- Use the Environment dropdown to select Production or Non-Production.
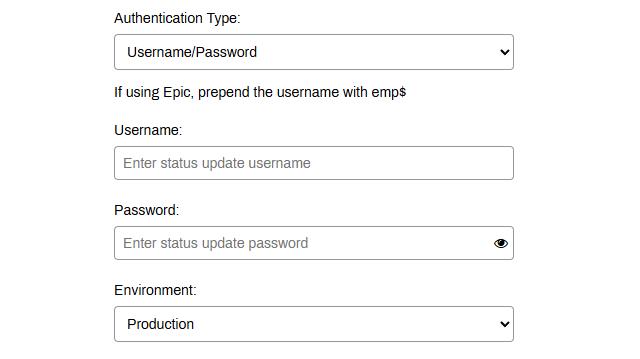
OAuth 2.0
- Enter your Epic URL (including the scheme https:// or http://) in the Epic URL field.
- Use the Environment dropdown to select Production or Non-Production.
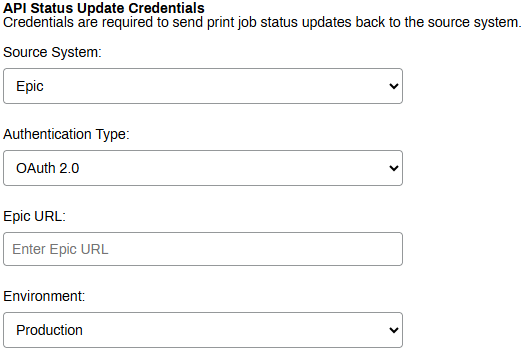
- Select Save.
The Status section shows a green circle and indicates the service is Online when everything is configured correctly.

API Print Service
For information on the API Services and print options, refer to API Print Service documentation.
Optional Next Step
Troubleshooting Help
In some setups, external applications may need to reach the PrinterLogic Output Service Agent using a DNS name that resolves to an external IP address. However, this can cause issues the following issues:
- The Service Agent cannot resolve the DNS name to its internal IP address.
- External DNS resolution conflicts with internal requirements.
Check if the Service Agent can resolve the DNS name to its internal IP address. If the DNS name doesn't resolve correctly, you may need to modify the hosts file. See Troubleshoot DNS Resolution for Output Automation Service Client
Ensure that the DNS name in the UI matches the one in the certificate used by the Service Agent.
In this topic:
For print jobs from Epic or our API Service, the Batch Printing functionality lets you collect batches of documents and print them in a specific order every time, ensuring complex processes remain standardized and efficient.