Recover Shared Storage Password
Last Updated: July 01, 2026
The Shared Storage password for your Virtual Appliance is only accessible during the web portion of the Host upgrade. This topic provides steps to recover a lost Shared Storage password, which are the same steps to upgrade the Host version. However, you can stay with your current Host build version if you do not wish to upgrade to a newer version.
Requirements
- Virtual Appliance Host and Application files are no longer available on the Admin Guide site. To obtain these files please create a support ticket with our team and include:
- Latest Host / Application Files Request in the subject field.
- Your current Host and Application versions (Support & Training
 About PrinterLogic) in the description.
 - Hypervisor file type (OVA, VMDK, VHD, QCOW2) in the description.
- Review the Minimum System Requirements for environmental specifics and version compatibility before upgrading your Host version.
- Note the network information of the existing Virtual Appliance. Upgrades require the information re-entered as network settings do not carry over during an upgrade.
Back Up the Virtual Appliance
Before upgrading the Virtual Appliance, it is crucial to back up the database. Failure to do so can result in irreversible data loss. For more information on comprehensive backup guidelines, refer to Database Backup Recommendations.
Host Build 1.0.757 and Earlier
For customers on Host build 1.0.757 and earlier and using the Virtual Appliance internal MySQL server, you are required to run the following query on the server before upgrading.
SET PERSIST innodb_fast_shutdown=0;
Access the Virtual Appliance Database to Run Query
Here is a quick overview of the instructions on how to access the Virtual Appliance. For detailed instructions, refer to the PrinterLogic Knowledge Base.
- Download and install a MySQL editor of your choice (e.g. MySQL, MySQL Workbench, HeidiSQL, PHPMyAdmin).
- Run the MySQL Editor.
- Set the host to the IP address of your Virtual Appliance.
- Set the user / username to admin.
-
Set the password to the password that was designated during the Virtual Appliance configuration.
Find the database password in the secrets.env file on the share drive. It is listed as the
DB_PASSWORDparameter.
Password Recovery
1. Create New Virtual Appliance
- Create a support ticket with our team to acquire the Host files. Refer to the Requirements section above for ticket details.
- Download the latest host upgrade file for your hypervisor.
- Gracefully shut down the Virtual Appliance Guest operating system (OS).
- Run a backup of the virtual machine.
-
In the hypervisor console, make a clone of the persistent storage disk containing your Virtual Appliance data.
This is generally the second disk created when spinning up the Virtual Appliance.
- DO NOT delete the disk from storage.
- Note the name so you can attach the clone to the new host.
- Alternatively, you may detach the disk from the virtual machine (if it does not contain snapshots) and attach it to the new virtual machine, but we don't recommend this method.
- Using the file downloaded in Step 1, create a new Virtual Appliance but do not boot it up. For minimum system requirements and steps on creating a new Virtual Appliance, refer to Virtual Appliance Installation and the related hypervisor subtopics.
- Attach the cloned disk to the new Virtual Appliance.
- If you detached the persistent storage disk rather than cloning it, attach it to the new Virtual Appliance.
- Start the Virtual Appliance Guest OS.
2. Configure Network Settings
Once the virtual machine spins up, use the web console to configure the network settings.
For environments using a fully qualified domain name (FQDN) when accessing the Virtual Appliance. Configure the FQDN in your Domain Name System (DNS) and assign it the IP Address shown in the web console. The licensed URL in the license file provided by Vasion must match the chosen FQDN.
The Virtual Appliance starts as a Dynamic Host Configuration Protocol (DHCP) client. You can leave the DHCP default and configure TCP / IP settings via DHCP Reservations. Alternatively, use the steps below to configure a static IP Address and adjust the private IP address range the Virtual Appliance uses for internal services to avoid conflict with existing subnets.
- In the hypervisor, open the web console to access the Virtual Appliance Linux terminal interface.
-
Sign in to the terminal using the network credentials supplied in the terminal banner.

- Enter "Y" to change the network settings.
- Enter "Y" to change the network mode.
-
Enter the TCP / IP settings.
The image below is just an example. Ensure you use the settings specific to your network.
-
If the existing address pool does not conflict with any subnets in the environment, enter “N”. Otherwise, enter “Y” to set a different address range.

-
Configure the address range. If you need to adjust IP addresses, be sure to read and understand the network range options you are presented with. Any range used must have a netmask < 20.

- Press any key to exit.
- Copy the IP address located at the top of the terminal interface in the To continue with this configuration please visit field.
3. Launch the Virtual Appliance Wizard
- In your preferred, supported browser, paste or enter the Virtual Appliance IP Address including port 8080. Example: 192.168.10.20:8080
-
Once the setup wizard displays, select Let's Do This.

-
Select the Storage Type dropdown and select VM-Attached Virtual Disk.

If you are presented with options to Format Attached Storage do not select the button. Formatting is for new disks, and seeing this option during an upgrade means something is incorrect and the disk settings and order should be reviewed.
- Select Continue.
-
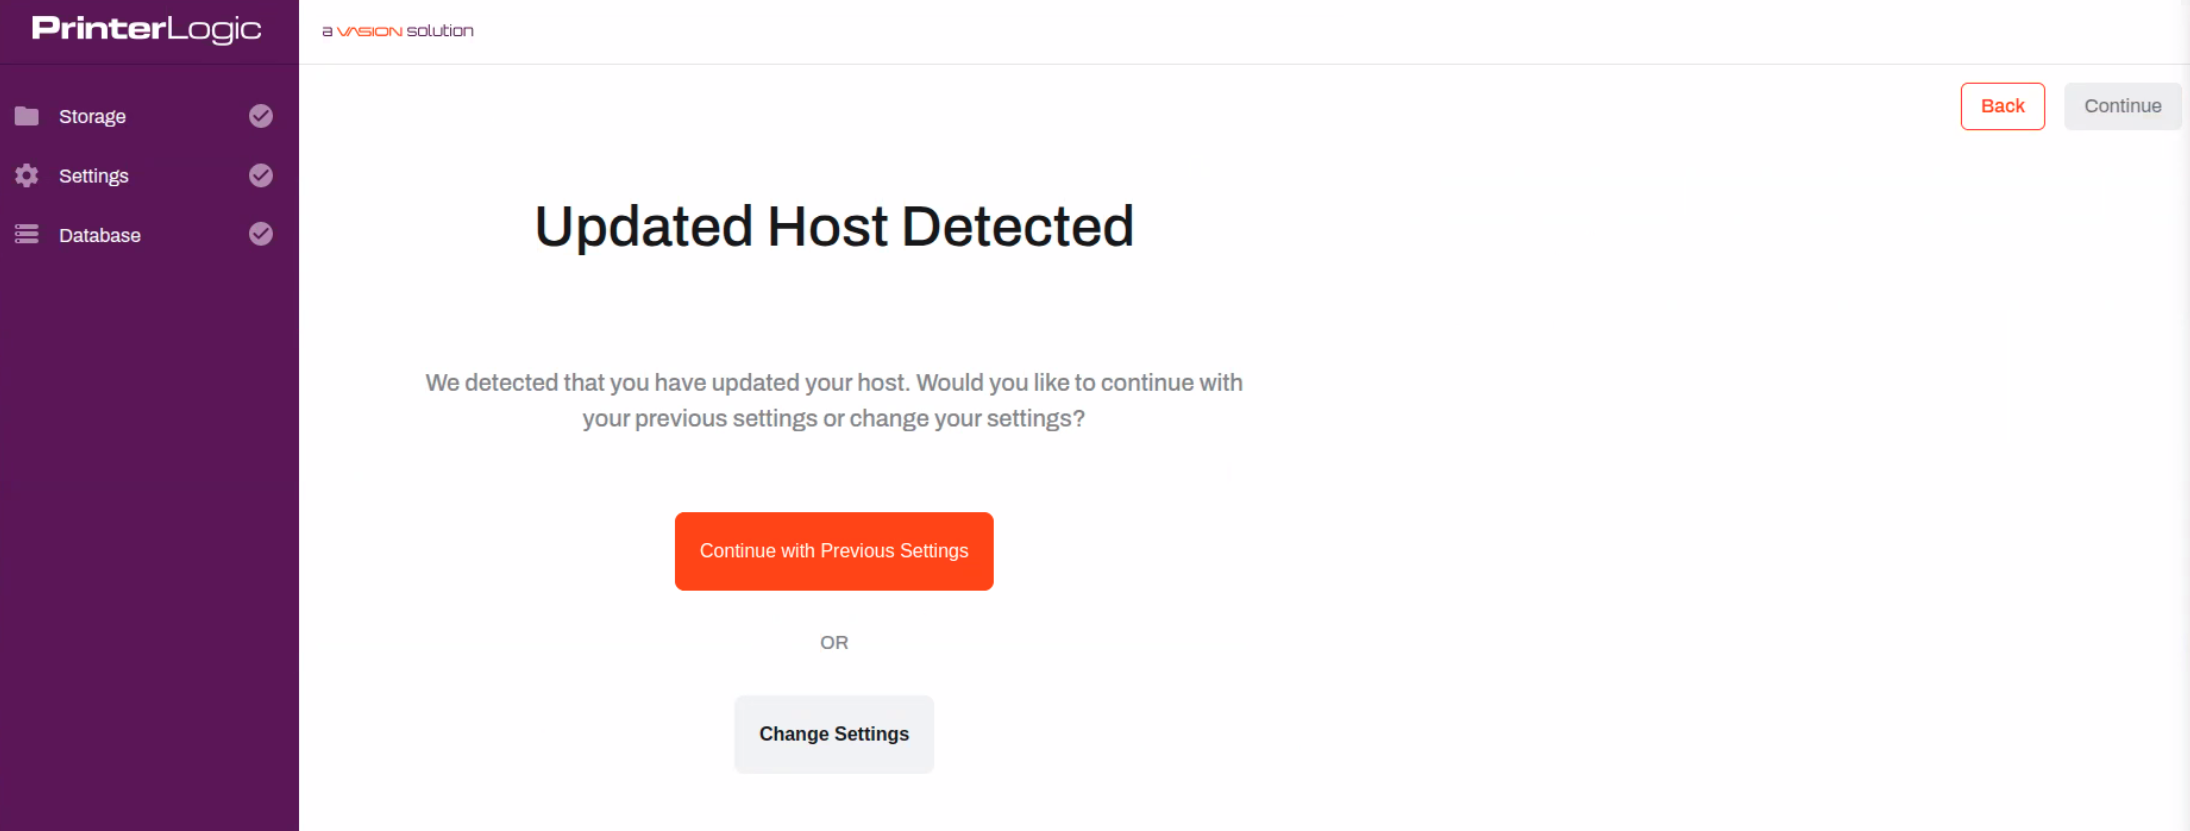
On the Updated Host Detected window, select the Change Settings option.
-
On the General Settings tab, review the information and update the Shared Storage Password. Document and save this password. It is available to view or edit only during this step.
Passwords can contain any alphanumeric character (a-z, A-Z, 0-9), the following special characters (%^()_-+={}[]<>,.;), and up to 128 characters.
- Review any other needed settings and Continue through the wizard. If you are only changing the shared storage password, no other values need changing.
- Select Finish Setup.
-
Allow time for the Virtual Appliance wizard to finish.
Please do not refresh the page during the installation procedure.
- After setup is complete, you can sign in to your Virtual Appliance.
In this topic: