Last Updated: August 13, 2024
PDF View
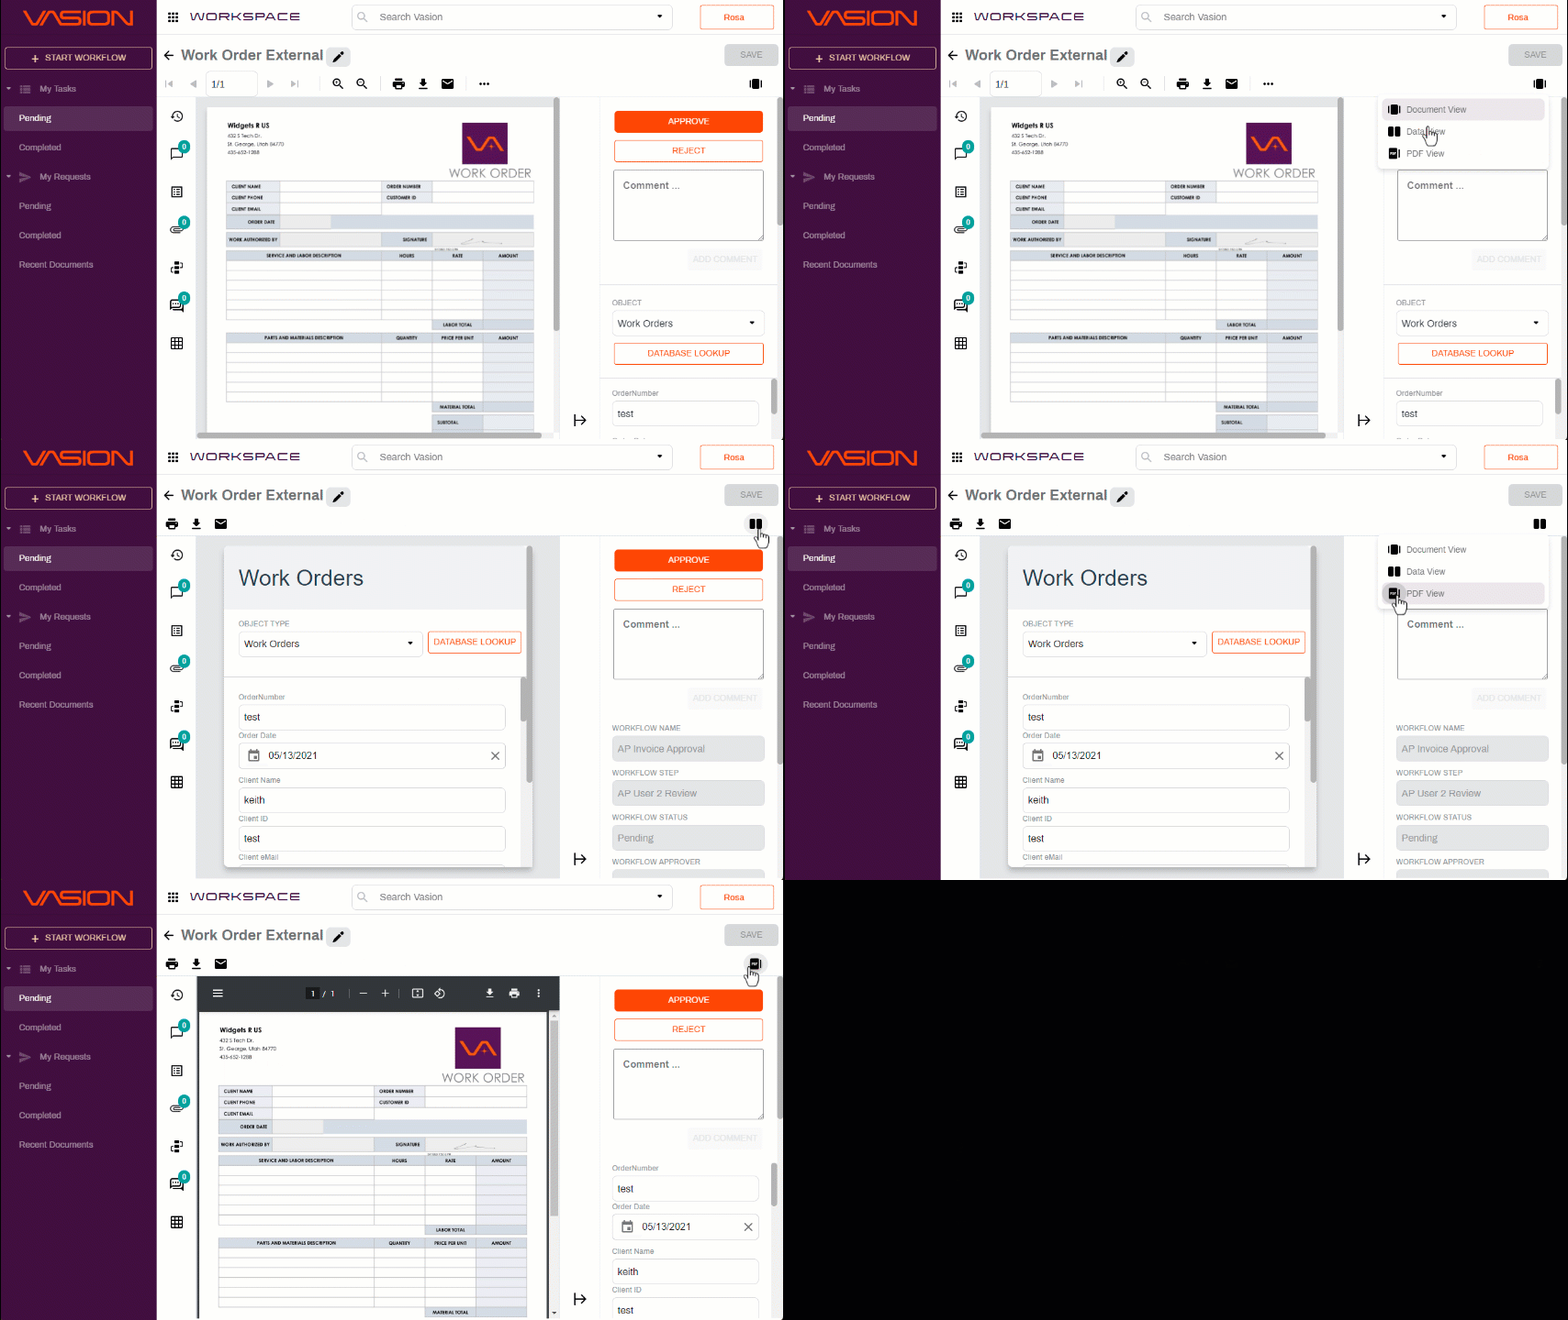
If a document has been uploaded or a document template is associated with a stored item, you have the option to select a PDF view.
Switch to the PDF View
To change the view on the current document use the view filter on right side of the tool bar.
- Select the view filter
 .
. - Select the view you want from the drop-down.
PDF View Toolbar
The toolbar has the following functionality:
- Download
- Emaill
- Create new document version
- Generate PDF
Depending on the selected document or form, not all buttons may display.

Print the selected document and any annotations. If the document is part of a signature workflow, you can also print the signature history.
- Select the Print button
 .
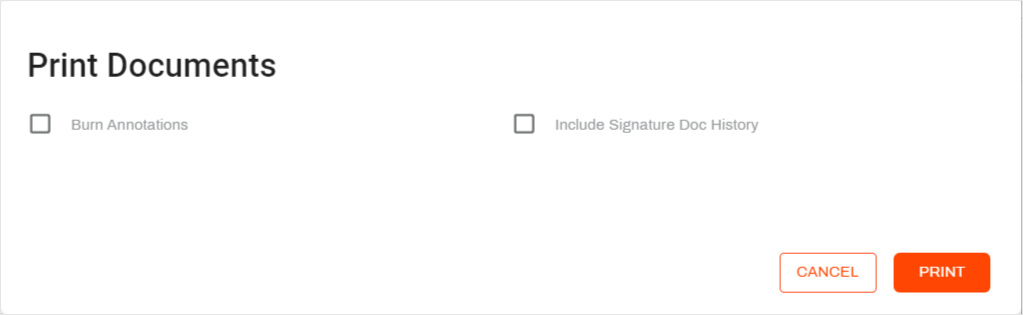
. - In the Print Documents modal, select from the following options:
- Burn Annotations — select this option to include unburned annotations on the document you’re printing.
- Include Signature Doc History– this option only displays if a document is part of a signature workflow. When selected, it downloads the current signature audit trail in a separate PDF.
- Select Print.
Download
Use the Download option to save a copy of the document to your local system.
- Select the Download button
 .
. -
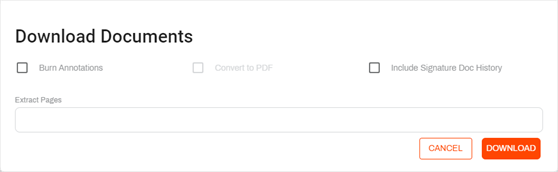
In the Download Documents modal, select your download options:
- Burn Annotations – includes annotations on the document. If you leave this box unchecked, the document will not include unburned annotations.
- Convert to PDF — select this option to download a form as a PDF.
- Include Signature Doc History– this option only displays if a document is part of a signature workflow. When selected, it downloads the current signature audit trail in a separate PDF.
- Extract Pages – use this option if you want to download specific pages from the document. To save a range of pages, use a hyphen between the first page number and last page number, for example, 2-7. To extract single pages, use a comma, for example, 3, 7, 9. You can combine hyphens and commas to get the pages you need, for example 2-7, 9, 15.
- Select Download.
The file is saved to your system's default download location.
Use the Email button to send a message to someone with either with a link to the document or as an attachment on the email. Here are some of the options available when choosing email.
- Send Document as Attachments.
- Sending only selected pages as attachments.
- Burn annotations.
- Send a link to a document.
- Set a maximum number of views for the document.
- If you want to allow the recipient to download the document, you can set a maximum number of downloads.
- Set document access limit in hours.
- Do not require the recipient to log in to view the document.
For more details, see Email.
Generate a New PDF
If you have created a new version of the document and made changes, use the Generate PDF button to update the PDF with the new changes.
This option is typically used when object data has been updated on a form and you want an updated PDF to reflect those changes, or if you've added annotations.
Document Info Toolbar
The toolbar on the left side of the window contains buttons for the document history, notes, versions, attachments and workflow comments. The options displayed on the toolbar depend on if there is an object or workflow that is associated with the document.

Document History
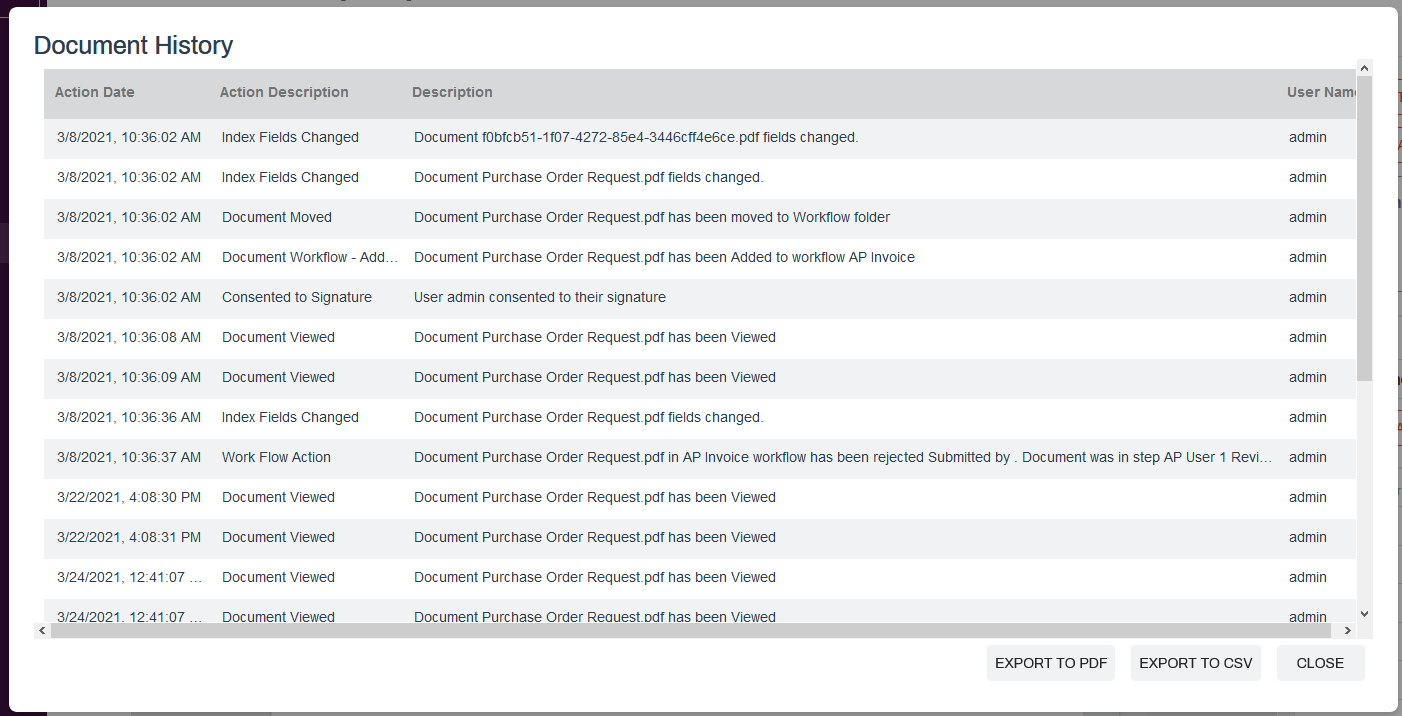
Document History  shows all of the actions that were taken on the document.
To view the history of a document, select the History button on the left side. In the Document History window, you can see the complete history, including entries for:
- When the documents were imported.
- When attribute fields were filled out.
- When a document was moved and the person that performed each task.
-
To export the history to a PDF, click the Export to PDF button.
-
To export the history to a comma-delimited (CSV) file, click the Export to CSV button.
-
Click the Close button to close the history.
Signature History
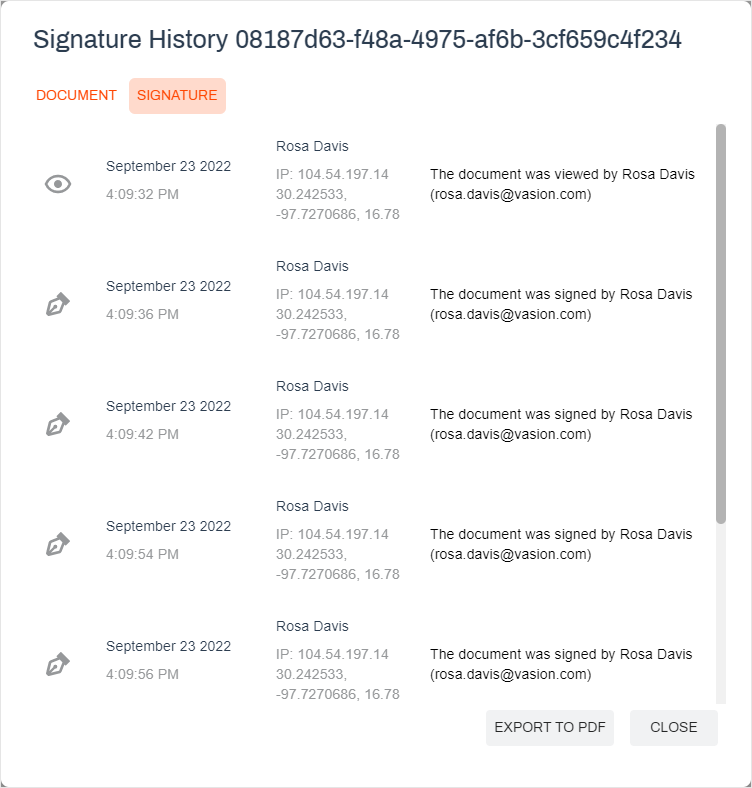
If the document is attached to a Signature workflow, the audit of the signature history is displayed in a separate tab. Select the Signature tab to view the details.
You can export the signature history as a PDF with the Export to PDF button.
Notes
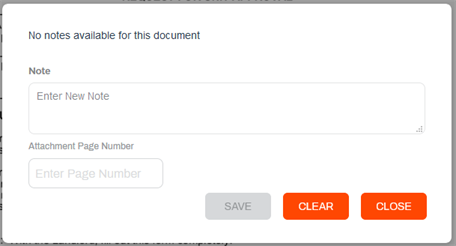
Use the Notes option to view any existing notes on a document or to add a new note.
Add a Note
The Notes button  shows a badge with a number that indicates if there are any notes attached to the document.
When you add a note to a document, the note is attached to the document itself and not visible on the document. It also won’t be visible on a printed or emailed copy of the document.
To add a note:
- Click the Notes button.
- In the Notes window type your note in the Note field.
- Add a page number in the Attachment Page Number field if you want to reference a specific page in the document.
- Click the Save button to save your note. The note appears in the notes area of the window.
-
Click the Close button.
Attachment
The Attachments button  shows a badge with a number that indicates how many files are attached to the current document.
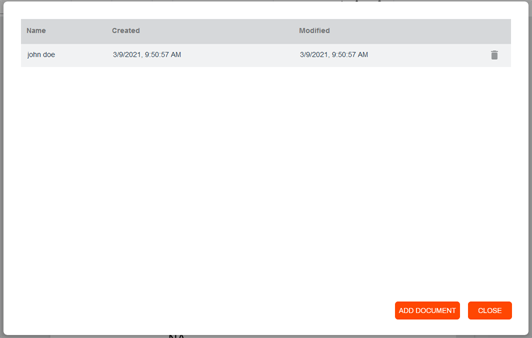
You can view any supporting documents or add documents by using the Attachments button.
- Click the Attachments button.
- In the Attachment modal:
- Click on any existing attachment to view, if applicable, or
Click on the Add Document button to add a document.
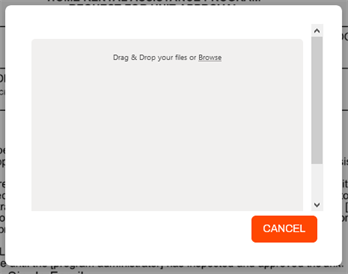
In the Upload modal, you can drag and drop the attachment into the upload section or click Browse to locate the file on your computer and select the attachment you want.
-
Click the Close button to close the Attachments modal.
Workflow History
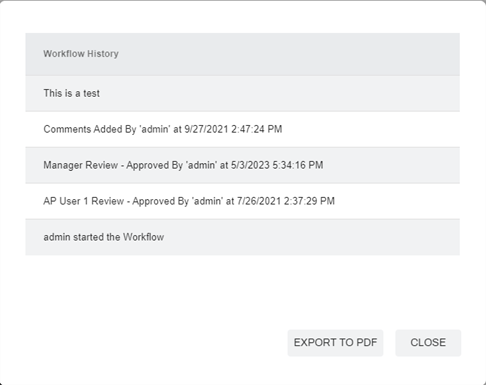
Any time an action is taken on a document when it is in a workflow, is recorded in the workflow history.
- Select the Workflow History button.
- To export the workflow history to PDF, click the Export to PDF button.
- When you're done click the Close button.
Document Versions
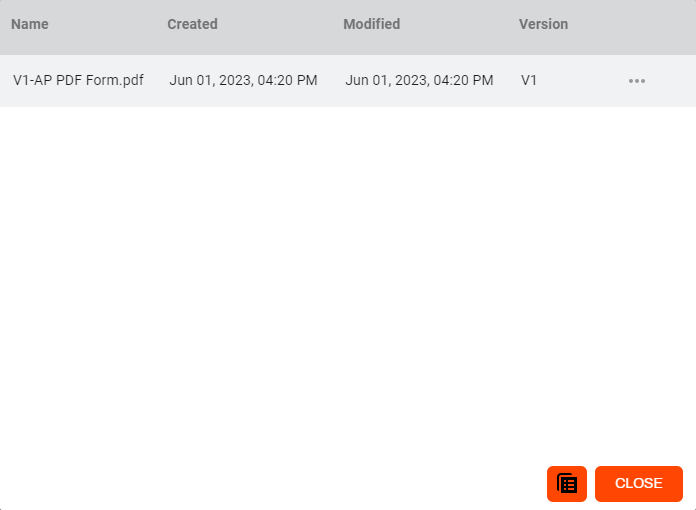
If you make a change to a document, you can make a copy of that document and create a new version. It may be helpful at times to see a prior version of a document.
To view the different versions:
- Click the Versions button.
- In the Versions modal click on one of the versions listed to open that PDF.
- Use the Create Versions button
 to create a new version, if necessary.
 - To exit select the Close button.