Configure ADQX
Last Updated: September 10, 2026
Enable and configure the Active Directory Query eXecutor (ADQX) Service Agent to allow PrinterLogic to query your on-premise Active Directory without requiring firewall port exposure.
Requirements
Review the Requirements before configuring this feature.
Enable ADQX
Follow these steps to enable ADQX :
- In the Admin Console, go to Print.
- Select the desired Service Agent from the tree structure.
- Select the ADQX tab.
- Select the box for Enable this client to be an ADQX.
- In the LDAP Configurations section, select your configured LDAP domain.
- (Optional) Select Use machine credentials (Windows SSPI) for this domain.
- Select Save in the upper-right corner.
- Allow a couple minutes for the service to start and connect, or Refresh Configurations on the Service Agent device.
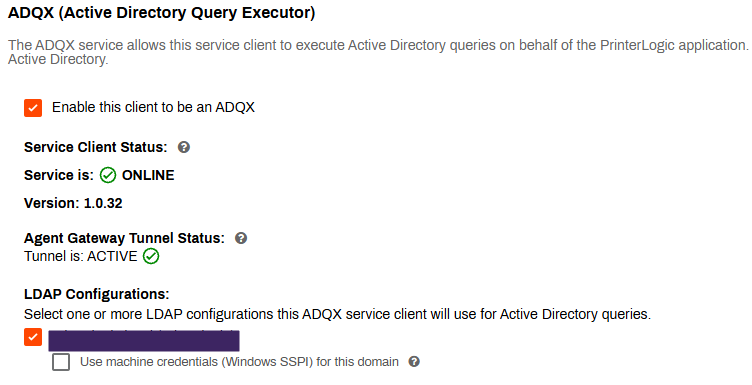
Once the service starts and connects, AD queries occur between the Service Agent and AD server, without the need for inbound firewall ports. Selecting the Ping button checks the connection and provides the current status.
ADQX Resources
Checks
When ADQX is enabled, the Test Settings button on the LDAP Settings page is unavailable.
-
Use the Ping button in the Domain DC Connectivity section to manually check the connection.
-
Use the Bind button in the AD Bind Status section to check the bind username / password validity.
Logs
Use the Download Logs button in the ADQX Logs section to directly download a .zip folder with the ADQX logs for troubleshooting.
View AD Queries
Use the View AD Queries button in the ADQX Query Transparency section to display the predefined queries that ADQX runs against your Active Directory, providing full transparency into how Vasion interacts with your directory data. This allows administrators to verify that all queries are handled securely and review any updates to those queries over time.

In this topic: