CPA Manager: Actions
Last Updated: September 09, 2026
You can perform specific actions, depending on which printers you select in the CPA Manager list. Actions rely on certain factors, such as printer configuration and whether the selected printers have the same manufacturer. Actions become available when you select a printer.
Requirements
Review the CPA Manager topic for information about this feature and to turn on the Printer Apps service.
- Before installing apps on printers, review the CPA 2.0 topic and manufacturer-specific subtopics for printer requirements.
Action Options
Options include the following:
- Install Apps: This option installs the CPA an other apps onto printers. When the printer is added correctly, you can install multiple apps onto printers.
- Uninstall Apps: This option uninstalls apps from printers. You can uninstall multiple apps, regardless of the manufacturer.
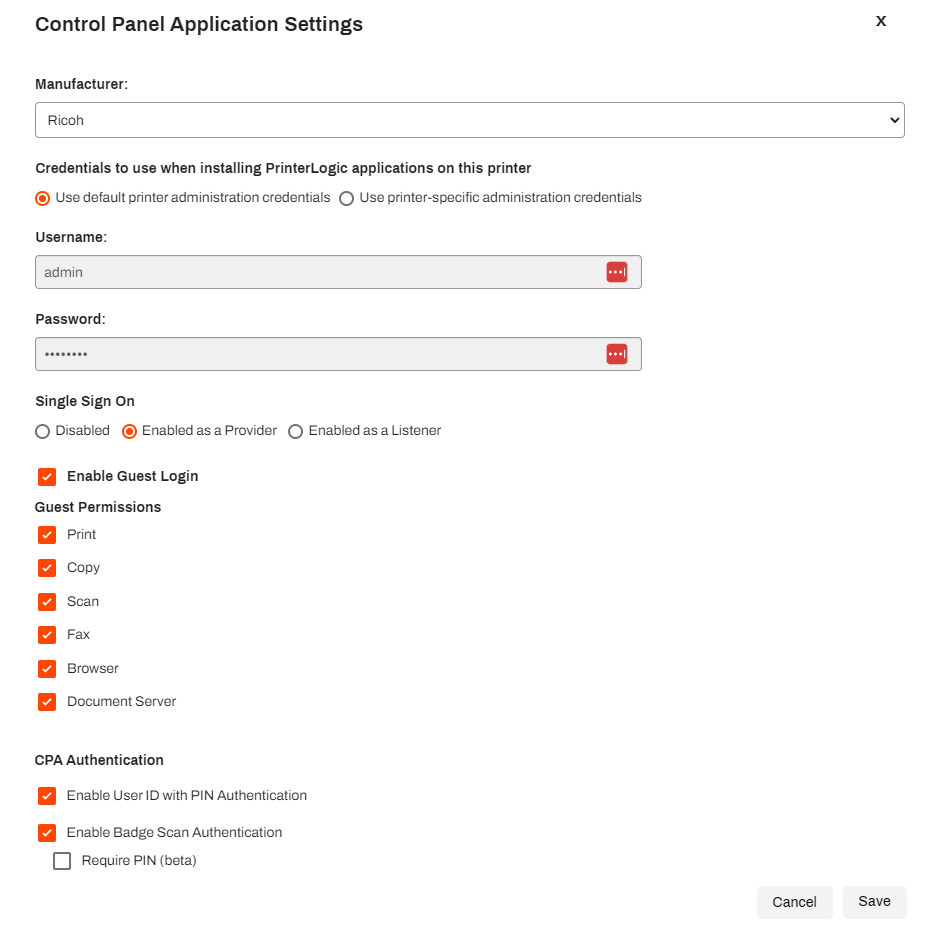
- Modify: This option is available only if you select printers from the same manufacturer. You can modify the printer's admin credentials, SSO authentication, and CPA authentication.
- Move: This option reassigns printers to another Service Agent and triggers a CPA reinstall so the association and network traffic route through to selected Service Agent.
- Delete: This option removes the printer definition from the Service Agent, which removes the Service Agent from the Printer Apps. If you delete a printer here, the Apps tab on the printer no longer lists the Service Agent. This option does not delete the printer from the tree structure. You can delete multiple items at once.
Install Apps
When you add multiple printers, they must all be from the same manufacturer.
Follow these steps:
- Select the printer that you want to install apps on.
-
Select Install Apps from the Actions menu.
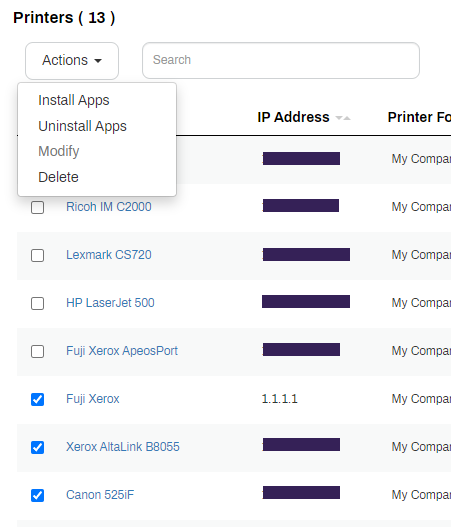
- Select from the following apps, which appear as long as they are turned on and meet all requirements:
- Direct Secure Release.
- Scan to Email: If your printer supports Simplified Scanning.
- Scan to Storage: If your printer supports Simplified Scanning.
- QR Code Display.
- Copy / Scan Tracking.
- Off-Network Cloud Print (ONCP).
-
Select Save.
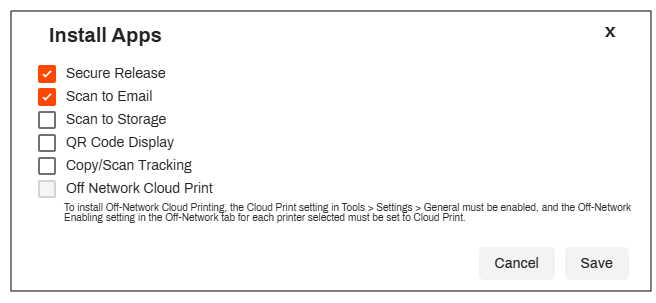
Depending on which features you select, the process can take time. You can refresh the page to view status changes.
-
Select Close on the modal. The process continues in the background and might take some time.
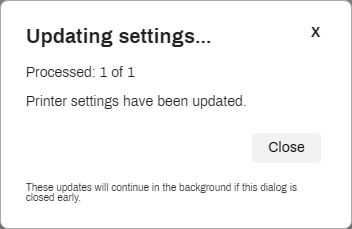
After the installation completes, the status updates to Control Panel: Install completed successfully or ONCP: Install completed successfully. Hover over the CPA Authentication icons to view descriptions.
Uninstall Apps
When you add multiple printers, they must all be from the same manufacturer.
Follow theses steps:
-
Select the printer that you want to uninstall apps from.
-
Select Uninstall Apps from the Actions menu.
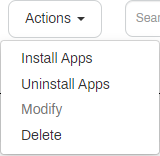
-
Select the apps to uninstall, and then select Save.
Depending on which features you select, the process can take time. You can refresh the page to view status changes.
-
Select Close on the modal. The process continues in the background and might take some time.
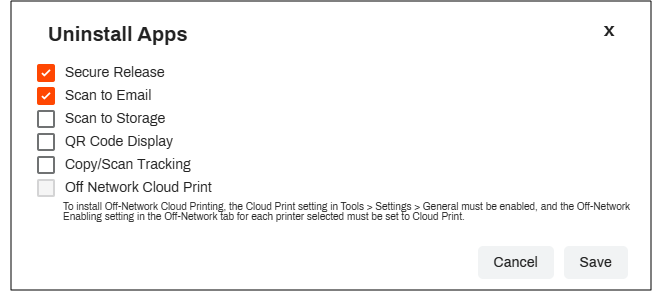
After the process completes, the status updates to Control Panel: Uninstall completed successfully or ONCP: Uninstall completed successfully. The status always appears in blue to indicate that you successfully uninstalled the app.

Modify Configurations
When you add multiple printers, they must all be from the same manufacturer.
Follow these steps:
- Select the printer that you want to modify app settings for.
- Select Modify from the Actions menu.
-
Adjust the app settings, and then select Save.
Move Printers
The Move action allows you to move managed printers from one Service Agent to another, in bulk. Configuration settings are not changed, just the associated Service Agent which may use different certificates depending on the environment.
To move printers to a new Service Agent:
- Select the printers that you want to move.
- Select the Move option from the Actions menu.
-
Use the dropdown to select the new Service Agent.
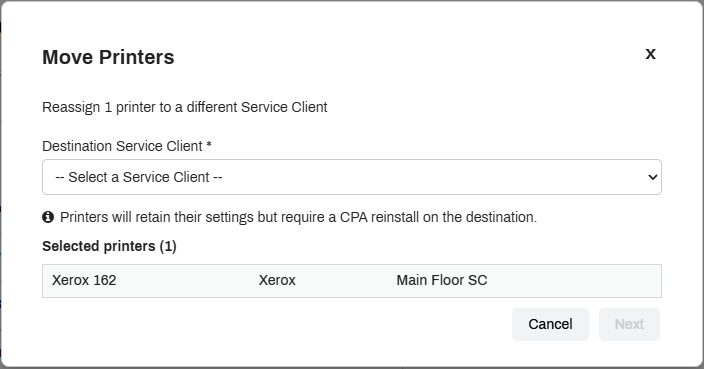
- Select Next.
- Review the change on the confirmation page.
- Select Confirm Move.
The printer(s) move to the new Service Agent. The move triggers a reinstall of the CPA.
Delete Printers
Follow these steps:
- Select the printer that you want to delete.
- Select Delete from the Actions menu.
- In the modal, select OK.
In this topic: