Last Updated: October 29, 2025
Portal Workspace
The workspace is the main page of the External User Portal. From here, initiate workflows, approve tasks assigned to you, and sign documents.
For more information about the Document Viewer in general and the views available, see Portal Document Viewer.
For more information about the External User Portal, see External User Portal User Guide.
Side Navigation
Utilize the left side navigation to initiate a workflow process, view and access tasks required of you and requested by you.
- + Start Workflow — select button to begin a new workflow.
- Tasks
- Pending Tasks — tasks waiting for your review or approval
- Completed Tasks — completed tasks in which you participated at any point in the workflow
- Requests
- Drafts — form drafts you have not submitted yet.
- Pending Requests — tasks you created and are awaiting review or approval by another user
- Completed Requests — tasks you created and were completed
- Forms
- My Forms — forms available to fill.
- Drafts — drafts of forms partially finished.
- Storage
- My Storage — available cloud storage for documents that have been uploaded to Vasion Automate Pro.

Tool bar
- Action Button — select to see the actions that are available for the selected task. Available actions may vary depending on your role and the selected task. For what each action does, see
- Refresh Button — select to refresh the task list.
- Navigation Bar — the navigation bar helps you move through the pages of the task list. Select the single forward or back arrow to move forward or back by one page. Select the double forward or double backward arrow to move to the first or last page in the task list.
- Task List Item Display — by default, there are 25 tasks shown on each page. Select the task list item display field to choose a different number of tasks to show on each page.


Action Menu
The Actions button above the task list provides options for actions you can take on the tasks. Select one or more tasks and then select the action. Any actions that are grayed out are not available for the task(s) you’ve selected.
The items available depend on which tasks list you're viewing and roles assigned to you.

To save time, you can take the same action on multiple tasks by checking the box for each task first and then selecting the action.
Approve
The workflow configuration determines what happens when a task is approved. The task may move to another step, it may be completed, or it can kick off another workflow.
To approve a task:
- Select the check box for the task you want to approve.
- Select the Action button and select Approve.
The task(s) move either to the next step, get marked completed, or kick off another workflow.
Reject
When you reject a task, that task can move back to the prior step in the workflow, be sent to a rejected folder which ends the workflow, or is assigned to the user that initiated the task. The workflow configuration determines what happens when you reject a task.
To reject a task:
- Select the check box for the task you want to reject.
- Select the Action button and select Reject.
The task moves to the prior step or the rejected folder.
Take Ownership
The Take Ownership option is typically used when a task is assigned to a group, and a user within that group takes ownership to avoid others working on the same task. When you take ownership of a task, the task is then assigned to you and does not display in the Pending list for other members of your group.
To take ownership of a task:
- Select the check box for the task for which you want to take ownership.
- Select the Action button and select Take Ownership.
The task is now assigned to you and your name appears in the Assigned To in the task list.
Reassign
When you reassign a task, you’re giving that task to another group or person. The ability to reassign is dependent on the role you’re assigned.
To reassign a task:
- Select the check box for the task you want to reassign.
- Select the Action button and select Reassign.
- In the User list, select the name from the list.
- To assign to a group, select the Group radio button and then select the name from the list.
The contents of the list depend on your permissions.

Print the selected document and any annotations. If the document is part of a signature workflow, you can also print the signature history.
- Select the document you want to print.
- Select the Actions button and then select Print.
- In the Print Documents modal, select from the following options:
- Burn Annotations — select this option to include unburned annotations on the document you’re printing.
- Include Signature Doc History – this option only displays if a document is part of a signature workflow. When selected, it downloads the current signature audit trail in a separate PDF.
- Select Print.

Download
Use the Download option to save a copy of the
- Select the document.
- Select the Actions button and then select Download.
-
In the Download Documents modal, select your download options:
- Burn Annotations – includes annotations on the document. If you leave this box unchecked, the document will not include unburned annotations.
- Convert to PDF — select this option to download a form as a PDF.
- Include Signature Doc History – this option only displays if a document is part of a signature workflow. When selected, it downloads the current signature audit trail in a separate PDF.
- Extract Pages – use this option if you want to download specific pages from the document. To save a range of pages, use a hyphen between the first page number and last page number, for example, 2-7. To extract single pages, use a comma, for example, 3, 7, 9. You can combine hyphens and commas to get the pages you need, for example 2-7, 9, 15.
- Select Download.

The file is saved to your system's default download location.
Open in New Browser Tab
Select this option to open the document(s) selected in another browser tab. Use this function to maintain your place on a long list of tasks.
- Select the document
- Select the Actions button
- Select Open in New Browser Tab from the list.
Filter Document View
On the far right of the toolbar you have a View Filter button ![]() . You can use this button to adjust the display in Workspace as follows:
. You can use this button to adjust the display in Workspace as follows:
- View — use the drop-down to select a custom folder view. You have the option of having the view only display while you are in your current session.
- Save As Default View — check this box if you want to set the selected custom folder view to load when you log in and navigate to Workspace.
-
Workflow — use the drop-down to select select from the following:
-
All — use this option to view all workflow types assigned to you. This is the default option.
-
Only Workflows — use this option to view only business process workflows.
-
Only Signature Documents — use this option to view only Signature documents.
-

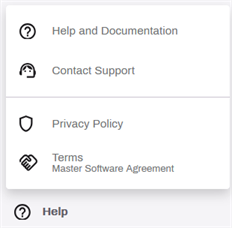
Help
For resources around the Vasion Automate Pro product, select the Help![]() icon.
icon.
- Help and Documentation — Select this item to be brought to this documentation.
- Contact support — Select this item to submit a support ticket.
- Privacy Policy — Select this item to view the Vasion privacy policy.
- Terms - Master Software Agreement — Select this item to view the Master Software agreement.
Account
Access Account Settings
To access your account settings:
- Select your avatar from the bottom-left corner.
-
Select Account Settings.

Reset Password
In the Profile Settings tab, do the following:
- Enter your new password in New Password.
- Re-enter the password in Confirm Password.
- Select Change Password.

Digital Signature
Add a digital signature and initials to your profile to quickly sign documents. The Digital Signature role is required to access this option.
In the Digital Signature tab you can add your signature and initals. If you want to apply a system timestamp to both your signature and initials every time you apply them to a document, select the Apply Timestamp to Your Signature option.
The Enter Password option requires a password every time you add your signature using the Signature app and in the Document viewer. Use this option if you want an additional layer of security.

Add a Signature
You can add your signature by drawing or uploading an image file. In the Digital Signature modal do the following:
-
Select Add Signature.
- Use your mouse to draw you signature in the box, or
- Select Upload and choose one of the following actions:
- Drag and drop an image file, or
- Select Browse to look in your computer for the image file.
- Check the Apply Timestamp to Your Signatures box if you would like to include a time stamp with your signature each time you add it to a document.
-
Select Save.

-
In the Almost Done modal, select I Agree.

Add Your Initials
- Select Add Initials.
- Use your mouse to draw your initals in the box, or
- Select Upload and choose one of the following actions:
- Drag and drop an image file, or
- Select Browse to look in your computer for the image file.
- Check the Apply Timestamp to Your Signatures box if you would like to include a time stamp with your initials each time you add it to a document.
-
Select Save.

-
In the Almost Done modal, select I Agree.
Next Steps
For more information on using the External User Portal, see the External User Portal user guide.