Last Updated: November 13, 2025
Add Customer Instances
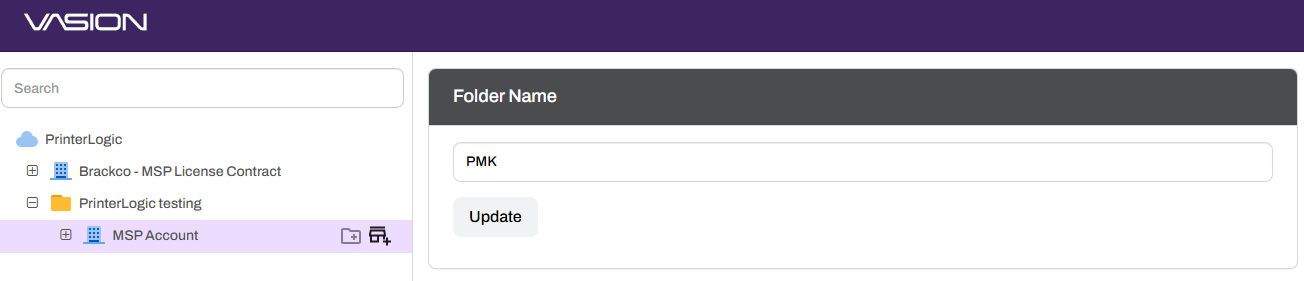
The tree structure in the MSP Portal houses all customer instances added by your organization. Hovering over the folder or MSP account icon displays the New Customer option to the right of the object name.
Key Points
- Before creating a customer instance, acquire the proper data privacy consent and basic company information. This includes:
- Account / business name.
- Customer address including zip code.
- Approximate printer and user counts.
- Preferred vanity URL. A backup URL choice is recommended in case the first is already taken.
- MSP accounts start with 50k licenses. Reach out to your Vasion representative for additional licensing.
- Adding a customer instance does not initialize the Vasion Print instance. Initialization occurs during the first login and requires configuring a root account.
- The only option to create a trial instance occurs during the customer creation process by selecting the This is a 30-day trial account box. For more information, see Trials.
Create Customer Instances
- Log into the MSP Portal.
-
Hover over the MSP or folder name and select the Add Customer icon.
-
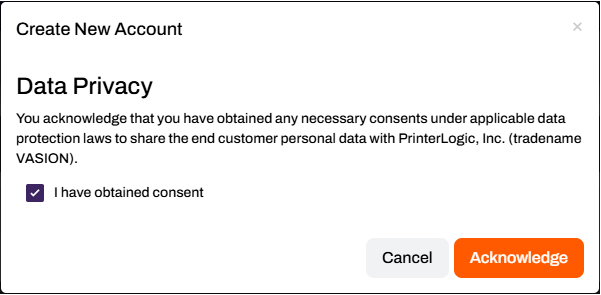
In the Create New Account modal, complete the data privacy consent and select the Acknowledge button.
-
In the Create New Account modal:
- Enter the customer Company Name.
- Enter the City and State / Province.
- Select the Industry vertical from the dropdown.
- Enter the MSP / Account Manager First and Last Name.
-
Enter their Email.
The MSP Portal will send automated emails about the upcoming trial end dates to this email address.
- Enter their Phone number.
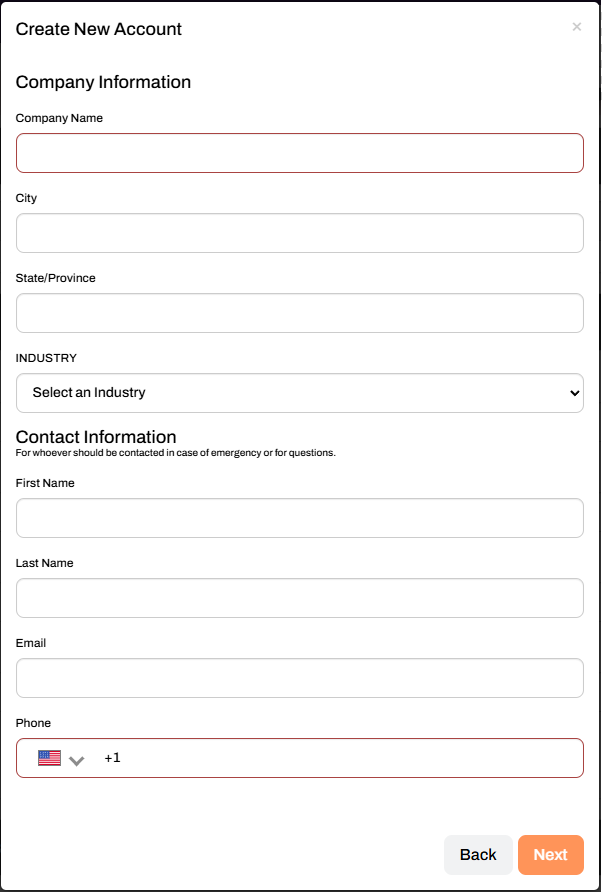
- Select Next.
-
In the Create New Account modal:
- Enter the number of Printers (approximate).
- Enter the number of Users (approximate).
- Enter a Vanity URL (friendly name) that the customer will use to access the Admin Console, Self-service Portal, and the Release Portal.
-
Set the Monthly License Limit (optional).
Set a license limit if needed. If set, you will be notified when this Customer exceeds their monthly license limit.
- If this is a trial account, select the box for Enable trial period for this customer.
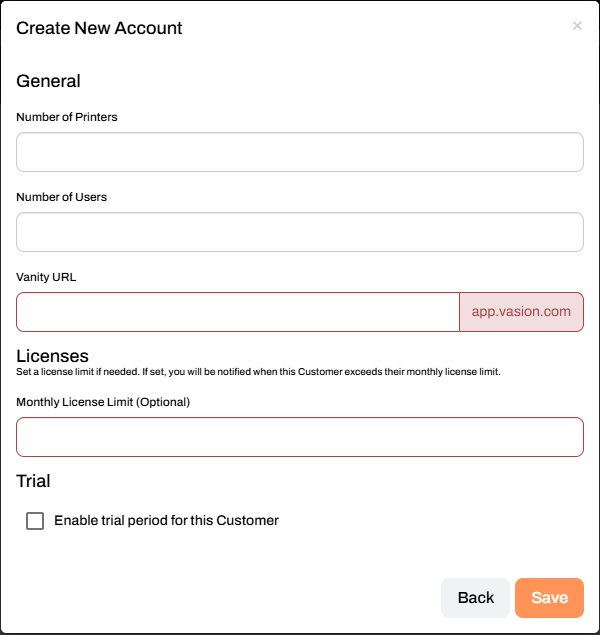
- Select Save.
Allow a moment for the instance to finish creating. Once complete, the customer shows in the tree structure. To initialize the instance, log in using the Login button to create the root account and complete the first sign-in. For steps, see Access Customer Instances.
ArchivoBlack-Regular Archivo-Light Archivo-Medium ArchivoNarrow-Regular Archivo-Regular RobotoMono-Italic-VariableFont_wght RobotoMono-VariableFont_wght Search-Results.htm